Sugared Productions Blog

  • Blog Home
    • Home
  • Online Classes
  • Shop
  • Contact
  • About

Basic Buttercream Class

September 19, 2010 by Sharon Zambito Leave a Comment


BASIC BUTTERCREAM CLASS


                                       Hosted by Sharon Zambito and Wendy Baiamonte

                                                           December 12-13, 2010

    Hammond, LA (40 minutes north of New Orleans)


Students will make Sharon’s buttercream icing recipe, and learn to ice both round and square cakes perfectly smooth and sharp. Bonus items will be thrown is a time permits.

$275 includes the icing and light lunch. Students will need to bring cakes and tools.


                                                       Only 7 spots left.

                             Email szcakes@aol.com to register. Hope to see you there!


—————————————————


Wish us luck as we shoot our next DVD this week! I will try to post some behind the scenes photos this week. I am also working on a gumpaste tulip tutorial, and have some class pictures to share with you guys as well within the next two weeks.
 
I hope that all of your caking dreams are coming true!
 
Sharon


Hangin’ Ten in 2010!

August 30, 2010 by Sharon Zambito 5 Comments

Hey everybody! We are back!
We recently attended the 2010 ICES Convention in San Diego. What a great time we had seeing old friends, meeting new ones, and catching up on all the cool new things happening in the cake world.
It was too far for us to drive this year, so I had to ship all of our stock and my demo supplies ahead, and we all flew up there. (We being me, Wendy, my sisters Janice and Barbara, and my son D.)
Oh man the weather! We were in heaven as soon as we stepped out of the airport. Mild temps, low humidity and beautiful blue skies. So very different from where we live, where it is so hot and humid it is a chore to breathe.

Do you guys recall our adventurous trip last year? My sisters rode in the lap of luxury in the air and their limos, while Wendy, D and I drove a cargo van across the country through about 8 million miles of cornfields. Well, time for payback, sistahs.


Find yer own way to the hotel.
——————————————————
Once we got to the hotel, we unloaded and stopped for a bite to eat. Here are Wendy and I in our Team Diet Coke shirts.

                                                                    Our crew.


Barb, Janice, me, Wendy, and D in front of our booth.

Our vendor booth with all the stuff.

These are my two selling machines. They were tired from working so hard!
This is my little friend who loves cake decorating, and he is very talented. He came all the way from Canada with his mom to attend ICES. I wanted to take him home.
This is Diane, Connie and Michelle of the Cake Connection. They are very dear friends of ours, and we so look forward to seeing them whenever we can.
It was Connie’s birthday, so we surprised her with a cupcake with a little ceramic squirrel on it. Connie has serious squirrel issues, hence her horrified face. I love the expression on Diane’s face in this one.
She won’t go near the squirrel. LOL
One evening the SugarEd crew went out for a nice dinner at an Italian restaurant. It was utterly wonderful in ambiance, food and company.
My beautiful Wendy.
The Cherry Hog wanted the cherry from my drink, but she wasn’t getting it.
———————————–
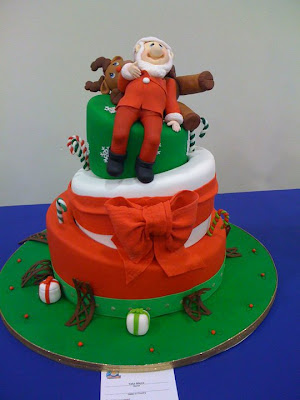
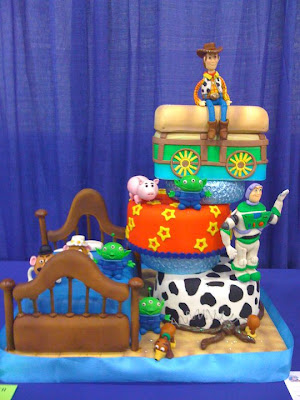
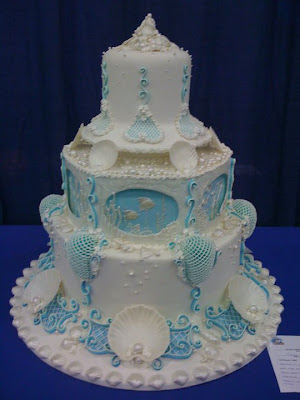
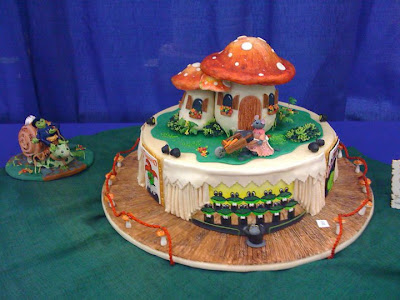
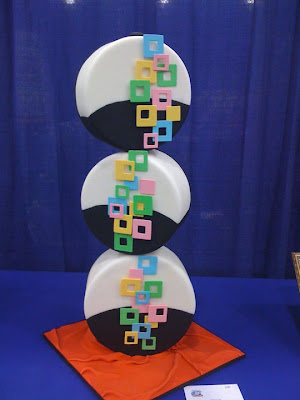
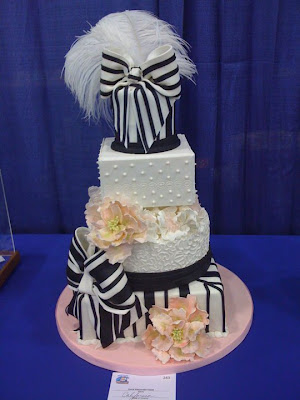
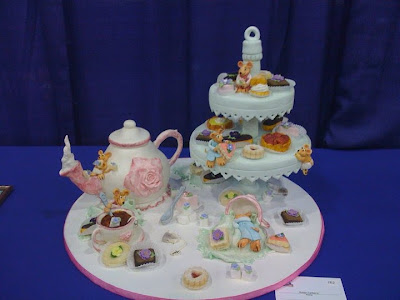
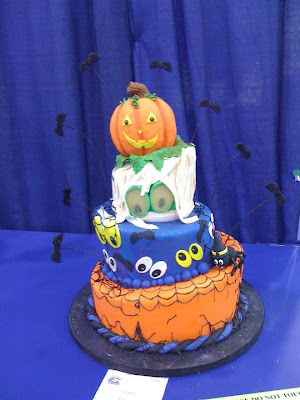
And here are some of the amazing cakes that were on display in the cake room. The talent on display was amazing.
If you ever get the chance to attend an ICES convention, I highly recommend it. It is a weekend of fun filled with demos, classes, displays, shopping and friendship.
Happy caking!
Sharon


SALE at the CONFECTION COLLECTION!

August 22, 2010 by Sharon Zambito 1 Comment

                              20% OFF ENTIRE ORDER!


  at CONFECTION COLLECTION and Handbags by Christian Marie!


                                    Coupon code: 20SALE


                               ORDER HERE


                                  Go now! You know you want too!

                                  Sale ends tomorrow, (I think) 🙂


Bronwen Weber Class

August 6, 2010 by Sharon Zambito 1 Comment


                                    SugarEd Productions Presents

                              Famed sugar artist Bronwen Weber


Monday and Tuesday, September 13 – 14, 2010
 
Kenner , Louisiana (near New Orleans)
 
Two Stack Jack O’ Lantern Cake
 
$415 All supplies included
 
Bring your own lunch


Spaces are limited so reserve your spot now. Payments are due in full and non-refundable.
 
Please email me at szcakes@aol.com to register.


Hope to see you there!
 
Sharon


                                        ———————————————————–


PS. I know I promised you guys photos of my 25th anniversary cake and party. But I just got word that Cake Central Magazine is going to use photos of the cake in the next issue, so I cannot post those until after that issue is released. I am going to wait until that time, so I can make one big post and show you all the juicy details at one time. Thanks for asking about it!


Contest Winners!

August 5, 2010 by Sharon Zambito 3 Comments


Hi everyone!

WOW! What a great response we had to this contest! Thank you all for entering!

 
By random draw the 6 winners are:


carlakb said…

I can remember the 1st cake I made for my mom becoming a pastor and I proudly brought it to her Church for her celebration; I think I might have embarrassed her w/it? It was a dark purple, didn’t know how to pipe yet or smooth my icing, but I really tried. Lol


Julie said…

Wow! You have come a long way! Such an inspiration to all of us novices!


Jenny said…

How fun! It proves that all anyone needs is practice and more practice. I love your cakes and videos. Thank you for sharing!!

 
aneal said…

Thank you so much for sharing your beginnings with us. I can recall my first class, better yet I can recall the first cake I tried to frost. It was from my Easy Bake Oven.
I love, love, love, your icing. Thanks for taking all the time (years) and perfecting it for us.


                                               courtneyscakes said…

I love the old pictures!! It shows just how far cake decorating has come. I still laugh at my first cakes too and they’re only from 3 years ago!! Thanks for posting.


                                                Jen H said…

I can’t tell you how much better your post made me feel about my cake decorating progress. Everyone has to start somewhere. It’s great to see how someone I admire as a decorator has grown. It gives me hope!


Congratulations to you all and please email me at sugaredinfo@aol.com to claim your prize!


————————————————–


And if those previous photos were not entertaining enough, I found even a few more. These are a little bit further down the road in my decorating career. You can see that I got bolder and braver as time went on! 🙂


This was done for my son during my star tip phase. I was too scared to try to ice it smooth, so I obviously thought this was a good idea at the time. Look at the left hand side of Pikachu; you can see the rows of stars. I failed to randomize the rows, LOL. This was the first time I transferred an image onto a cake. I took the image to Kinkos and had them blow it up to this size. I cut it out, and laid all the pieces on the icing to make an impression outline to follow. I thought I was hot stuff, and I do recall all of my neighborhood moms making over how great this cake was! HAHA!


Nothing was safe during my star tip phase. If it wasn’t moving, I covered it with stars. I am pretty sure I did this one with canned icing too. Might have been Wilton canned buttercream.


This was my first or second fondant cake. I saw a fondant cake in a magazine and knew I wanted to master that. I bought a box of Wilton fondant, read the directions on the back, and went for it. I used a contoured pan (easier to cover), no filling. Sadly piped royal icing lace points and silk flowers. Plastic Wilton turntable. I was on fire!


This was when I discovered colorflow. I guess I wanted to see how many royal icing things on sucker sticks I could jam into one cake without destroying it. Please help me.

 
OK


SIT DOWN


READY?


This has got to be the worst cake of all time. Canned Betty Crocker frosting tinted puke green. Crappy borders and plastic plants! Yes folks, plastic ivy from the craft store! What in heck’s name was I thinking? This was for my hubby’s BD, for a family gathering, and I distinctly remember bursting with pride over this one. Somebody pray for me.


Well folks, that is all the old photos I have for now. I enjoyed sharing this trip down memory lane with you all!


Next week we will be at the ICES convention in CA. Please stop by my booth to say hello if you are there!
 
Happy Caking!
Sharon


In The Beginning….

July 29, 2010 by Sharon Zambito 312 Comments


Hello everyone! How is your summer going? Mine has been busy as heck and it is flying by.

And since it’s hot as Hades down here where I live, I took the opportunity to stay in the A/C and did some deep de-cluttering of my house.
While going through boxes, I found these very old photos of cakes I made about 23 years ago , at the time of my first classes. What a fun surprise to have found them, and to look back at the old days!
These are the actual class cakes. My brother Michael took the class with me. He is such a cool guy. You have met him before here and here. I think mine are the two on the right. The class was given at a local cake supply shop, and would be the equivalent of Wilton 1 and 2 , I would guess.
A sheet cake I did shortly after. The flower basket is made like those panoramic eggs with a mold and granulated sugar. I think that started my infatuation with molds.

Proof that at one time I could make a buttercream rose that was halfway decent.


Ah, my famous rough icing that I use when I do not want to bother with smoothing the cake. Freehand writing could use a little work, LOL.
I remember bringing this baby shower cake to work at the hospital where I worked at the time. All plastic decorations….. haha
A baby rattle……
Notice that you can see the cake through the icing. I had not perfected my icing technique yet. 🙂
I seem to have been fascinated by plastic decorations. Tried my hand at block writing since my script left something to be desired.
It tickles me to look back and see how my skills have progressed. There are a lot of good memories tied to these cakes as well, as I did them all for friends and family.
Do you guys have old cake pictures you look at from time to time?
To celebrate all of our humble beginnings, and because it has been way too long…….

                         TIME FOR A GIVE-AWAY!

Everyone who posts a comment below will be entered into a drawing for fabulous prizes:
Wedding Bouquet Flavoring (5 bottles will be given away)
and a beautiful item from the CONFECTION COLLECTION!
Winners will be announced next week, so enter now!
Good luck!
Sharon


Back to Basics DVD

July 8, 2010 by Sharon Zambito 8 Comments


The new Back to Basics: Baking for Cake Decorating DVD is at the presses and we anticipate to start shipping in about two weeks!
 
 
UPDATE: Things are moving faster then we expected and we MAY be shipping next week!
 
You can read more about it, watch a video clip,
and place your order HERE
 
 
——————————————————-


I am very busy with preperations for and making a huge cake for the 25th anniversary party hubby and I are throwing for ourselves. Hey, no one else is going to do it!
 
I will post lots of pictures and give you all the inside scoop next week.
 
 
Have a great weekend!
Sharon


Beach Ball Blowout

June 20, 2010 by Sharon Zambito 20 Comments

Cue the Beach Boys Music:
 
Na na na nare nare nare na na nare na na……
(that was that electric guitar Beach Boy-ish music…)

         It’s summertime! Time for swimming pools, the beach, flip flops and frozen drinks…..

What better way to celebrate a birthday than with a beach ball blow out cake? This is one of my most popular designs, and I get tons of requests for info on how I did the ball, so here is the scoop:

The ball is 8 inches of pure unadulterated……… Styrofoam. Bet you thought I was gunna say cake, huh? Do I look nuts?….. No seriously, you could do it in cake just the same way, but we did not need that much cake.

Figuring out how to get the beach ball pattern on there was challenging. My first few attempts were shall we say, less than stellar. Then it hit me. The stroke of genius. The Divine intervention. The best idea I have ever had in my entire life!!

I drove my little self right over to Walgreen’s (making one pit stop at the gas station for a fountain Diet Coke because they have the best syrup to carbonation ratio of course.) And I picked up an inflatable beach ball. I cut out one segment of the ball and scanned it in two pieces with my scanner. I then cropped the two halves together in my editing program, and voila! I had one perfect jpeg image of a beach ball segment, that I could then resize to any size I needed to fit any size ball I needed.


I printed it out the size that I needed, and cut it out to make a template. I love templates. I use them for everything. I am not sure which I love more: templates, Diet Coke, or cornstarch. They all play such a huge roll in my life. (I think cornstarch is winning; I adore that stuff.) Then I used that template to cut out the sections of colored fondant, and applied them to the piping gel covered ball. White circles on the opposite ends of the ball were applied for authenticity.


And the cute little fishies. The fish were made by cutting football shapes with a circle cutter. I made the gills by impressing the end of a piping tip into the surface. The fins were made by freehand cutting little shapes from fondant and scoring and ruffling them with a toothpick, then gluing them on the fish body. I attached them to wires with melted chocolate on the back. (Use royal icing in the summer or your fish will swim away.)

The curlies are made by wrapping strips of fondant around a dowel rod until they are firm enough to hold their shape. Then slide them off, shape as desired, and let dry fully. I demonstrate this in the Topsy Turvy DVD.

The life preservers are simply made from cutting white fondant discs and applying red stripes, then wrapping a clay gun string around as the rope. I demonstrate this in the Boxes and Bows DVD .


Now it is your turn to give it a try.
HAVE A BALL!
Happy Summer,
Sharon

Back to Basics DVD Preview

June 18, 2010 by Sharon Zambito 3 Comments


BACK TO BASICS
BAKING FOR CAKE DECORATING
 
 
Learn everything you need to bake sturdy, level, and delicious cakes. See how to cool, level, freeze, torte, fill and decorate a dessert style cake. And more!


                                          Bonus Section: Cake Balls!

                                           Recipe Booklet included.


                                ORDER HERE


Winter Roses for a Spring Wedding

June 7, 2010 by Sharon Zambito 13 Comments

Hi Sugar Babies!
Sorry for the delay in posting. I have been working hard on the editing of the new DVD so we can release it ASAP. Plus my a/c went out for a few days, and that threw my whole schedule behind. Ain’t it always sumthin’?

 So a few months back a lovely bride brings me this magazine cover for her wedding cake. She wanted it exactly the same, except for the appliques not to be snowflakes since she was having a spring wedding. The magazine did not give credit to the artist, so at the time I did not know it was the amazing Liz Finch of Britain. I have since found that out, and contacted her to thank for such a gorgeous design, and to let her know I copied it. She was very lovely and sharing.


I hoped that my version would do her incredible art justice. I was pleased with my rendition in the end, and the bride was happy with it too.

The bow was satin, and the brooch was costume jewelry purchased by the bride. At the time that I made the cake, I had no idea what those flowers were, so I just tried to copy them as closely as I could with the materials I had available to me. Liz has since told me that they are Christmas roses, and there is a cutter set available for them. Good to know for next time!


So I just winged it based off the magazine photo. I started with two types of stamens I purchased online here and here.


This photo is washed out, so you can’t really tell that the tips of the stamens are yellow. I gathered up a few of each type, and used white floral tape to assemble them around a short floral wire.


Then I used this small eight petal blossom cutter to cut the shapes from green gumpaste.
I pinched the ends of the petals to elongate them just slightly, and then pushed the slightly dampened stamen wire down thru the center of it.
I then let them dry upside down until they were fully dry. (Yeah, that is a cooling rack on a Viva paper towel roll… I am just so high tech! LOL)
Next I cut out little discs of white gumpaste, to provide a base to glue the flower petals onto. Liz has told me that her flower petals were individually wired, but this worked in a pinch!
I let the discs firm up a good bit, and then slipped them up the wire. Notice that I left a space between the green blossom and the white disc. We need that space to place our petals. The white discs did not want to stay in place , so I cheated and put a dab of hot glue under each to keep it from sliding around.
Then it was time to cute the petals. I used this rose set, the same one I used to make the purple flowers on my TLC cake. It was the closet shaped cutter I had to what I saw in the magazine photo. I rolled the gumpaste to number 5 on the pasta roller, and very barely softened the edges with a very light touch with the ball tool. The petals looked to me to be on the thicker side, than say regular roses, so I purposefully left them that way.
I placed some foil over a cup, and stuck the stamen down into it.

Then I dampened the white disc and applied the petals around it.


Overlap each one as you place it, for a total of five.
I pinched the petals to give them movement, and lifted and turned them slightly to make them look more realistic. I propped the petals up with cotton to achieve the shape that I wanted.
Drying…..
After they were fully dry, I dusted the insides of the flowers, down at the base of the stamens, with some yellow and kiwi green. Then I gave the whole flower a dusting with super pearl luster dust. The dusting really makes gumpaste flowers come to life. When I assembled the cake, I put them in place and glued them down with just a small dab of melted white chocolate.
A little bling added to the topper. I also dusted the fondant appliques with super pearl. I brought the cake in 2 sections and finished the assembly at the venue. It was really quite striking and beautiful in person.
I was very excited to be able to do such a beautiful design, and something different. It was very ironic to later found out that I had made Christmas rose for a spring wedding cake!

                        _______________________________________________

Don’t forget to order your copy of our new DVD:
Back to Basics
Baking for Cake Decorating

See all the details here.
———————————————————–
And check out the Confection Collection.
New items are added weekly!
Free shipping code: SugarEd
————————————————————
Happy baking everyone!
Sharon
  • « Previous Page
  • 1
  • …
  • 19
  • 20
  • 21
  • 22
  • 23
  • …
  • 36
  • Next Page »

Sharon Zambito

Sharon Zambito

An RN turned SAHM turned cake maniac. Owner of SugarEd Productions Online School. Join me for some caking, baking, and all around sweet fun :)

Follow me..

  • Facebook
  • Instagram
  • Pinterest
  • YouTube

Pinterest

  • Autumn House Two Trees Machine Embroidery Design – Blasto Stitch
    Autumn House Two Trees Machine Embroidery Design – Blasto Stitch
  • Embroider  Sew :: Jelly Roll Purses - Embroidery Garden In the Hoop Machine Embroidery Designs
    Embroider Sew :: Jelly Roll Purses - Embroidery Garden In the Hoop Machine Embroidery Designs
  • (1) How to QUICKLY & SAFELY remove acrylic, gel, and dip powder polish | BAGGY METHOD - SO EASY! - YouTube
    (1) How to QUICKLY & SAFELY remove acrylic, gel, and dip powder polish | BAGGY METHOD - SO EASY! - YouTube
  • (1) Bouffant Surgical Cap - YouTube
    (1) Bouffant Surgical Cap - YouTube
Follow Me on Pinterest

Follow Me on Instagram

Instagram requires authorization to view a user profile. Use autorized account in widget settings

Recent Posts

  • Egg Safety Basics
  • Stable Mabel Support System Sale
  • Guest Post : 4 Vegan Cake Recipes No One Should Miss Out On!

Popular Posts

  • Ways To Make Your Cake Fluffy And Moist
  • How To Stencil on Cookies with Royal Icing
  • Doctored Cake Mix Recipes
  • Transferring an Image Without a Projector
  • All About Buttercream!
  • How to Fix Broken Ganache
  • Edible vs Non Toxic Gold Dusts

Categories

Search

Archives

Copyright © 2025 · Sharon Zambito and SugarEd Productions,LLC

Copyright © 2025 · Evangeline Theme on Genesis Framework · WordPress · Log in