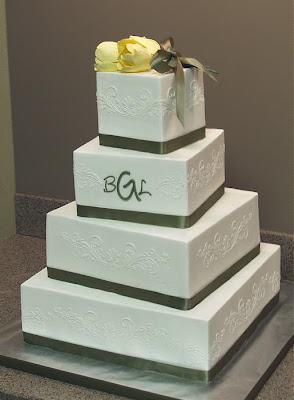
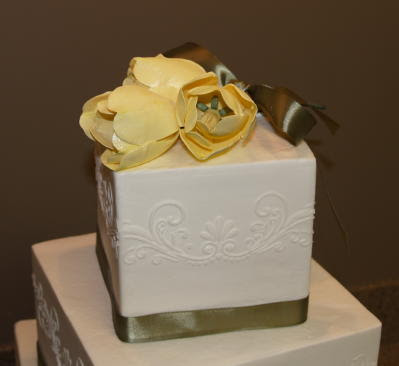
 This bride came to me with her cake design and colors already determined. A very classic, simple cake with a small nosegay of tulips on the top.
Buttercream stenciling on buttercream. With our pretty creations on top.
So let’s do this!
 Use a piece of white gumpaste to form the…. the…. the…… the little thingies that stick out the sides of that middle stamen thingy. Yeah, make a bunch of those. The mold can be found here.
Then dust them with shades of mossy green petal dust.
 Now, to make that yellow middle stamen thingy, form a sausage of yellow gumpaste and insert a wire into one end.
 Use your thumb and forefinger to pinch around the top of the sausage three times.
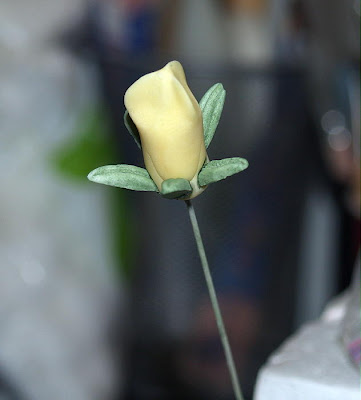 Then take five of those green stick out the side thingies, dip a little bitty bit of each end in water or gum glue, and stick into the bottom of the yellow sausage, going all the way around.
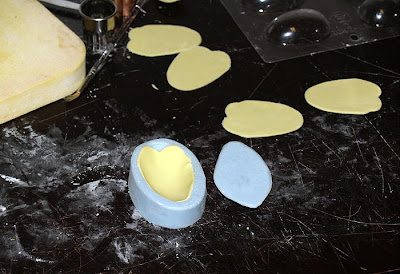 Roll your yellow gumpaste thin (number 5 on my pasta roller). Cut out the smaller petals with the tulip cutter and vein in the double sided press.
 Give them a little pinch on one end and lay them over a former, which in this case is a half egg chocolate mold sheet.
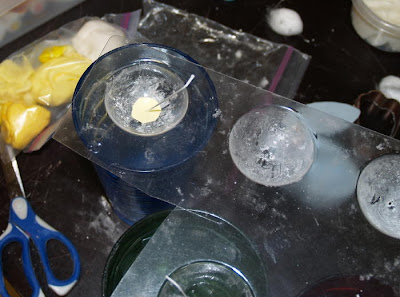 You will build your flower inside the half sphere candy mold. Put a disc of yellow gumpaste in the bottom and poke a hole through the center with a wire. Poke holes through the center of the sphere molds as well.
 Insert the stamen wire through the holes and attach the base of it to the petals with a very light dab of water or gum glue.
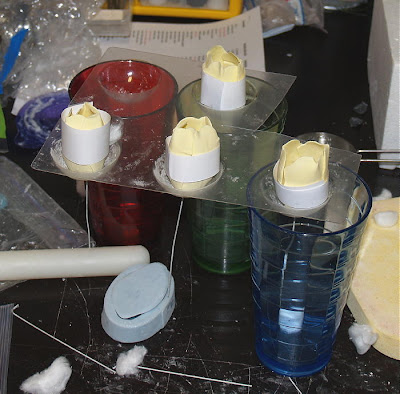 When the first portion is dry, make another set of three petals with the larger petal cutter and vein. When those are firm enough, hold the partially made flower upside down and glue 3 more petals on in another row. (This step was not shown). You can dry the flowers upside down at this point, or you can put them back in the formers. I used paper collars to hold the outer petals at just the degree of openness I wanted.
Allow those to dry fully and give them a light dusting with the shade of yellow petal dust you desire. A very light puff of super pearl can be applied also for a little sheen.




Beautiful tutorial (despite the Tiny Tim reference!) 🙂
Thank you for taking the time to do this and to share it with us
Thanks, Sharon! Beautiful cake.
Thanks so much for this tutorial. Your tulips and cake were just perfect!
Thank you so much for sharing this.
Very elegant cake. I love it.
Real Estate
Oh that is beautiful! Do you have a tutorial/dvd for buttercream on buttercream stenciling?–I'm the most impressed with your work!
Thank you : )