Sugared Productions Blog

  • Blog Home
    • Home
  • Online Classes
  • Shop
  • Contact
  • About

WOW!

April 17, 2009 by Sharon Zambito 3 Comments

 
MY DEAR SWEET WONDERFUL SUGAR FRIENDS:
 

I am totally blown away by the outpouring of comments and emails in support of me after yesterday’s post. Your love, encouragement, and kind words have filled my humble heart with a warmth and joy you cannot imagine.

I hesitated to bring this into my blog, but I just felt the need to get my thoughts out to the person in question. I never expected nor anticipated such a wonderful outpouring of support. I want you all to know that I treasure each and every word you have written to me. Honestly, I feel undeserving of such.

I absolutely love what I do. Making cakes and teaching the art has fulfilled me in a way no other aspect of my life has. I THANK YOU for giving me the opportunity to continue to do what I love. I will keep going as long as you want me to, or my poor old tired body gives out. Whichever comes first.

So now, this chapter of the SugarEd story is over. This issue will get no more attention from me, and now we can get back to the important stuff:


THE CAKE PAR-TAY!


I am off to Texas this weekend to demo and vendor, and I will check back in with you awesome people next week!

PS. Remind me to never piss any of you off! LOL

 
Gratefully,
Sharon


Calling the Coward……

April 16, 2009 by Sharon Zambito 41 Comments


Hello Sugar Friends!


This post is directed to only one person that I have no way of contacting, so this is my only recourse. I hate to take this to a public forum, but it is time that I speak up. All of my wonderful and loyal customers and blog readers… please forgive my indulgence here.

I have been getting anonymous “self-destructing emails” from someone who is not happy with my participation on a particular cake message board. I did not even know self destructing emails existed until I got the first one. Once you open it, the message cannot be copied and pasted, there is no return email address, and then in about 60 seconds the whole email disappears and cannot be traced.

To the coward who can be so judgmental of my activities, but does not have the guts to write me in first person:

I have no idea why my postings on a cake message board are of such importance to you. I am not ashamed of any activities I participate in. If you have such a serious problem with me, then at least have the integrity to contact me directly. At least when I write something, I do not hide behind an anonymous email service. You are a coward of the highest degree, and you have no affect on my life whatsoever. In addition, this is the last time I will acknowledge or respond to your childish behavior.


Sharon


The Story of the Cherry Hog

April 14, 2009 by Sharon Zambito 27 Comments


Once upon a time there were 3 sisters that grew up in the city of New Orleans with their 2 older brothers and parents. They were not exactly poor, but things were very tight, as they were living on one modest accountant’s salary. Melba, the mom, knew how to make every penny stretch. She was very frugal. There were never any treats like candy, soda, chips, or cookies in the house. Those things were reserved for very special occasions.

Since vacations were out of the budget, the family would make day trips a few times a summer to a nearby state park. The kids would swim in the Bogafalaya river and play on the sandy beach. Melba would pack an ice chest and picnic basket and they would spend the day swimming, eating, and relaxing.

On one particular trip to the river, Melba really splurged and bought a bag of fresh cherries. Not a big bag, mind you. But this was still a really special treat for the kids to get such an extravagance.

So on this particular day, after lunch, the 2 youngest sisters, Sharon and Janice, decided to go for a nice long swim, anticipating their refreshing treat of cherries upon their return. They wanted to save them for the just the right moment, to enjoy them to their fullest. So after their nice swim in the river, they happily skipped back to the picnic table, excited about the luscious fruit that awaited them. But alas, to their dismay, they discovered that their older sister Barbara (aka the Cherry Hog) had eaten them all! All of them! All that was left was a bag of pits and stems.

Needless to say the 2 little sisters were disappointed….. no, devastated….. no, scarred for life! Despite years in therapy and reading many self help books, they have not been able to work through the trauma of this event. In this tragic story they did not live happily ever after. So needless to say, to this day they give Barbara grief about it any chance they can get.

—————————————-


Last week, when the whole family was invited to a friend’s house on the bayou for a Good Friday seafood boil, they took the opportunity to also celebrate Barbara’s birthday.


And here is the Cherry Hog’s birthday cake.


CH with her cake. She loved it.


                        Sharon and CH.


Sharon, CH and Janice.


Seafood boil of crabs , crawfish, potatoes, corn and more!


And fresh boiled shrimp! It was so yummy!


J-Man got to drive the boat!


Cherry Hog and her nephew D.


The cake was yummy and enjoyed by all. We had a wonderful day of boating, eating, and playing board games.
 
Note: Cherry Hog claims to have no memory of this event ever happening. Classic case of denial, if you ask me.


—————————————


HOW TO MAKE CHERRY HOG’S CAKE:


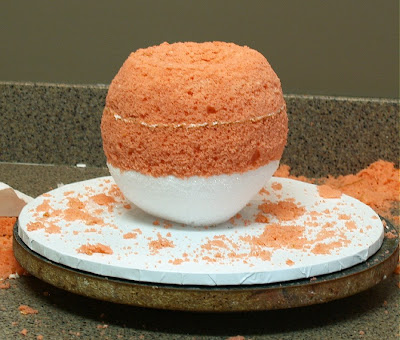
My BFF Heather gave me the great idea of using Styrofoam as the base of the cake. I used an 8 inch ball and cut it a little shorter than in half. I cut a flat bottom so it would stand up, and I used another piece of styro as “sand paper” to shape the bottom half of the cherry. (I learned that trick in a Collette Peter’s demo.)


Then I sharpened wooden dowels and drove them thru the styro and into the cake drum base for stability. I used 3, but in retrospect I could have done with just 2.


I then attached a circle of parchment paper to the top of the styro with buttercream to form a barrier with the cake.


First layer of cake in place.


I put a ball of modeling chocolate down in the hole to serve as the pit. Tee hee. Then I plugged the hole with the cake from the heating core.


Second layer of cake in place.


Carved to a cherry shape with a sharp knife. I intentionally went with a somewhat asymmetrical look, because real cherries are not perfectly round. Also makes the carving easier; I love that!


Then I applied a basecoat of thickened ganache over the whole thing. The ganache is 2 parts semi sweet chocolate to one part heavy cream. You let it cool to a thick paste consistency and then apply it just like a buttercream coat with a hot spatula. It firms up to make a nice chocolate shell; a wonderful surface on which to apply your fondant.


I smeared the whole cake with piping gel and then applied red fondant. I used a wad of fondant cupped in my hand in lieu of fondant smoothers. This works great on round and curved shapes.
I then gave the whole cake a liberal rubdown with everclear alcohol to get the excess cornstarch off before airbrushing. What??? No Crisco? I know what you are thinking. Sharon rubs down everything with Crisco! Yes, this is true, but not in the case of airbrushing. That will cause the airbrush color to not go on smoothly and you might get blotching.


After the everclear dried (took about 2 minutes) , I gave it several coats of red color. Let the coats dry in between or you will get pooling and dripping of color. Here it is still wet with color. (And I am still blowing red snot a week later.)


One more coat of color and dried.


I made the stem by wrapping several 18 gauge floral wires with brown floral tape and then airbrushed brown and green over that. I just stuck the stem down thru the center of the cake and down into the base of the styro. Note: This is not food safe, but it was for Cherry Hog so I did not care. The proper thing to do would have been to coat the part of the stem going down into the cake with chocolate and dried before inserting.


I made the beach chair with the cutter set here. I cut the pieces from white gumpaste. After fully dried I painted them with brown airbrush color mixed with everclear to make the wood look. The seat of the chair is white gumpaste. Ain’t it cute?? I love this chair! The sand is Domino’s brownulated sugar from the grocery store.


It was a lot of fun making this cake! This is when I love caking the most. A fun, challenging cake that has a special story to go with it.


Now you all go make one for your favorite Cherry Hog!


Happy Hogging!
Sharon
http://www.sugaredproductions.com/


PS. Remember you can click on the photos for a larger view.


A Day at the Zoo

March 22, 2009 by Sharon Zambito 11 Comments


Hi Ya’ll! Hope you are having a nice weekend. This post has nothing to do with cake whatsoever. So if you stop reading now I will not be offended. I can’t be offended because I have no way of knowing if you stop reading or not. But if I did know you stopped reading, my feelings would be hurt, so please keep reading. I think you will enjoy the pictures.(Click on them to enlarge, because some of them are pretty good if I may say so myself!)

My hubby P, my youngest son J, and I took advantage of the arrival of some beautiful spring weather and spent the day at the Audubon Zoo. Apparently so did the other 2 million people that live in the Greater New Orleans area. It was packed. Despite the crowds, we had a wonderful day at our nationally highly ranked facility. ( Which I am very proud of because when I was a kid, the place was a total dump. They did a major improvement project about 25 years ago or so and it is a world of difference.)


We are fortunate enough to be one of only a few zoos in the nation with white Bengal tigers.


So sweet and peaceful.


I though this little fellow was cute.
Some kind of bear walking right towards us.


                  Oh, a little to the left. No, a smidgen to the right.

                     Ah, yes, that’s the spot.


Watching the apes is one of my favorite things at the zoo. They don’t do much, but their mannerisms and facial expressions are so human like, it fascinates me.


Yeah, he scared me a little.


Here are my 2 apes. They are very uncooperative with picture taking. This photo is out of focus because my camera focused on those 2 guys in between them (pro photog I am not.) But I am blown away by the exact same facial expressions they have here.


Now that is better. I had to threaten them with cooking dinner to get some nice smiles out of them.


The zoo has a brand new exhibit about dinosaurs. They are life sized robotic things, kind of like you see at Disneyworld. They move and roar and stuff. Not sure what kind this is.


This is the dreaded T Rex.


And my little monster in front of a smaller one. He really loves the Jurassic Park movies, and enjoyed this exhibit a lot.


A nice shot of rhino butt for your enjoyment. This was taken just moments after he sprayed his territory about 4 times in a row. That was lovely to watch.


Looks like a decoy, doesn’t it? He was gorgeous.


What ya’ll lookin‘ at?


A black bear walking in the swamp water. Nasty.


J-Man and P-Daddy on the climbing thing. J makes Dad do everything with him. He is at that age where he is separating from me and all about his dad. Sniff. Sniff.


OK. The giraffes were my absolute favorite yesterday. They were out and walking all around, very close to the viewing area. They were very interactive with each other and I was just mesmerized by them. This is the baby who kept just walking in this big circle.


Close up of the baby. I named him Lagniappe. Get it? Cuz lagniappe is a little something extra thrown in ?


Two adults who stayed side by side the whole time. I think one was courting the other. See the little tongue sticking out? Cute! There were 2 other adults out and about also.


Love this shot for some reason. Aren’t they magnificent creatures?


Here is the lovey dovey couple literally “necking.” Right after this pic was taken, one of them did something really disgusting. The whole crowd went “EEEWWE!” My trance was broken. Time to move on to another animal.


J-Man was really into the raccoons for some reason so I had to take some pics for him.


Here is one foraging with his front paws. They would not stay still long enough for me to get any good shots.


Big ole swamp alligator with algae growing on him. He was huge. That’s good eatin‘ in these parts! (But not me. I don’t like alligator; too chewy.)
 
 
I saved some room on my photo card hoping the elephants would come outside and they never did. So I didn’t get any pictures of my all time favorite zoo animal. Next time!


————————–


It did my spirit a lot of good to get out in the fresh air, do some walking, and spend some time with my 2 guys. It would have been totally perfect if my other son had been there, but alas, he is away learning crap in college that he may or may not use later in life.
I hope you enjoyed the photos. Support your local zoo. The animals need you and it will do your heart good.
 
 
Sharon


Roller Jammers

March 20, 2009 by Sharon Zambito 4 Comments


I have to share with you something my friend Barb (not be confused with my sister Barb) sent me after reading yesterday’s blog post:


Barb is a graphic artist with way too much time on her hands, and probably the funniest person I know.
 
Thanks Barb for making me spew Diet Coke out my nose. It burns.


Sugar Free Celebration Cake

March 11, 2009 by Sharon Zambito 39 Comments

Today we have a guest blog entry by my other big sister Janice. You have met my other sister, Barbara, already. Janice is 7 years older than me, and Barb just 1-2 older than her. Since there was such a gap in our ages, they were not really my playmates when I was a kid. In fact, I think I was their play-thing, but that is a whole therapy session in and of itself. Once we reached adulthood, that gap in years has faded away and we three have become very close. Don’t get me wrong; they still take care of me and look out for me and spoil me. Some things just should not change in life.
Janice is the adventurer of us three. She rides Harley’s with her boyfriend, and has para sailed with my dear hubby as Barb and I fried on the beach watching. She has traveled the country and has a bucket list of things to do that scares the bejeesus out of me and Barb. This was her bright idea:

Janice is a crackerjack legal secretary, and my secretary as well. ( I call her CJ.) One day when I can start paying her, she is going to leave that huge corporate law firm down in the city that she works for. She takes care of all my invoicing and PO’s for wholesale orders, and keeps me in line with business law issues. She also comes on cake trips with me and Barb to help me vendor. And let me tell you; that girl could sell ice to an Eskimo. That girl has a gift for sales! She is beautiful, skinny, funny, and just damn near perfect. Another overachieving sister, sheesh. Hard to keep up with those two! But I love them both so.
So without further adieu, I present to you Janice……
—————————————-
Since I am a diabetic and several other members of my family adhere to a sugar-free diet, I am always responsible for providing a sugar-free dessert at all of our family gatherings. Thanks to the invention of Splenda, I’ve come up with some pretty good ones over the years.
A few months back, my sister Sharon, the professional cake baker/decorator, sent me an email with a recipe for a knock-your-socks off sugar-free cake, and asked me to make it for the holidays. It looked just beautiful in the picture – much more elegant than anything I had made in the past. Since I am not one to shy away from a challenge, I said I would give it a try.
 
As Christmas got closer, I started to stress out over it. I wanted it to be perfect. That’s just the German in me. I decided that I needed to take the whole day off on Christmas Eve to work on this cake so that I could take my time and not be rushed. Good thing I did that because as it turns out, it took me all day to make it and I finished it at 9:00 p.m. that night. Of course, I did take a break to run a few miles that morning, and to go to church that evening.
Because cake layers baked with Splenda don’t rise very much like cakes with regular sugar, I decided that I wanted to double the recipe to make the cake taller. But I only had two cake pans, so I had to bake the layers in two batches. That took a little extra time, and as it turned out, when I started to construct the cake, I only used three layers, instead of four. Four would have been too tall.


Mascarpone cheese was a challenge to find, but my daughter-in-law, the health nut vegetarian, found it for me at the Whole Foods Market. I let the cream cheese sit out at room temperature to soften it, but I actually think it was a little too soft. Next time, I think I would not leave it out as long because when I went to spread the filling, it was a little drippy over the sides. I think it would go on better if it were a little bit firmer. When you add the vermouth, that softens it too. But the best part was that since it was sugar-free, I got to sample it as I was making it! And since I had the vermouth out anyway, I decided to make myself a little martini. What the heck, it’s Christmas Eve, right?

I splurged on organic strawberries, also bought at the Whole Food Market. Expensive, but I figured if you’re going to create something special, you should buy only the best ingredients.


Chopped hazelnuts are not easy to find either. I went to three different stores before I found them at a Winn Dixie. I thought they needed to be a little bit finer, so I put them in a food processor just to chop them up a bit more.


I could not find a paper doily with a design that was open enough to use as a stencil for the powdered cocoa. So my sister, Sharon, found some snowflake coloring pages online and emailed them to me. I printed one of those and cut it out with a razor knife, and used that as the stencil.


The whole strawberries on the top of the cake are dipped in sugar-free chocolate melting wafers that my sister ordered for me from one of her suppliers.


Here’s what went into the filling:

1 tub (something like 250grams) mascarpone cheese
1/2 tub (about 100grams) light cream cheese

About 5 tablespoons Red Martini (sweet red vermouth)
1 teaspoon vanilla extract
1/4 cup Splenda
About 2 cups small strawberries, cleaned and halved


First cake layer.
 

First cake layer with sugar free strawberry jam on top.

Add some mascarpone filling.

Add fresh strawberry slices and repeat with each layer.

I used the sugar-free Cool Whip for the frosting.

Chopped nuts were pressed onto outside and design stenciled on top with cocoa.
 
The finished cake!

When the cake was finally done, I was exhausted, but I was happy with the end result. I put the whole thing in the refrigerator to firm up overnight. But as I flopped down on the sofa and sipped on my dirty martini, I immediately started stressing over how I was going to transport this masterpiece the next day from my house in Kenner to my sister’s house in Mandeville – about a 50 minute trip.

The next morning, I had to pick up my 95-year old aunt who lives nearby in an assisted living home. She’s in a wheelchair and it takes a while to get her situated in the car. I wanted my confectionery creation to be off the ice for as little time as possible, so I loaded up my car with all my gifts, but left the cake in my refrigerator, went and picked up my aunt, and then went back home to get the cake. I put a towel on the backseat to level it (center seat, of course – that’s the safest seat, right?), strapped it in with the seat belt, gave it a little kiss and jumped into the car and headed out. I figured I would speed just a little bit and the most my cake would be off the ice was 45 minutes.
So here I am, zipping along, with my old aunt in the front seat, and my award-worthy culinary delicacy in the back seat. Can’t wait to get to Sharon’s house so everybody can see it. (The cake, I mean, not my aunt. They see her all the time.)
Well, how could I have foreseen that when I turned onto Causeway Boulevard, it would be a freaking parking lot! Fog on the bridge! What?! Fog on Lake Pontchartrain. It’s a warm day, 1:00 o’clock in the afternoon, how can there be fog on the bridge? I could not believe it. Traffic was limited to one-lane, speed limits were greatly reduced, and that 50 minute trip turned into a three-hour trip. It took me three hours to get to my sister’s house in Mandeville! I was so upset because I had spent all day making this cake and I just knew it was in the backseat melting! And I also knew that my 95-year old aunt was going to have to use the bathroom very soon, and boy, was I going to be in trouble!
When I finally got to my sister’s house, I had to have my nephew, Daniel, open the lid and look at the cake. I couldn’t bear to do it. He said it looked fine, but I said, “Put the damn thing in the refrigerator and get me a martini!” He said, “Okay, but it won’t do much good because the power is out.” The power was out! It’s a conspiracy, I thought. There are terrorists working behind the scenes here to assure that my delectable piece of culinary craftsmanship would turn into a melted mess of vermouth-laced drippy cheese, strawberry juice and Cool-Whip. This cake baking stuff is not my thing! Sharon, I don’t know how you do it. This is too stressful! I am a legal assistant. Someone give me a brief to type! That I can do.
Well, the power came back on shortly, the cake was still firm and beautiful, and tasted delicious when we served it. It’s a good recipe and I highly recommend it.

————————————————-


Sharon here again. Whew, I am stressed out just reading that! Now I want a martini too. That was a crazy Christmas Day. Our 3PM lunch did not get served until 6:30 due to the power outage and late guests. In perfectly fine weather too!
Well, I think Janice did a fabulous job on her cake, and it did taste wonderful too. Thank you for the entry sis, and helping me out on my blog.
Speaking of blogs, if you guys like mine, just leave me a note in the comment section below, and you will be entered into a drawing to win this fabulous prize! :

Isn’t it great?! There are only 2 hats like this in existence, and I own the other one. So if you want a little piece of SugarEd to call your very own, let me know how great and fabulous and amazing and wonderful my blog is! Oh yeah, you can also leave a comment about Janice’s great post too, yadda yadda yadda.
I will announce the winner by random drawing sometime next week, when the spirit moves me. Gotta keep you guys on your toes, don’t I?
Happy Sugar Free Caking!
Sharon the baby sister Zambito
http://www.sugaredproductions.com/

I found the Hershey Kisses Today

March 6, 2009 by Sharon Zambito 20 Comments


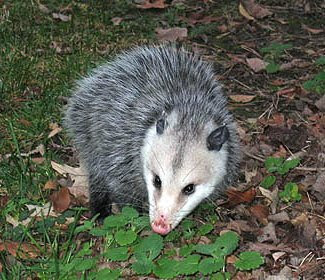
NANNY NANNY BOO BOO, LOSER POSSUM


Victory is mine.


My apologies to the Walgreen’s guy for blaming him.


Mardi Gras King Cake

February 17, 2009 by Sharon Zambito 38 Comments

HAPPY MARDI GRAS EVERYONE!


Since it is Mardi Gras season right now down here in the Big Easy, I thought you might enjoy learning about another one of our unique culinary creations. I have recruited my big sister Barbara to do a guest blog entry on making a king cake. Barbara is the inventor of the original King Rock (more on that later). In addition to that, she is just the best big sister ever. She looks after me. She is an accountant by profession, so she helps with my business finances, taxes, and all that other icky stuff I have no clue about. She also comes on some of my cake trips with me to help me out with my demos and my vendor table. She is one of the most energetic, social, and fun to be with people I know. She is a very cool chick and I love her tons. So now I present to you… Barbara…..


—————————————-


Hi, I’m Barbara, Sharon’s sister, and she’s asked me to do a guest blog. This is me getting ready for Mardi Gras, which this year falls on February 24.


(Note from Sharon: I have this same outfit and yes we do wear this when we go parading.)

Speaking of Mardi Gras, that brings me to the topic of the day. I am not a cake decorator. I see some of the magnificent pieces of art that you all do and I am in complete awe. But, I am here today to talk about the king of all cakes – the King Cake.

If you are not from the New Orleans are, you might be asking yourself “what is a King Cake?” A king cake is a brioche-style cake similar to a coffee cake that is served throughout the carnival season in New Orleans. The carnival season begins on the 12th Day of Christmas, the Epiphany (January 6), which is the day the three kings visited the Baby Jesus. It is believed that it took the three kings 12 days to find their way to the stable. The carnival season ends on Mardi Gras Day, which is the Tuesday before Ash Wednesday.

The king cake is circular, representing the circular path the three kings had to take to ward off King Herod, who was seeking them so that he could kill the Christ Child. The king cake is typically decorated with colored icing and/or sugar. The three colors are purple, green and gold, the colors of Mardi Gras, which represent justice, faith and power. I’ve also heard that the three colors represent the three gifts presented by the Magi (gold, frankincense, and myrrh.) Within each cake is hidden a small plastic doll, which represents the Baby Jesus. (In olden times, it used to be a porcelain doll, or a bean or pea.)


King Cake parties where all the rage when I was growing up. Whoever was lucky enough to get the doll in their piece of cake would be named king (or queen) of that party and had to throw the next party. Today, this tradition is very prevalent in offices throughout the city where the person who gets the doll must bring the next cake. King cake sales are so prosperous that many bakeries in New Orleans are more profitable during the carnival season than they are for the entire rest of the year.


The making of a king cake should not be taken lightly. Since this is a yeast sweet bread, it has to be kneaded and left to rise twice, and is a day-long commitment. There are many bakeries that make excellent king cakes, so why in the world would anyone want to make their own? Just for the fun of it!!

My introduction into making home-made king cakes came many years ago. I found a recipe and tried it out on my family. Geez almighty, it was horrible. It came out heavy and hard as a rock, so much so that they called it the King Rock. My other sister, Janice, told her office mates about it and they accused her of exaggerating – that it couldn’t possibly have been that bad. So, they asked me to make a cake for their office party. Much to my dismay, it was just as horrible, but everyone was so polite and complimentary so as not to hurt my feelings, but I knew it was a bomb. I hope to think that I have gotten a little better at it over the years, but it is still tricky. I continue to try out new recipes and techniques, as I continue my search for perfection.

The recipe below is a really good one. It produces a light, but moist cinnamon cake. A few pointers for success: You have to get the yeast at just the right temperature (105 to 115 degrees) and let it foam for at least 10 minutes. You have to be careful not to add too much flour and not to over knead it. The dough should be slightly sticky, but elastic and able to hold its own shape, but never firm.


You have to be careful not to over bake it or it will be dry. I now use an instant-read thermometer, which should register 195 to 200 degrees for doneness.


The recipe is below. Basically, this is what you do. It’s much like making a bread dough. Let it rise till double in bulk and then roll out into a rectangle.


Here’s what it looks like rolled out with the cinnamon sugar sprinkled on:


Then roll up each piece into a long string.


Pinch the edges together so that the filling doesn’t ooze out. Flatten down the pinched edge afterwards so that it lays flat.


Twist the two strings together.


Form into a circle on a baking pan.


Let rise until double in bulk.

This is what it looks like right out of the oven.


Let cool and then decorate with a glaze and colored sprinkles.


See the baby’s head?


And that’s me with my cake.


You can do these in a variety of ways. You can divide the rectangle of dough into thirds and braid it like this. I rolled these strings in the cinnamon sugar to get it on the outside, rather than on the inside.


This is what it looked like after it was left to rise, baked and decorated. This one raised a lot and was very light and airy.


This one was filled with cinnamon sugar, raisins, and pecans. If you put a lot of “stuff” in your cake, it won’t rise as much.


You can also use other fillings, such as cream cheese filling, apple pie filling, lemon pie filling, cherry pie filling, etc. But I don’t like those. They turn out too sweet for my taste and the filling overpowers the taste of the cake. I’m a purist and like just a little cinnamon sugar.


So, that’s it. I hope that you all give it a try and bring a bit of New Orleans to wherever you might live. Also, if you ever have the chance to visit New Orleans during Mardi Gras, the city would love to have you. Let me just say that Mardi Gras is not only what you see in the media. Yes, there are some unmentionable things that go on in the French Quarter, but that is a very small piece of what our carnival season is about. Mardi Gras outside of the Quarter is very family oriented. The parade routes are filled with kids and families having fun. When we were little kids, my family did not miss a parade. We loved every minute of it. We would lift Sharon, the youngest, smallest and spryest of all of us, over barricades to get that all-elusive string of beads, trinket or doubloon out of our reach. Police were all over the place supposedly monitoring such infractions, but because she was so cute, the police would just look at her and us, and just shake their heads. We trained her young; you should see how she still scoops up the parade throws.


Happy Mardi Gras!


KING CAKE RECIPE:
(This recipe makes two medium size cakes.)

¼ cup warm water (105 to 115 degrees)
1 tablespoon (1 package) dry yeast
1/3 cup sugar
5 ¾ to 6 ¼ cups unbleached all-purpose flour
1 ½ teaspoons salt
½ cup warm milk (105 to 115 degrees)
1 cup sour cream
3 large eggs
finely grated zest of 1 lemon or orange
8 tablespoons (1 stick) unsalted butter, at room temperature, cut into small pieces

Cinnamon Sugar:
1 cup sugar
4 teaspoons ground cinnamon


Frosting:

4 cups powdered sugar
4 tablespoons butter, melted
7 tablespoons hot water, more as needed
1/4 teaspoon almond flavoring


1) Pour warm water into small bowl. Sprinkle yeast and a pinch of sugar over the surface. Stir to dissolve and let stand at room temperature until foamy; about 10 minutes.


2) Place 1 ½ cups of the flour, the remaining sugar, and the salt in mixer bowl. Make a well and add the milk, sour cream, eggs, and zest in the center. Beat until smooth on medium-low speed, about 1 minute.


3) Add the yeast mixture and beat for 1 minute more.


4) Stop the machine and add 1 cup more flour. Beat for 1 minute.


5) Add the butter pieces and beat on low speed until incorporated.


6) Add the remaining four, ½ cup at a time, until a soft, smooth dough that just clears the sides of the bowl is formed. Switch to the dough hook when the dough thickens, about two-thirds through adding the flour.


7) When all flour is added, knead with dough hook for about 5 minutes on medium speed. (If you don’t have a dough hook for your mixer, you’ll need to turn the dough out onto a lightly floured surface and knead for about 5-10 minutes.)


8) Turn dough out onto lightly floured surface. Knead until smooth and just able to hold its own shape, under 1 minute if you used the dough hook (6 to 10 kneads to smooth it out), dusting with flour only 1 tablespoon at a time, just enough to prevent sticking to your hands and the work surface. This dough will be very smooth, with a definite soft elastic quality, a little sticky, but never stiff, and will hold its shape.


9) Place the dough ball in a greased deep container, turn once to grease the top, and cover loosely with plastic wrap. Let rise in a warm place until double in bulk, 2 ½ to 3 hours. Do not allow the dough to rise over double.


10) Punch dough down with fist. Turn out onto lightly floured surface. Let rest 10 minutes.


11) Divide the dough in half with a bench scraper, pizza cutter or knife, never tearing the dough.


12) Divide each half into thirds. Roll out to a rectangle approx. 20 x 12 inches.


13) Divide in half with pizza cutter. Brush with melted butter keeping edges dry. Sprinkle with cinnamon sugar.


14) Roll up and pinch ends together so filling does not ooze out. Flatten pinched edge.


15) Twist two long rolled pieces together. Form into a circle and fold edges under.


16) You can insert baby trinket into cake at this point or wait until after it is baked. (I like to wait after it is baked if it is plastic.) Insert from underneath. (If you don’t have a baby trinket, use a whole pecan, walnut or other object; just be careful it is big enough that it cannot be swallowed whole.)


17) Cover with greased plastic wrap or light cloth towels and let rise in a warm place until double in size, about 1 to 1 ½ hours.


18) Preheat oven to 350 degrees. Bake 20-25 minutes. An instant-read thermometer will read 195 to 200 degrees.


19) Let cakes completely cool.


20) To prepare frosting, mix melted butter, powdered sugar and flavoring; add hot water 1 Tablespoon at a time until glaze reaches desired spreading consistency. You don’t want this too thin because it will run right off the cake or too thick because it won’t drip down the side of the cake.


21) Pour frosting over cake; sprinkle with purple, green and gold colored sprinkles or colored sugar.


—————————————-


Sharon again here. WOW! Was that great or what? Thanks Sis for showing me up on my own blog. Dang overachiever.  (Just kidding.) But seriously, I have been trying to convince Barb for months now to start her own food blog. She is a good cook, and photography has been a hobby of hers for a long time. What do you guys think? If you think she needs to start her own blog, leave a note in the comment section below ……


Then you can pretend you are down here with us having a great time while you sip your Mardi Gras martinis.


Mardi Gras Martini:


This festive concoction will add color to your celebration and your cheeks. To make purple sugar, add a few drops of red and blue food coloring to granulated sugar and mix. Rim glasses with a cut lemon and dredge in colored sugar, add a lemon twist and enjoy this purple, green and gold treat.


 2 ounces vodka
1 ounce triple sec
1 drop creme de menthe dark
Lemon twist, optional


In a martini shaker, combine vodka, triple sec and creme de menthe with ice and shake until well chilled. Strain into a martini glass, preferably one rimmed with purple sugar. Garnish with a lemon twist.(*from acj.com)


Happy Mardi Gras Everyone!

Sharon
PS We’ve got a full video tutorial on making the King Cake in our online school:
http://www.sugaredproductions.com/
Visit our online school


Organizing Cake Stuff

January 15, 2009 by Sharon Zambito 7 Comments

 
I have gotten a request from one of my readers to see pics of how I store my cake supplies and what my work area looks like. (So this is for you Fiddlesticks!) I often get asked if I have any suggestions on organization. I am not sure that I have any brilliant pearls of wisdom to contribute to this topic, so I am calling upon you guys to help me out with this one.

I am very anal about certain things in my life, like my cakes, and a few other things. Some things I am a total train wreck with, such as my closet. I can’t find anything in there. (Note to self: clean out closet). But when it comes to general housework and organization of “cake stuff” I am somewhere right in the middle. Everything is basically organized and has its place, but its not perfect. There is a controlled amount of mess within that organization, if that makes any sense.


This is looking into my cake room/office.


This is my work area where I do prep work like gumpaste flowers, bows, modeling and all that stuff. This picture is a few years old and I now have a larger black table to work on in that spot. As you can see on the table, I have one of those plastic organizers sold at Home Depot to hold screws and nails for your garage. It has sliding out draws, and all my piping tips are in there. Each drawer is labeled with the tip number. I have just a few pencil type holders for my tools, and the white thing on the right of the table is a dehydrator.


Please keep in mind that these pictures were taken before my room renovation was complete. As of this date, I have the lights hardwired into the walls, and I even have a real countertop now. What you see there is plywood covered with a vinyl tablecloth, LOL. You can get a general idea here how I have stuff organized in the cabinets. The thing to the left is Jack, my portable A/C, which allows me to customize the temperature in this room when I am working on cakes. I keep it 68-72 in here when cakes are out.


This is inside the tall cabinet on the right. As you can see I am a big Rubbermaid fan. I use those stacking sliding drawers all over to organize stuff. I have all my gel colors separated by color, and many of my cutters separated by category in these stacking drawers. Foil rolls are at the bottom. (Please ignore the dirty floor; I snapped this pic before I mopped.)


The upper cabinet uses more Rubbermaid drawers and trays. It doesn’t look extremely organized but I know exactly where each thing is and can put my hands on it right away when I need it. Most of the time.


I also use the hall closet for my cake drums, boxes, fomecore, dummies, ribbons, pre-made gumpaste flowers and other miscellaneous stuff. I’m a little embarrassed cuz this looks kinda messy but really, each thing has a place and it works! I promise!


I have these fabulous deep drawers in the kitchen that allow me to store almost all of my cake pans in there. Very convenient and easy to get to them.
 
I know I am very blessed to have the work and storage space that I do. In the previous house we lived in, I did not and I had cake stuff just piled up all over the place. So this is where I need you guys to help me. If you have any great organizational tips, ideas, or photos, please leave them in the comment section or email them to me. I will post them in a later post. All those great ideas you have can really help all those cakers out there that are pressed for space.
 
So send those tips on in!
 
Happy Caking,
 
Sharon
www.sugaredproductions.com


New Orleans Doberge Cake

January 7, 2009 by Sharon Zambito 21 Comments

What is Doberge, you say? You look it up in a french dictionary and the word is not there. How do you pronounce it? (I say dough-bearj; some say dough-bosh or dough-boj.)
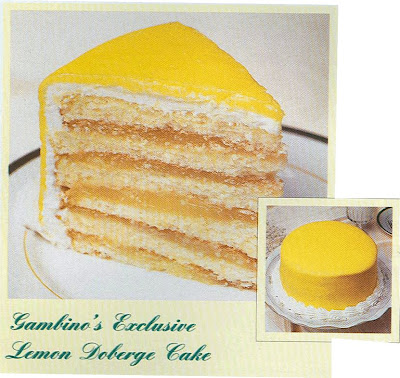
Doberge cake is an iconic staple of living in New Orleans. It is a yummy multi-layered cake with pastry cream inside and a poured glaze on the outside. You can order one for yourself here:

Traditional flavors are chocolate, lemon and caramel. But how did this deliciously delicate delight come to be? I did a little research and learned a few things myself.

Back in the 1930’s there was a New Orleans woman named Beulah Ledner, who came from a baking family in Germany. She started baking during the Depression to supplement the income from her husband’s furniture business. Experimenting in her kitchen, she came up with a variation on the famed Hungarian-Austrian dobos torta, which was thin layers of sponge cake filled with butter cream. She changed that to thin layers of butter cake with a custard filling, either chocolate or lemon.
This was a cake that was subtly rich and lighter than the original, and better suited to the New Orleans climate. But its inventor recognized that “dobos” wouldn’t fly in New Orleans. She thought it should be “Frenchified” to fit the city’s style. And so the name “doberge” was born.
The business was first known as Mrs. Charles Ledner Bakery and was based in her home. Eventually she moved to a store front. A heart attack caused Beulah Ledner to sell the bakery, the name and the recipes to the Joe Gambino family in 1946. The agreement forbade her from operating another bakery in Orleans Parish for five years. But she could not stay away, and 2 years later opened another business in a neighboring parish (ie county) called Beulah Ledner Bakery. Beulah Ledner worked until she was 87 and sold Beulah Ledner Bakery in 1981. She died at 93, her culinary legacy intact.

Gambino’s Bakery is another icon of New Orleans, more famous for the doberge cake than Beulah. Many think that it originated there, but now we know better!

No one knows the original recipe except for Gambino’s , but here is a recipe we found on the Internet that my best friend Heather has made with good success. The only difference is that an authentic doberge cake has a poured glaze icing, not a spread on one:

CHOCOLATE DOBERGE CAKE

CAKE:

2 cups cake flour sifted
1 teaspoon baking soda
1 teaspoon salt
10 tablespoons butter
1-1/2 cups sugar
3 eggs separated whites beaten until stiff
1 cup buttermilk
2 squares unsweetened chocolate melted
1-1/4 teaspoons vanilla
1 teaspoon almond extract


FILLING:

2-1/2 cups evaporated milk
2 squares semisweet chocolate
1-1/4 cups granulated sugar
5 tablespoons flour
4 egg yolks
2 tablespoons butter
1-1/4 teaspoon vanilla
1/4 teaspoon almond extract


FROSTING:

3 cups sugar
1 cup evaporated milk
2 ounces bittersweet or unsweetened chocolate
4 tablespoons butter
1 teaspoon vanilla


DIRECTIONS:

Preheat oven to 300.
Grease and flour 2 round cake pans.
In a medium bowl sift flour, soda and salt 3 times.
Cream margarine and sugar in a large mixing bowl then add egg yolks one at a time.
Gradually alternate adding the flour mixture and buttermilk then add chocolate and mix well by beating about 3 minutes.
Fold in the three beaten egg whites, vanilla and almond extract.
Bake 45 minutes.
Allow cake to completely cool then split each layer into thirds to make six thin layers.
Put milk and chocolate in a saucepan and heat until chocolate is melted.
In a bowl combine sugar and flour.
Make a paste by adding hot milk chocolate by tablespoons to the sugar and flour and then return to saucepan.
Stir over medium heat until thick.
Add 4 egg yolks all at once and stir rapidly to completely blend.
Cook 3 minutes longer.
Remove from heat then and add butter, vanilla and almond extract.
Cool and spread on cake layering as you go.
Do not spread on top layer.
Combine sugar and milk in a heavy saucepan and bring to a boil stirring constantly.
Reduce heat and simmer 6 minutes without stirring.
Remove from heat and blend in chocolate.
Add butter and vanilla and return to medium low heat cooking 2 minutes.
Place in refrigerator to cool.
Beat well and then spread on top and sides of the cake.

——————————————————-

Now, we all know I am a fan of short cuts. Don’t get me wrong, taste is critically important to me, but if I can find a way to get excellent results with a little less work, I am all over that. So in my laziness, um, I mean, thriftiness, I have created a “doctored” version that Heather teasingly calls my Faux-berge cake.

Sharon’s Fauxberge Chocolate Cake
2 layers of your favorite doctored cake recipe in white or yellow
Jello pudding cups premade chocolate pudding
Chocolate buttercream icing
Chocolate ganache
Torte each cake layer into 3 thinner layers. Spread a thin layer of pudding in between each layer. (Premade cups have a better consistency than making the pudding in the box.) And it’s easier!! MWAHAHAHA.

Here are the 6 layers of cake on a 1/2 inch fomecore board. You will need to cover the fomecore with something appropriate to make it food safe. This was for family so I threw caution to the wind.


Ice to the edge of the fomecore with a layer of chocolate buttercream and chill in fridge until firm.


Now this next step is NOT necessary and I usually do not do it. However, this puppy was a huge 15 inch cake and rather unstable. So I gave it a coating of thick ganache (made with a 2:1 ratio of chocolate to cream.) You let the ganache thicken to a paste consistency and ice the cake with your spatula and bench scraper just like you do for buttercream. It sets up nice and firm to give you a stable chocolate “shell” encasing the layers. That top ledge of chocolate you can see in the picture was removed with my palette knife after the cake was fully chilled, but before I poured the thinner ganache layer on top.


Wanna see something scary?…………………….


Here is my ganache pouring set up. (Pretend you don’t see that pile of laundry on the chair, kay?) From bottom to top: cookie sheet lined with foil, fondant bucket wrapped in plastic wrap for food safety, piece of non skid stuff, cooling rack, piece of non-skid, and chilled cake on its fomecore board. When the iced cake is fully chilled, then you pour the final ganache coating on. That’s a LOT of ganache for this huge a$$ cake! My friend Jacque has a great tutorial on how to pour ganache on her fabulous blog Daisy Lane Cakes. Thanks Jacque, you rock!


OK, wanna see something even more scary?………………….

Moving that huge cake with wet ganache into the lowest shelf of my fridge where it barely fits without messing it up! Stress! I need a drink.


I let that ganache firm up overnight. Next day I took it out the fridge (fairly easy now that it is firm) and placed it on the display board, piped a border and placed the edible photo on top. This was for my sister in law’s dad’s 85th birthday bash. Everyone went nuts over this cake, in both looks and taste. I was even told it was better than Gambino’s! Shhh, don’t tell I cheated.


And here is a picture of the cake after serving. This photo was taken with D’s cell phone. Don’t think we’ll be getting any blog awards with this one! LOL


So there you have it, class. Your lesson on the New Orleans Doberge cake. Your assignment is to go make one of these beauties and tell me how you like it! Enjoy!

Sharon
http://www.sugaredproductions.com/
  • « Previous Page
  • 1
  • …
  • 3
  • 4
  • 5
  • 6
  • Next Page »

Sharon Zambito

Sharon Zambito

An RN turned SAHM turned cake maniac. Owner of SugarEd Productions Online School. Join me for some caking, baking, and all around sweet fun :)

Follow me..

  • Facebook
  • Instagram
  • Pinterest
  • YouTube

Pinterest

  • Autumn House Two Trees Machine Embroidery Design – Blasto Stitch
    Autumn House Two Trees Machine Embroidery Design – Blasto Stitch
  • Embroider  Sew :: Jelly Roll Purses - Embroidery Garden In the Hoop Machine Embroidery Designs
    Embroider Sew :: Jelly Roll Purses - Embroidery Garden In the Hoop Machine Embroidery Designs
  • (1) How to QUICKLY & SAFELY remove acrylic, gel, and dip powder polish | BAGGY METHOD - SO EASY! - YouTube
    (1) How to QUICKLY & SAFELY remove acrylic, gel, and dip powder polish | BAGGY METHOD - SO EASY! - YouTube
  • (1) Bouffant Surgical Cap - YouTube
    (1) Bouffant Surgical Cap - YouTube
Follow Me on Pinterest

Follow Me on Instagram

Instagram requires authorization to view a user profile. Use autorized account in widget settings

Recent Posts

  • Egg Safety Basics
  • Stable Mabel Support System Sale
  • Guest Post : 4 Vegan Cake Recipes No One Should Miss Out On!

Popular Posts

  • Ways To Make Your Cake Fluffy And Moist
  • How To Stencil on Cookies with Royal Icing
  • Doctored Cake Mix Recipes
  • Transferring an Image Without a Projector
  • All About Buttercream!
  • How to Fix Broken Ganache
  • Edible vs Non Toxic Gold Dusts

Categories

Search

Archives

Copyright © 2025 · Sharon Zambito and SugarEd Productions,LLC

Copyright © 2025 · Evangeline Theme on Genesis Framework · WordPress · Log in