Sugared Productions Blog

  • Blog Home
    • Home
  • Online Classes
  • Shop
  • Contact
  • About

Lazy Halloween Cheesecake

October 17, 2012 by Sharon Zambito 18 Comments

 Hello Sugar Friends!

Those of you who have followed my blog for a while know that I am a very lazy busy woman. I am all for making things easier on ourselves when possible. I think everything has its place: scratch, doctored, handmade, pre made. Whatever works works for me!

Since I am especially lazy busy right now, I was brainstorming a really easy dessert I could bring to a Halloween function. I wasn’t in the mood for cake, or cupcakes, or cake balls, or pie, or donuts…… but cheesecake, yes!

 easy pumpkin cheesecake


However, I am way too lazy busy right now to make cheesecake from scratch. So I decided to experiment with my idea using boxed no bake cheesecake. Yep, I went there. 🙂


easy pumpkin cheesecake

 I used 3 mixes for the cheesecake I made.


easy pumpkin cheesecake

I used an 8 inch spring form pan. I used almost two of the three packs of the crust mix because I like a really thick crust on my cheesecake. After I packed in the crust, I went over the outer edges with the back of a spoon to pack it all down evenly. I wanted the crust to look very uniform and even when the cake was unmolded. (Just cuz I am being lazy using shortcuts doesn’t mean I don’t want it to look good!)

Next I mixed up 2 packs of cheesecake and colored it orange with gel colors. You could also add some orange flavoring to jazz it up if you like.


easy pumpkin cheesecake

 In went the orange cheesecake, estimating one third up the pan.


easy pumpkin cheesecake

I used a paper towel to wipe the inside edges clean of any smears. I was trying to keep the layers of the cake as clean as level as possible so it would be pretty when unmolded.

Third pack of cheesecake mix was colored black. Yep, I went there! It’s Halloween; what’s more fun than a black mouth! You could start with chocolate mix if you desire, and then you would have chocolate and orange flavored cheesecake. That would be yummy.


easy pumpkin cheesecake

In went a layer of black cheesecake mix.


easy pumpkin cheesecake

Third layer is orange again. Bang the pan well and clean up the top edges again. Into the freezer overnight. We need it to be rock solid to unmold it.


easy pumpkin cheesecake

The next day (or week, or whenever you get around to it like me), unlatch the spring and take off the outer ring of the pan. It will release easily and cleanly from the cake. Immediately put a piece of parchment and cake cardboard on top and flip it over. Then remove the bottom of the pan. It also came off super easily.


easy pumpkin cheesecake

 Then quickly put your cake plate on top and flip it back over.

Now guys, this cake is going to sweat profusely if you leave it out at room temp. It’s going to sweat buckets. It’s going to pool and drip black streaks down the sides. And yes, I do know this from first hand experience. 😯  So you need to let this thaw in the fridge, preferably inside a box. That way the condensation will collect outside the box and not on the surface of the cake.


 easy pumpkin cheesecake


If you are lazy a minimalist like me, a simple presentation on a cake platter is all it needs. It’s pretty enough to stand alone.


easy pumpkin cheesecake

Yummy cheesecakey deliciousness. And it really did taste pretty good for coming from a box.

BUT, if you really want to get your Halloween on, you can pipe some super easy buttercream ghosts around the side this :


easy pumpkin cheesecake


 Wooooooooo…………. (not really sure how you type scary ghost sounds)


easy pumpkin cheesecake


Since it’s too hard to explain how I piped these ghosts, I have a teeny tiny little video to show how I did it.  Disclaimer: My son filmed this using my phone;don’t expect too much:

Piped Ghost Video


easy pumpkin cheesecake


 Wasn’t that fun?


easy pumpkin cheesecake


 And lazy easy!


easy pumpkin cheesecake


Just in case you can’t bring yourself to use a box, here is an easy no bake cheesecake recipe:

Crust:

1 1/4 c. graham cracker crumbs
3 tbsp. sugar
1/3 c. butter, melted

Mix crust ingredients and press into bottom and sides of 9-inch pie plate.

Filling:

 
1 (8 oz.) pkg. softened cream cheese
1 can sweetened condensed milk
1/3 c. lemon juice
1/2 c. sour cream

In medium size bowl beat cream cheese until fluffy. Add condensed milk, stir in lemon juice and sour cream; blend ingredients well. Chill 20 minutes then fill pie crust. Chill 2 hours.

Hope you guys try it! Send me pics of the black mouths! :mrgreen:

Happy Halloweening,

Sharon

Visit our online school

Ghostly Cake Push Ups

October 11, 2012 by Sharon Zambito 21 Comments

Hello everyone!

No, your eyes are not playing tricks on you. I have actually posted another tutorial to the blog! You are not dreaming LOL! Things continue to be very time consuming behind the scenes around here as we build our new website and prepare for our membership area to open soon. We are putting together a really wonderful community with loads of features that I think you all will really love. I am also preparing for some new DVD filming days coming up in the next few months. So stay tuned for some new and exciting things to come!

At times like this, when it seems there are not enough hours in the day, it can be a real challenge to come up with some cute and creative confection ideas for our families, friends and customers. I am sure you experience this a lot too. So my next few blog posts will feature some designs that are high on impact but easy in the labor department.

I am sure most of you are familiar with the cake push up craze by now. It has been around a couple of years now. It’s a really fun clever way to  present cake and icing in a whimsical manner; a nice change of pace from the beloved cupcake. So let me please share with you these easy ghost push ups that took no time at all.


 Let’s make them really spooooooky…….


 What you will need:

cake
push up tubes (can be found all over the place including Ebay and Amazon)
colored icing
sugars, jimmies, sprinkles
mini chocolate chips
icing decorations (the little ghosts shown below are from Wilton)
large  round piping tip and bag


Color your cake batter with gel colors if desired, then bake and level your layers to the height you want your pieces in your push ups to be. Use the end of the push up tube to cut out the circles of cake.


With the plunger of the tube pushed all the way down, push the first layer of cake all the way in.  Now how do we get the icing down deep into the tube in a clean and level manner? I wanted my parfait layers to look as clean and straight as possible from the outside of the tube. So I made my own contraption to get the icing  down in there.


I put a portion of a bubble tea straw into the opening of the coupler and taped it in place well. You have to tape it really really good or it will pop off under the pressure of piping. (Ask me how I know that! lol)


Use your straw tuby piping thing to pipe a nice level ring of icing on top of the cake layer.


Repeat with another color if desired. It works beautifully! It keeps the icing level and also keeps the side of the tube clean of smears. Maybe I should patent my straw tuby piping thing? What do you think? I could get it on QVC and make a fortune! I could become the queen of the straw piping thingy! …… Sorry, I digress.


Back to the push ups….


I added a top layer of cake and put a very thin layer of icing on top to keep the cake fresh.


I pressed that into some colored sanding sugar.


Now you have a pretty top, but the cake will stay sealed in and not dry out.


With a huge round tip (Ateco 808), I piped a dollop of icing on the top to make my ghost.


Added some mini chocolate chips for eyes and mouth. (This is a really bad photo but you get the idea.)


You can add some jimmies around your ghost if you like, or use some premade decorations on top like my little ghost holding candy corn shown above.


Vary up the color combos, add sprinkles into your layers, let your imagination go!


 Have fun with it!


For my presentation here I used Styrofoam in a metal bucket, stuck the pop handles into that, and covered the top with Halloween grass. Very cute presentation I think, don’t you?

And it’s just that easy!  If you give it a try, please send me photos. I would love to see your take on it.

Happy Halloween Caking!

Sharon
www.sugaredproductions.com

Visit our online school


Easy Halloween Cupcakes

October 25, 2011 by Sharon Zambito 19 Comments

Halloween is almost here!
Are you ready? No?
Well I am here to help!


This post is for all you procrastinators out there. And I say this with the utmost love and respect. For I am a champion, card carrying, flag waving procrastinator. I even joined a support group, but it hasn’t been much help:

I feel your pain. You had all these great delusions of grandeur of all the amazing treats you were going to make for Halloween. Maybe a haunted gingerbread house. Or a topsy turvy Tim Burton style. Or a batch of fabulously custom decorated cookies. You had it all planned in your head. You laid awake at night with excitement thinking of the joy you were going to experience while creating your incredible Halloween confections.


And here we are, just a few days before Halloween and…… nothing….. nada…… crickets. Where did the time go? What will we do? The kids are looking up at you with those sad longing eyes, asking what you will be making for their class or neighborhood party. Crikey! Why did we wait so long? Your heart starts to race; sweat forms on your brow; the room is going white. Pure unadulterated panic.

Raise your hand if you are with me so far. I have been in this situation more times than I count.

Well, have no fear. Queen Procrastinator is here to help you.

Oops wrong queen. I will fix that. Later.


So let me share with you these super duper easy Halloween cupcakes that you can whip out in no time, but still impress even the most discerning goblins and ghouls.

Ghosts and skeletons and graveyards, oh my!


Let’s start with the standing skeleton:


You will need white chocolate covered pretzels, sucker sticks, and marshmallows.


Draw a face on the flat side of a marshmallow that has been cut in half with an edible food marker. Three of the pretzels need to be glued to the sucker stick with some melted chocolate to make the rib cage.


And that was the tricky part. I spent a good 20 minutes trying to get those finicky pretzels to line up correctly on the sucker stick without flopping over or getting out of alignment. I found the above method worked the best. I used gravity to hold the back edges of the pretzels onto the stick while the chocolate hardened. Worked great and was very easy.


You use another pretzel cut as shown above to make the arms. You use the piece on the left, and eat the piece on the right. It’s a win/win for everybody.


After you pipe your icing swirl, just stick the sucker stuck in and lay the arm bones into the holes of the upper rib cage pretzel. Done. Fast. Easy. Cute. ( I must give credit to Woman’s Day for this idea. I saw it online and copied it.)


Now to the spooky graveyards:


I found these adorable sugar skulls at Wal Mart In the Wilton isle.


They appear to me to be gumpaste, and they were a very nice shape with good details.


To kick them up a notch, bring out a couple of brown petal dusts and give them a roughing up.


That took all of about 30 seconds, and they look awesome!


To make the tombstone, just cut a rectangular piece of fondant (with tylose added) and impress the RIP with your favorite alphabet cutters.   The cute cupcake wrappers were also made by Wilton.


Once the tombstones dry, hit them with a little luster dust. Pipe a swirl onto your cupcake, and slap a tombstone and skull on top. Done. How easy was that?


Crazy easy ghosts:


A Dum Dum lollipop.


Drape a circle of white fondant over it.


Add two eyes made from either fondant or your edible ink pen. Stick into cupcake icing. Woooooooo.


And you are done!


Group shot!


Cuteness overload.


Tread only if you dare!


He is a happy little fellow.


I don’t know what came over me. I lost my head.


And you saved the day! You have created this wonderful spread of amazing cupcakes, and it was fast and easy. You can take convenient pre-made products, do a little doctoring, and turn them into a custom made and impressive result:

HAPPY HALLOWEEN EVERYBODY!


Happy baking,
Sharon
Visit the SugarEd Online School

Halloween Marshmallow Pops

October 13, 2011 by Sharon Zambito 24 Comments

Boo!


Did I scare ya?


Probably not, as you intentionally logged onto this post. 🙂


Monster Marshmallow Pops Tutorial


One of my very favorite holidays is upon us. Halloween is a confectioner’s dream, as it provides an opportunity to make some of the cutest tasty treats evah. Let me share with you some I made this week. These were a lot of fun, and not very difficult nor time consuming. They get extra points for that!


Halloween marshmallow pops

Meet Broomelda and Franque. (He is French).


Initial supplies used to make our cozy candy couple include yellow candy melts, green oil based candy color, marshmallows and sucker sticks. I highly recommend Merkens brand melts for optimum dipping performance. In this case I used the campfire roasting marshmallows. Have you seen those things? They are hugantic! They are as big as…..as ……as a giant marshmallow! I also suggest using the thicker sucker sticks, as these bad boys are heavy once they are done.


Big bowl of green melty chocolate.


Other supplies used will be these candies and pre-made googly eyes, that you can get at most cake decorating places.


For Broomelda, we have to cut angles off each side of the gargantu-mallow. Run your knife under hot water, and dry it off before each cut. This will make the cutting of the freakishly large marshmallow much easier.


Stick and dip. Place on wax paper to dry fully.


Let’s do Franque first:

Cut out a circle of black fondant and cut out notches along the outer edge. Do not cut them evenly or symmetrically. Franque does not have the most couture coif I have ever seen. Just sayin’.


Lay the toupee over his head and just press down all around the sides. (Hint: use shortening as your glue. Trust me. You will thank me for this later.) Glue on his googly eyes with melted chocolate. Cut a white Good & Plenty in half and glue in place for his bolts. Give the rest of the box to hubby because he loves those nasty candies. Oh wait, that is my hubby. Ignore that. Next use a paintbrush to drop a dollop of the same green chocolate on his handsome face to make a nose.


Next we need to bring out the big guns. OK just one small gun. Anyway, get your clay gun out, and using the smallest size circle disc, extrude a string of black fondant. Use that to make eyebrows and mouth. Again, using shortening on his face as glue will save you many bad words. And if you just cannot help yourself (like me), use silver luster dust mixed with vodka to paint his bolts. An edible marker (not shown) can be used to make his scar.

You mad confectionery scientists will have
created a marshmallow monster!


MWAHAHAHA!

Now on to Broomelda:


Marshmallow pops


As with all ladies, we need to spend some time on the hair. Use your clay gun with the largest muti hole disc.


Extrude a length of purple fondant and apply to the side of her head.


Repeat process on each side until her head is covered.


Cut a few short pieces to make her bangs. The bob is very in this season in the witch world.


Now to make her face. Clay gun string again for the brows and mouth. Half of the green Mike and Ike candy for the nose. (Keep that box cuz we like those.) Another pair of google eyes.


Well hello my pretty!


To make the pointy part of her hat, start with a ball of black fondant.


Roll it into a cone shape initially, and then continue to elongate and shape it into a witch hat shape.


A circle of black fondant laid on her head, and then the cone part of the hat is attached to the top of that. A couple of purple clay gun strings will create a perfect hat band.


marshmallow pops

 And they are done!


marshmallow pops

Franque: Hey good lookin’. You want to go for a drink?
Broomelda: Why yes, thank you. I will have a Bloody Mary.


marshmallow pops

Double date!


Happy Halloween everybody! Send me pics if you make these and I will post them on Facebook. Please tell all your friends to like our Facebook page.

Sharon
Sugared Productions Online School

visit our online school


Poured Fondant Pumpkin Cookies

October 8, 2009 by Sharon Zambito 29 Comments


Fall is here! Fall is here!
 
Don’t you just love fall? It is my favorite time of year. More than Spring, more than Summer vacation, more than the Christmas holidays. I love the cooler temps and lower humidity (what little of that we get where I live, LOL.) I love fall colors , pumpkins and turning leaves. I love the promise of the time to be spent with family and friends during the upcoming months.
 
I especially love fall baking. I adore fall themed cakes, cookies and cupcakes. Just love everything about it!


Recently I used the pumpkin cutter set we featured in a SugarEd free gift promotion to make some cookies using poured fondant and rolled fondant. I cannot locate this exact set anywhere retail, but set 1872 here looks to be very similar.


After baking the cookies, I made poured fondant:


6 cups confectioners’ sugar (I often add 1-2 cups more sugar to make it a bit thicker, optional)
1/2 cup water
2 tablespoons light corn syrup
1 teaspoon almond extract ,optional
1 teaspoon vanilla, optional


DIRECTIONS:
In a saucepan, combine confectioner’s sugar, water and corn syrup. Cook over low heat, stirring constantly, until it reaches a temperature of 92 degrees F (33 degrees C.) Mixture should be thin enough to pour, but thick enough to coat cookie. Add food coloring to desired color and stir thoroughly.


Make sure not to overheat. Overheating will cause the mixture to crystallize and show sugar crystals once dried. It may also become too thick to flow well.


I take it off the heat to pour over the cookies. It will thicken up as it cools. If it gets too thick to flow well, gently heat it back up until it is thin enough again. Again, be careful not to overheat it at any time. If you do it will give you trouble. You will get mad. You will say bad words. You might throw cookies across the room. …..Just sayin’.


I hold the cookie in one hand over the pot and spoon the icing over it, allowing the excess to flow back into the pot.


Coat entire cookie. (I do normally wear gloves for this but was so excited to do this tutorial it slipped my mind.)


Let all the excess drip off and then slide your spoon under the cookie.


Slide the bottom of the cookie across the edge of the pot to scrape the excess off.


Lay it on wax paper or parchment. I do not like to put my cookies on cooling/cookie racks because the icing hardens and sticks to the rack. Then when you release the cookie from the rack it messes up your pretty cookie edge.


See that pool of icing? No worries. When it is all dry and hardened, you scrape that excess off with a palette or exacto knife and you end up with a perfectly clean edged cookie.


For the big kahuna cookies, the process is close to the same.


Use several spoonfuls to get the entire cookie coated well.


Let the excess drip back into the pot.


Hold the large cookie with both hands and tap the sides of your hands on the edge of the pot to get all the excess icing flowing off the cookie.


Slide the bottom of the cookie along the edge of the pot as you take it out to scrape off any more excess.


This is where you get so excited because you have this adorable Jack o’ lantern cookie looking back at you! Place him on the parchment too and leave them alone for a while till fully hardened. I leave them for at least a few hours before I clean them up.
 

                                               Rolled fondant covered:


Roll out your orange fondant and cut out the shape with the cookie cutter you used to make the cookie. Smear a little thinned buttercream onto the cookie to make it stick.


                          I used a large oval cutter to make indentations into the fondant.


I did this four times to make the indent lines that pumpkins have.


                                                                  Airbrushing:

Airbrushing adds more depth and dimension and interest to your cookies. It is not necessary to do this, but I like what it adds to the look. I gave it a light overall coating of orange color.


Then I did more pinpoint lines in the grooves with orange.


I did the same thing on the poured fondant cookies.


You can vary the colors if you like. You can add some yellow to give it bright highlights or add some brown to make it more rustic.
 
 
                        Let that dry fully and then add your fondant leaves and arrange!


A beautiful bounty of fall pumpkins!


I love fall stuff!


Here is the fondant one. I even dusted just a tad of pearl dust on this one. Not too much or it will be ugly; trust me on this one.


Punkies, punkies everywhere!


Mr. and Mrs. Happy Patch


Mr. Grouchy Gourd


Cuteness factor overload!


Now go make some of these.
 
Now.
 
Hurry.
 
Then send me some.
 
Please.


Happy Fall!
 
Sharon
www.sugaredproductions.com


NOLA Photography http://bentzphotography.com/

Trick or Treat!

October 31, 2008 by Sharon Zambito 18 Comments

Happy Halloween everyone!

Hope you have a wonderful day with your kids and families. Don’t get sick eating too much of their candy like I always do!

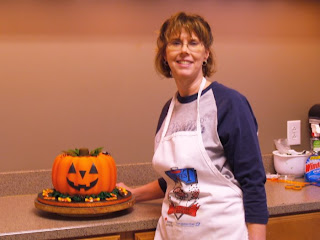
My sister Barbara, who has never decorated a cake in her life, came over for me to help her make a cake for her office Halloween goody contest. She has been a huge help to me with SugarEd over the last year, and has come with me to several of my demos and vendor shows, so she has been exposed to a lot this last year. (Some of you have met her! I also have another fabulous sister that you will meet later on.) She baked the cake herself and brought it over. I showed her how to do each technique (basically off the cake) and then she did the rest herself. She was quite a quick learner. She colored and rolled out the fondant, applied it (I helped her smooth one side while she did the other in the interest of drying out time.) She airbrushed it, made her own leaves and stem, piped the grass, and made the words. I helped her just a little bit with the face and spider.

We used 2 bundt cakes and spackled the seam with stiffened buttercream. Cream cheese filling was piped down into the center hole and a circle of cardboard sits on the top to support the stem.


Here is Barbara airbrushing her masterpiece. Do you dig the fancy taped up towels?

Piping the grass.

Finished!

Hers came out better than mine! And she won first place too! I am so proud, congrats Barb!

I also want to share with you the cookies I did yesterday for my bestest client.

All flooded with royal icing and candy eyes.

These were huge! The web was about 6 inches across.


The big bats are royal icing stenciled onto royal.

Pumpkins are royal stenciled on royal, ghosts are royal with fondant face.

Fondant face on airbrushed royal icing.
These were my favorite! They make me giggle.
Have a nice night everyone; have fun and stay safe!
Sharon
http://www.sugaredproductions.com/
  • « Previous Page
  • 1
  • 2

Sharon Zambito

Sharon Zambito

An RN turned SAHM turned cake maniac. Owner of SugarEd Productions Online School. Join me for some caking, baking, and all around sweet fun :)

Follow me..

  • Facebook
  • Instagram
  • Pinterest
  • YouTube

Pinterest

  • Autumn House Two Trees Machine Embroidery Design – Blasto Stitch
    Autumn House Two Trees Machine Embroidery Design – Blasto Stitch
  • Embroider  Sew :: Jelly Roll Purses - Embroidery Garden In the Hoop Machine Embroidery Designs
    Embroider Sew :: Jelly Roll Purses - Embroidery Garden In the Hoop Machine Embroidery Designs
  • (1) How to QUICKLY & SAFELY remove acrylic, gel, and dip powder polish | BAGGY METHOD - SO EASY! - YouTube
    (1) How to QUICKLY & SAFELY remove acrylic, gel, and dip powder polish | BAGGY METHOD - SO EASY! - YouTube
  • (1) Bouffant Surgical Cap - YouTube
    (1) Bouffant Surgical Cap - YouTube
Follow Me on Pinterest

Follow Me on Instagram

Instagram requires authorization to view a user profile. Use autorized account in widget settings

Recent Posts

  • Egg Safety Basics
  • Stable Mabel Support System Sale
  • Guest Post : 4 Vegan Cake Recipes No One Should Miss Out On!

Popular Posts

  • Ways To Make Your Cake Fluffy And Moist
  • How To Stencil on Cookies with Royal Icing
  • Doctored Cake Mix Recipes
  • Transferring an Image Without a Projector
  • All About Buttercream!
  • How to Fix Broken Ganache
  • Edible vs Non Toxic Gold Dusts

Categories

Search

Archives

Copyright © 2025 · Sharon Zambito and SugarEd Productions,LLC

Copyright © 2025 · Evangeline Theme on Genesis Framework · WordPress · Log in