Sugared Productions Blog

  • Blog Home
    • Home
  • Online Classes
  • Shop
  • Contact
  • About

Book Giveaway!

April 29, 2016 by Sharon Z 537 Comments

Hi sweet friends!

There is a new cookie decorating essential I can’t wait to tell you all about!  Georganne Belle is an immensely talented cookie artist, and has contributed some amazing tutorials to our online school. (You can see those here).

Her blog, LilaLoa, is a true testament to her creativity and innovation. There are so many cool tips and tricks there, I would definitely add her blog to your weekly reads.
Georganne has written a book! The Cookie Companion is her newest contribution, and it is a must have. Whether you are a beginner, or a seasoned pro there is something in this book for you. The gorgeous cookies on the cover tell the story!

cookie book giveaway


To celebrate her achievement, I’m giving away one copy of  her book (hardcover too!)


Don’t worry, if you don’t win the giveaway you can still get a copy of Georganne’s book right here on Amazon. Good luck!

–

WINNER IS LISA BELL! CONGRATS!

Thanks to all who entered.

–

AND……..if that’s not enough….. she has a wonderful Craftsy class on using common cookie cutters you already have in new and innovative ways; I highly recommend it.

You can get it for 50% off at this link. 

50% OFF CRAFTSY CLASS


COOKIE BOOK GIVEAWAYGeorganne Bell is the sugar artist behind the popular cookie decorating blog LilaLoa. She began her journey into sugar through cakes, but quickly switched to cookies when she moved to South Korea and discovered that her oven was the size of a bread box. Georganne has been teaching the basics of sugar cookie art all over the world, including television, and her cookies have appeared in magazines such as Cake Masters and American Cake Decorating Magazine. She teaches online at SugarEd Productions, Craftsy, and Arty McGoo U.
Happy Cookies!
Sharon

Visit our online school

Mardi Gras Give-away!

February 9, 2016 by Sharon Zambito 91 Comments

HAPPY MARDI GRAS EVERYONE!
Since it is Mardi Gras day down here in the Big Easy, I thought you might enjoy learning about another one of our unique culinary creations. I have recruited my big sister Barbara to do a guest blog entry on making a king cake. Barbara is the inventor of the original King Rock (more on that later). In addition to that, she is just the best big sister ever. She looks after me. She is an accountant by profession, so she helps with my business finances, taxes, and all that other icky stuff I have no clue about. She also comes on some of my cake trips with me to help me out with my demos and my vendor table. She is one of the most energetic, social, and fun to be with people I know. She is a very cool chick and I love her tons. So now I present to you… Barbara…..


—————————————-


Hi, I’m Barbara, Sharon’s sister, and she’s asked me to do a guest blog. This is me getting ready for Mardi Gras, which this year falls on February 24.


(Note from Sharon: I have this same outfit and yes we do wear this when we go parading.)

Speaking of Mardi Gras, that brings me to the topic of the day. I am not a cake decorator. I see some of the magnificent pieces of art that you all do and I am in complete awe. But, I am here today to talk about the king of all cakes – the King Cake.

If you are not from the New Orleans are, you might be asking yourself “what is a King Cake?” A king cake is a brioche-style cake similar to a coffee cake that is served throughout the carnival season in New Orleans. The carnival season begins on the 12th Day of Christmas, the Epiphany (January 6), which is the day the three kings visited the Baby Jesus. It is believed that it took the three kings 12 days to find their way to the stable. The carnival season ends on Mardi Gras Day, which is the Tuesday before Ash Wednesday.

The king cake is circular, representing the circular path the three kings had to take to ward off King Herod, who was seeking them so that he could kill the Christ Child. The king cake is typically decorated with colored icing and/or sugar. The three colors are purple, green and gold, the colors of Mardi Gras, which represent justice, faith and power. I’ve also heard that the three colors represent the three gifts presented by the Magi (gold, frankincense, and myrrh.) Within each cake is hidden a small plastic doll, which represents the Baby Jesus. (In olden times, it used to be a porcelain doll, or a bean or pea.)


King Cake parties where all the rage when I was growing up. Whoever was lucky enough to get the doll in their piece of cake would be named king (or queen) of that party and had to throw the next party. Today, this tradition is very prevalent in offices throughout the city where the person who gets the doll must bring the next cake. King cake sales are so prosperous that many bakeries in New Orleans are more profitable during the carnival season than they are for the entire rest of the year.


The making of a king cake should not be taken lightly. Since this is a yeast sweet bread, it has to be kneaded and left to rise twice, and is a day-long commitment. There are many bakeries that make excellent king cakes, so why in the world would anyone want to make their own? Just for the fun of it!!

My introduction into making home-made king cakes came many years ago. I found a recipe and tried it out on my family. Geez almighty, it was horrible. It came out heavy and hard as a rock, so much so that they called it the King Rock. My other sister, Janice, told her office mates about it and they accused her of exaggerating – that it couldn’t possibly have been that bad. So, they asked me to make a cake for their office party. Much to my dismay, it was just as horrible, but everyone was so polite and complimentary so as not to hurt my feelings, but I knew it was a bomb. I hope to think that I have gotten a little better at it over the years, but it is still tricky. I continue to try out new recipes and techniques, as I continue my search for perfection.

The recipe below is a really good one. It produces a light, but moist cinnamon cake. A few pointers for success: You have to get the yeast at just the right temperature (105 to 115 degrees) and let it foam for at least 10 minutes. You have to be careful not to add too much flour and not to over knead it. The dough should be slightly sticky, but elastic and able to hold its own shape, but never firm.


You have to be careful not to over bake it or it will be dry. I now use an instant-read thermometer, which should register 195 to 200 degrees for doneness.


The recipe is below. Basically, this is what you do. It’s much like making a bread dough. Let it rise till double in bulk and then roll out into a rectangle.


Here’s what it looks like rolled out with the cinnamon sugar sprinkled on:


Then roll up each piece into a long string.


Pinch the edges together so that the filling doesn’t ooze out. Flatten down the pinched edge afterwards so that it lays flat.

Twist the two strings together.


Form into a circle on a baking pan.

Let rise until double in bulk.

This is what it looks like right out of the oven.


Let cool and then decorate with a glaze and colored sprinkles.


See the baby’s head?


And that’s me with my cake.


You can do these in a variety of ways. You can divide the rectangle of dough into thirds and braid it like this. I rolled these strings in the cinnamon sugar to get it on the outside, rather than on the inside.


This is what it looked like after it was left to rise, baked and decorated. This one raised a lot and was very light and airy.


This one was filled with cinnamon sugar, raisins, and pecans. If you put a lot of “stuff” in your cake, it won’t rise as much.


You can also use other fillings, such as cream cheese filling, apple pie filling, lemon pie filling, cherry pie filling, etc. But I don’t like those. They turn out too sweet for my taste and the filling overpowers the taste of the cake. I’m a purist and like just a little cinnamon sugar.


So, that’s it. I hope that you all give it a try and bring a bit of New Orleans to wherever you might live. Also, if you ever have the chance to visit New Orleans during Mardi Gras, the city would love to have you. Let me just say that Mardi Gras is not only what you see in the media. Yes, there are some unmentionable things that go on in the French Quarter, but that is a very small piece of what our carnival season is about. Mardi Gras outside of the Quarter is very family oriented. The parade routes are filled with kids and families having fun. When we were little kids, my family did not miss a parade. We loved every minute of it. We would lift Sharon, the youngest, smallest and spryest of all of us, over barricades to get that all-elusive string of beads, trinket or doubloon out of our reach. Police were all over the place supposedly monitoring such infractions, but because she was so cute, the police would just look at her and us, and just shake their heads. We trained her young; you should see how she still scoops up the parade throws.


Happy Mardi Gras!


KING CAKE RECIPE:

(This recipe makes two medium size cakes.)

¼ cup warm water (105 to 115 degrees)
1 tablespoon (1 package) dry yeast
1/3 cup sugar
5 ¾ to 6 ¼ cups unbleached all-purpose flour
1 ½ teaspoons salt
½ cup warm milk (105 to 115 degrees)
1 cup sour cream
3 large eggs
finely grated zest of 1 lemon or orange
8 tablespoons (1 stick) unsalted butter, at room temperature, cut into small pieces

Cinnamon Sugar:
1 cup sugar
4 teaspoons ground cinnamon


Frosting:

4 cups powdered sugar
4 tablespoons butter, melted
7 tablespoons hot water, more as needed
1/4 teaspoon almond flavoring


1) Pour warm water into small bowl. Sprinkle yeast and a pinch of sugar over the surface. Stir to dissolve and let stand at room temperature until foamy; about 10 minutes.


2) Place 1 ½ cups of the flour, the remaining sugar, and the salt in mixer bowl. Make a well and add the milk, sour cream, eggs, and zest in the center. Beat until smooth on medium-low speed, about 1 minute.


3) Add the yeast mixture and beat for 1 minute more.


4) Stop the machine and add 1 cup more flour. Beat for 1 minute.


5) Add the butter pieces and beat on low speed until incorporated.


6) Add the remaining four, ½ cup at a time, until a soft, smooth dough that just clears the sides of the bowl is formed. Switch to the dough hook when the dough thickens, about two-thirds through adding the flour.


7) When all flour is added, knead with dough hook for about 5 minutes on medium speed. (If you don’t have a dough hook for your mixer, you’ll need to turn the dough out onto a lightly floured surface and knead for about 5-10 minutes.)


8) Turn dough out onto lightly floured surface. Knead until smooth and just able to hold its own shape, under 1 minute if you used the dough hook (6 to 10 kneads to smooth it out), dusting with flour only 1 tablespoon at a time, just enough to prevent sticking to your hands and the work surface. This dough will be very smooth, with a definite soft elastic quality, a little sticky, but never stiff, and will hold its shape.


9) Place the dough ball in a greased deep container, turn once to grease the top, and cover loosely with plastic wrap. Let rise in a warm place until double in bulk, 2 ½ to 3 hours. Do not allow the dough to rise over double.


10) Punch dough down with fist. Turn out onto lightly floured surface. Let rest 10 minutes.


11) Divide the dough in half with a bench scraper, pizza cutter or knife, never tearing the dough.


12) Divide each half into thirds. Roll out to a rectangle approx. 20 x 12 inches.


13) Divide in half with pizza cutter. Brush with melted butter keeping edges dry. Sprinkle with cinnamon sugar.


14) Roll up and pinch ends together so filling does not ooze out. Flatten pinched edge.


15) Twist two long rolled pieces together. Form into a circle and fold edges under.


16) You can insert baby trinket into cake at this point or wait until after it is baked. (I like to wait after it is baked if it is plastic.) Insert from underneath. (If you don’t have a baby trinket, use a whole pecan, walnut or other object; just be careful it is big enough that it cannot be swallowed whole.)


17) Cover with greased plastic wrap or light cloth towels and let rise in a warm place until double in size, about 1 to 1 ½ hours.


18) Preheat oven to 350 degrees. Bake 20-25 minutes. An instant-read thermometer will read 195 to 200 degrees.


19) Let cakes completely cool.


20) To prepare frosting, mix melted butter, powdered sugar and flavoring; add hot water 1 Tablespoon at a time until glaze reaches desired spreading consistency. You don’t want this too thin because it will run right off the cake or too thick because it won’t drip down the side of the cake.


21) Pour frosting over cake; sprinkle with purple, green and gold colored sprinkles or colored sugar.


—————————————-


Sharon again here. WOW! Was that great or what? Thanks Sis for showing me up on my own blog. Dang overachiever.  (Just kidding.) But seriously, I have been trying to convince Barb for months now to start her own food blog. She is a good cook, and photography has been a hobby of hers for a long time.

UPDATE : GIVE-AWAY WINNER IS VickiN!

THANKS ALL FOR ENTERING!


Good luck and Happy Mardi Gras Everyone!
Sharon


PS We’ve got a full video tutorial on making the King Cake in our online school:
http://www.sugaredproductions.com/


Visit our online school


Agbay Leveler Giveaway!

June 29, 2014 by Sharon Zambito 1 Comment

  DON’T MISS OUT! GIVEAWAY ENDS FRIDAY! 


Collages20


We are having a giveaway on our Facebook page!
 
Agbay Single Blade Leveler (full size)
 
Retail value $230!
 
Enter Giveaway Here
 
*Earn up to 16 entries!
 
————————————————————–
 
Don’t have a Facebook account? You can enter the giveaway
by entering your e-mail address in the sign-up box on our
website home page. (One entry only.)
 
Alternative Entry Here
 
—————————————————————
 
*Note: Agbay is available for shipping to USA and Canada only. If an international entry is drawn, a $50 gift certificate to the SugarEd Online store will be awarded and another entry drawn for the Agbay.


GOOD LUCK!
 

————————————————————————————————————


1452450_10151914164635999_1498578573_n


Join SugarEd Productions Online School

Use Coupon Code OFF50

50% off one month membership


Agbay Leveler Giveaway!

June 25, 2014 by Sharon Zambito 1 Comment

Collages20


We are having a giveaway on our Facebook page!
 
Agbay Single Blade Leveler (full size)
 
Retail value $230!
 
Enter Giveaway Here
 
*Earn up to 16 entries!
 
————————————————————–
 
Don’t have a Facebook account? You can enter the giveaway
by entering your e-mail address in the sign-up box on our
website home page. (One entry only.)
 
Alternative Entry Here
 
—————————————————————
 
*Note: Agbay is available for shipping to USA and Canada only. If an international entry is drawn, a $50 gift certificate to the SugarEd Online store will be awarded and another entry drawn for the Agbay.


GOOD LUCK!


Wafer Ranunculus with Kara’s Couture Cakes

November 19, 2013 by Sharon Zambito 188 Comments

Hello Sugar Friends!

I am so excited  about this blog post. As you know, ranunculus are all the rage right now in the sugar world. And making them in sugarpaste can be quite time consuming and cumbersome. That’s why I am so thrilled  that we have a guest blog post today by the amazingly talented Kara Andretta of Kara’s Couture Cakes. She is going to share with us her wonderful technique for making these beautiful flowers from wafer paper! Brilliant I tell you!

And to make it even sweeter, stay tuned to the end of this post for information on a great give-away of Kara’s wafer paper Ranunculus kit!!


 Isn’t this cake just stunning? All of Kara’s cakes are.


And now I turn it over to Kara to share her wonderful technique for the wafer paper ranunculus:


I love the ranunculus. It’s like the mille-feuille of the botanical world, lush with impossibly delicate, silky petals. No matter how many different ways I’ve tried, I have never been content with the finished look of sugar paste for this beauty. Confectioner’s wafer lends the lightness, delicacy, and translucency that I find so essential to successfully imitate nature.

–Kara


Materials

1.5-inch foam ball

2 sheets wafer paper

Bright green petal dust

Coated foam or gumpaste flower center affixed to an 18- or 20-gauge floral wire

Cutting mat

Craft circle punches (1 inch and 1.5 inch)

Craft knife

Deep green petal dust

Large angled soft brush

Ruler or straight edge

Small bowl of water

Small and narrow soft brush

Small scissors

Soft round-tipped brush

Violet (or your choice color) petal dust


Instructions


ranunculus2


1. Using the smaller circle punch, cut one circle as close to the corner of one sheet of wafer paper as possible.


2. Using the cut hole as a guide, line up your ruler or straight edge and cut a strip just larger than the hole. Use that strip as a guide to cut the remainder of the wafer sheet into equal strips.


3. Group 2-3 strips of wafer paper together. Turn your circle punch upside down, and punch holes down the length of the grouped strips of wafer paper. Having the punch upside down allows you to see that you have the paper properly centered in the cutting area and it reduces waste.


4. Repeat the process with the large craft circle punch and the second sheet of confectioner’s wafer paper.


5. The wafer circle now needs to be cut:


6. Cutting 2-3 circles at a time, cut from the edge straight towards the center, approximately ? of the diameter inward (? inch for the 1 inch round).


7. Dip your brush lightly into the water, only to dampen it slightly. Blot any excess water on the side or on a paper towel. Brush the water on the wafer just to the left of the cut. You shouldn’t see any visible moisture on the wafer; it doesn’t take much to create a sticky surface. Too much water will simply melt the wafer.


8. Fold the right side of the cut over top of the dampened left side and press gently together. You do not need to hold it or apply much pressure, it sticks almost instantly. This step should produce a slight cup to the wafer petal.


9. Repeat step 8 with all of the circles.


10. Paint a circle of water around the top third of the flower center. (You can use a bit more water in the following steps than you used in creating the cupped petals.)


11. Begin applying the small wafer petals in a circle, slightly overlapping each other, all meeting at the center top of the ball.


12. Use 4-5 petals to form your first and innermost layer.


13. Apply your second layer of petals about ? inch lower than the first set of petals. Overlap these as well. Use approximately 5 petals to complete this layer. (Each following layer should be applied slightly farther down than the previous layer, just as you did here.)


14. Before you add subsequent layers, you’ll notice that there are some pointed areas from the cupping of the petals and where they may overlap. Tamp down the points with the side of your slightly wet brush. Don’t get too close to the tops of the petals, but also don’t be afraid of using water at this point. The center does much to absorb excess moisture as does the layered petals.


15. The petals don’t have to be flush to the center. A little irregularity will create more volume and visual interest.


16. Once you are content with the look and quantity of the first smaller petal layers, you can begin using the larger petals.


ranunculus14

17. These petals will overhang the ball a bit at first. Paint water at the edges of the petal.


ranunculus15

18. Use your fingers to arrange the look of the petal and to pull the petals down and closer for the first few layers of the larger sized petals. This will help the flower to still look a bit tight rather than opening up too abruptly. Allow the last few layers of large petals to open more.


ranunculus16

19. Once you’ve finished applying all of your petals, use a wet brush to secure the bottom visible layers of petals to the center and create a flush surface.


ranunculus17

20. You can leave your petals as applied like in this picture. They have crisp, clean edges and look very refined. Or…


ranunculus 18

21. …You can use a lightly wet brush and run it around the edges of the outer side of the edges of the petals, as in this picture. The wafer will curl to the side you applied the water and create a more worn, shabby chic look. I find this look to be more natural, but each look has their place in design.


Yes, you’ve just finished these flowers. And if you’re accustomed to working with sugarpaste you may move on to a different task, have a cup of coffee, or call it a day. We’re used to allowing the sugar to dry for at least 24 hours (in general) before we apply the finishing touches. No need with these wafer flowers! You can begin dusting right away! Just be sure your edges have dried if you applied water to curl them.


ranunculus19

22. To dust them and add life, I used three shades of green petal dust: Holly, Moss Green, and Apple Green for the center.


ranunculus20

23. First start with the Apple Green, applying your largest diameter coating of color with the small, soft, narrow brush.


ranunculus21

24. Add the Moss Green and Holly to the center to gradually deepen the shading towards the center.


ranunculus22

25. Using your large, soft, angled brush, load a very light amount of violet (or your chosen accent color) onto it, tapping the excess off.

ranunculus23

26. Hold the brush at an angle to the petals and make short downward motions to gently apply the color to just the edges of the petals. I used a bit more color on the outermost petals.


27. The accent color is very, very gentle (and very difficult to reproduce on camera!) but it highlights the edges and gives the flower life and dimension.


ranunculus24

 This flower took 20 minutes, from punching the wafer paper to finishing dusting!


ranunculus25


Ranunculus-Cake-Close-Angle-450x600


                                                                                                                                            About the Author 

251810_10200343574050004_56449475_nI am a graduate of The Culinary Institute of America and have studied under some of the best pastry chefs and cake decorators in the world. I specialize in fondant covered cakes, gourmet cupcakes and cookies, custom designed to perfectly fit each client’s unique occasion. The only thing better than how my cakes look, is how they taste! Ask me about cake!

Kara’s Couture Cakes
making the world sweeter, one cake at a time.

Kara’s Facebook 

————————————————————————————————–

AND NOW FOR THE GIVE-AWAY!

Kara  has been so kind as to donate three of her wafer paper ranunculus kits (available in her Facebook shop here) as prizes!

rerere

TO ENTER:

One entry into the raffle will be given for each of the following actions: (the more you do, the more chances you have to win)

1) Leave a comment under this post

2) Subscribe to our blog via email using the box on the right hand side of this page

3) Sign up for the SugarEd Newsletter via the box on our homepage here: www.sugaredproductions.com

4) Enter via Facebook for more even chances to win using the tab on our Facebook page here: SugarEd Facebook Page

Winners:

Three winners will be chosen by random draw from all entries. Deadline November 26, 2013 midnight central time.

(Open to USA and Canada only please.)

GOOD LUCK!

Sharon

www.sugaredproductions.com

SugarEd Online Sugar Art School Open!

August 26, 2013 by Sharon Zambito 8 Comments

Hello my sugar friends!  

The time has finally come!  It has been a long and crazy journey, but we made it! The SugarEd Productions Online Sugar Art School is now open!

kimcollage1


I am SO very excited about the new school and all the features we have to offer. It is your one stop place to learn all things cake.

Here is a list of just some of things waiting for you:

  • library of outstanding video tutorials featuring myself and other celebrity instructors
  • printable photo tutorial library with tons of amazing ideas and how-tos created by some of the brightest talent in the industry.
  • printable recipe bank chock full of deliciousness
  • access to business, photography and decorating articles you won’t find anywhere else
  • member tutorials and recipes – share your favorites with the rest of the community
  • member photo gallery where you can marvel at your friends’ creations and post your own
  • advice and chat forums with positive conversation and useful information; interact with me and other members anytime you want
  • enjoy games, contests and other interactive activities within the SugarEd community
  • valuable resources include lists of classes, events, organizations, and offsite tutorials
  • special SugarEd store discounts for members only
  • new content is added (at least) weekly


We have wonderful guest instructors lined up for you as well. Kathleen Lange will teach us her Lambeth and embellishment piping techniques:

kathy


Wayne Steinkopf of Swank Cake Design has filmed four videos for us. This beautiful celebration cake is just one example of what he has in store for us:

15644_10151726633830999_520391859_n


The amazing Bronwen Weber and Francois Long  have  fun filled videos on sculpted cakes and structure coming soon:

bw


Here are some more examples of tutorials we have waiting for you, as well as some coming soon:

Collages4


Gorgeous piping and fantasy flowers:

Desktop16 (2)


Fondant figures of many types will be added to our growing library:

School


Do you want to learn how to ganache  and fondant cover a tall double barrel cake? And learn the popular luster and leaf techniques? We have the videos that will show you how! (The ganache and fondant videos are available now and the luster video will be added Monday)

doublebarrel


Learn how to get your cakes perfectly smooth, with level tops, sharp edges and no bulges!

Sierra Exif JPEG


You can have 24/7 access to the entire online school from any computer or mobile device. We add new content every week (or more), so there is always something new to see, learn and explore.


We have tutorials on:

  • cake projects
  • chocolate work
  • flowers
  • figures
  • desserts
  • candy
  • cookies
  • cupcakes
  • specialty techniques
  • business
  • food safety
  • marketing
  • and an exclusive series on cake photography you won’t find anywhere else!


AND we have a special bonus for our new members. Everyone who joins will get an exclusive bonus PDF tutorial for this adorable elephant…….

ele


…….AND this cute badge for your profile page:

SAMPLE


It really is a wonderful  place to learn and share. Our current members are loving it. (And I thank those of you who have already joined.) I look forward to chatting with you in the forums; we have a wonderful community growing; Please come join us! 


www.SugarEdProductions.com

Happy Caking,

Sharon

Baker’s Bingo!

July 26, 2012 by Sharon Zambito Leave a Comment


BINGO!


Are you ready to play some LIVE cyber bingo for great prizes such as DVDs  and cake toys?


We will play Monday July 30th at 8 PM central time.

Email SugarEdBingo@gmail.com to get your bingo card.

SUNDAY is the deadline to get cards.

 Print out 4 cards to play.


We will play bingo at this link: http://justin.tv/szcakes 

You will need to register for a free account there to participate.


So get your cards and meet us there Monday at 8PM! It is going to be a ton of fun!


Sharon

SugarEd Productions


Give-Away Winners!

October 31, 2011 by Sharon Zambito Leave a Comment


Hello everybody!
 
Thanks to you all who have purchased your Flowers DVDs  on pre-order!
 
The duplicator is supposed to have them to me by November 5th, and we will ship them out as soon as we receive them.  All of the orders are boxed up and just waiting for the DVDs to be added and mailed. We thank you so very much for your patience; we know you are anxious to get them. And we are eager to get them to you!


By random draw, the three tote bag winners are:
 
Deb Werner
 
Dawn Beckley
 
Grace Hanson
 
Your tote bags will added to your pre-order shipments. Congratulations!!


And the winner by random draw from the sunflower tutorial post is:  
 
Rita Greer 
Rita please email us to claim your prize.


 Stay tuned as we will have another contest soon.
 
Thank you all for business!!
 
I hope you all enjoy  your Halloween festivities tonight. Then it is time for us to go right into Thanksgiving preparations! I have a few great blog posts coming up in the Turkey Day theme, so stay tuned!
 
 
Happy caking,
Sharon
www.sugaredproductions.com


Two New Flower DVDs!

October 22, 2011 by Sharon Zambito 1 Comment


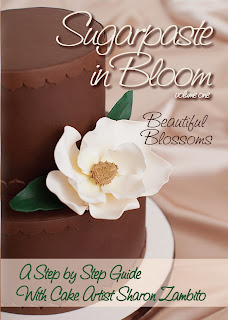
Sugarpaste in Bloom
Volumes 1 and 2


We have two brand new DVDS on the horizon for you!
 
Sugarpaste in Bloom  Volume 1  
Beautiful Blossoms
 
 
Learn all the basic techniques needed to make gorgeous sugar flowers, while applying those techniques to the 6 flowers taught in this DVD. Once you learn these techniques, you can apply them to making any kind of flower you desire.
 

Magnolia


Diva Flower


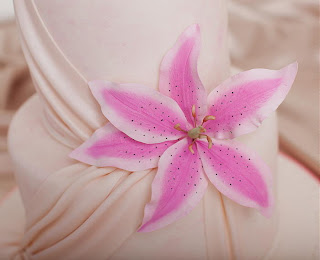
Small Pink Lily


Large Pink Lily


Large Stargazer


Small Stargazer


Tiger Lily


Small Yellow Lily


Casablanca Lily


Daisy and Sunflower


Sunflower


Daisy


Daisies


See a video preview here:


Sugarpaste in Bloom Volume 2 
Fantasy Flowers
 
 
Learn 11 fantasy flowers that will add a 
custom touch to all of your cakes.


Fantasy Rose


Bermuda Bling


Lacy Flower


Ribbon Rose Topper


Ribbon Roses and Pinch Flowers


7 Petal Pinch Flower


Carnation Pinch Flower


4 Petal Pinch Flower


Bow Tie Pinch Flower


3 Petal Pinch Flower


5 Point Star Pinch Flower


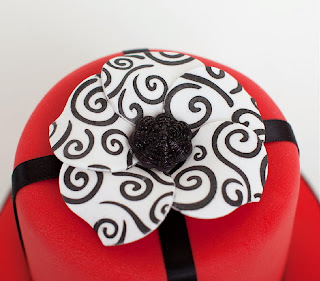
  Stenciled Flower


See a video clip here:


SPECIAL PURCHASE: 
 
Purchase both DVDs and get a $13 savings plus a
FREE BLOSSOM CUTTER used in the DVD.
 
DETAILS HERE


 And a Give-away!


All orders placed by October 28, 2011 will be entered into a drawing for three of these great logo tote bags:

BOTH OFFERS EXPIRE  10/28/11
 
 
We thank you for your business!
 
www.sugaredproductions.com


Long Time No Talk

September 29, 2011 by Sharon Zambito 2 Comments

Hello Sugar Friends!
 
 
I have missed you all so much! I apologize for neglecting  the blog these last few months. We have had so much stuff going on behind the scenes at SugarEd, (and some of them unexpected  and rather complicated), that it has taken all my time and attention.  We have filmed (and are presently editing) our two new gumpaste flower DVDs. We have rebuilt the entire website and shopping cart for better performance on both ends. We are now able to process credit card orders directly on the website. You can still use Paypal to checkout if you choose to do so. We are also planning a  big website expansion that will include a lot more goodies for you. We are brainstorming and developing that as we speak!
 
I thank you for your patience as we work on all of these projects, so that we can continue to provide you with the best service and products we can produce.
 
I will have another blog post for you in a few days. In the mean time, please enjoy these fabulous cakes submitted by our readers:


 This stunning topsy turvy was made by  Karen in Australia for her son’s 21st birthday. Perfection!


This sassy fish cake was made by Mari in Florida.  Love it!


Katherine C made this buttercream beauty. Can you believe she has only been decorating for one year?  Unbelievable!


Lucy made this wonderful version of the Sweet Luxuries cake. Bravo!


Esther S shows her mastery of image transfers with her cute Cuban drummer. Maybe that is Ricky Ricardo? ( Love Ricky!)


Jaycee made this beauty as a 10th anniversary gift from a husband to his wife. Now that is flawless fondant!


———————————————————


Gorgeous work guys!  Feel free to submit your sugar art, recipes, tips and questions to this email address. You might get it published on the blog or newsletter.
 
 
Thanks again everybody! I will see you in a  few days with a post about our last buttercream basics class. I will show you how I repaired a HUGE blowout!
 
Happy caking!
Sharon
 
www.sugaredproductions.com


  • 1
  • 2
  • 3
  • 4
  • Next Page »

Sharon Zambito

Sharon Zambito

An RN turned SAHM turned cake maniac. Owner of SugarEd Productions Online School. Join me for some caking, baking, and all around sweet fun :)

Follow me..

  • Facebook
  • Instagram
  • Pinterest
  • YouTube

Pinterest

  • Autumn House Two Trees Machine Embroidery Design – Blasto Stitch
    Autumn House Two Trees Machine Embroidery Design – Blasto Stitch
  • Embroider  Sew :: Jelly Roll Purses - Embroidery Garden In the Hoop Machine Embroidery Designs
    Embroider Sew :: Jelly Roll Purses - Embroidery Garden In the Hoop Machine Embroidery Designs
  • (1) How to QUICKLY & SAFELY remove acrylic, gel, and dip powder polish | BAGGY METHOD - SO EASY! - YouTube
    (1) How to QUICKLY & SAFELY remove acrylic, gel, and dip powder polish | BAGGY METHOD - SO EASY! - YouTube
  • (1) Bouffant Surgical Cap - YouTube
    (1) Bouffant Surgical Cap - YouTube
Follow Me on Pinterest

Follow Me on Instagram

Instagram requires authorization to view a user profile. Use autorized account in widget settings

Recent Posts

  • Egg Safety Basics
  • Stable Mabel Support System Sale
  • Guest Post : 4 Vegan Cake Recipes No One Should Miss Out On!

Popular Posts

  • Ways To Make Your Cake Fluffy And Moist
  • How To Stencil on Cookies with Royal Icing
  • Doctored Cake Mix Recipes
  • Transferring an Image Without a Projector
  • All About Buttercream!
  • How to Fix Broken Ganache
  • Edible vs Non Toxic Gold Dusts

Categories

Search

Archives

Copyright © 2025 · Sharon Zambito and SugarEd Productions,LLC

Copyright © 2025 · Evangeline Theme on Genesis Framework · WordPress · Log in