Hi Sugar Babies!
Halloween is next week! Here comes another round of treats to get you ready!

Witch Hat Peanut Butter Cookies


Poured Fondant Pumpkin Cookies


Happy Halloween Caking!
Sharon
Hi Sugar Babies!
Halloween is next week! Here comes another round of treats to get you ready!
Witch Hat Peanut Butter Cookies
Poured Fondant Pumpkin Cookies
Happy Halloween Caking!
Sharon
Hi there! This week we have an awesome guest post courtesy of Shari’s Berries! We focus on cake here alot, but there are other ways to get that wow facor using treats! Shari’s Berries tells us how:

Do you remember the birthday parties of your childhood? Nothing brought quite as much joy as the colorful pinatas filled with sweets and cakes piled high with icing. Now that you’re an adult, your parties don’t have to be devoid of sugary delight. We’ve compiled all of the candy buffet ideas you need to create a stunning (or stunningly cute) setup at your next get-together.

Candy buffets are an excellent way to give your guests their sugar fix without the stress of a fancy dessert. We especially love them for their versatility and the way that you can customize them for any event. Keep reading for some helpful hints and tricks to make your buffet a success.

What Colors Should my Candy Buffet be?
One of the first decisions that you should make about your candy buffet is its color scheme. If you’re unsure of what to choose, a monochromatic theme is a great idea. It looks put-together and sophisticated, but can also be fun and playful when using a brighter hue. We chose a monochromatic pink palette for our buffet, with hints of gold and white. Some other color choices include:
Black and white
A black-and-white theme works well for formal or adult soirees. Keep in mind that this option may limit the types of candy you’re able to use. Your best bet is a diversity of chocolates in milk, dark and white.
Rainbow
If you’re throwing a kid’s party, a rainbow color scheme is a fun choice. The benefit of this theme is that you can use any candy you want, while the downside is that your buffet risks looking visually cluttered or overwhelming.
Pastels
For a get-together happening in spring or early summer, pastels are a timely option. Plenty of light-hued candies should be available in the months surrounding Easter and they look darling displayed together.
Saturated colors
For a buffet that stands out in the best way, choose a couple dark or saturated colors to feature. You can look for candy-coated chocolates and jumbo lollipops in color-drenched hues.
Tips:

What Types of Candy Should I Purchase?
The coolest candy buffets have sweets in a variety of shapes, sizes and textures. Choose your goodies accordingly, while staying mindful of guest preferences. You should plan on purchasing about eight ounces of candy per guest. For things like lollipops, one per guest should be plenty. For the most cost-effective solution, try buying your candy in bulk.
For reference, these are the types of candy that we used in our buffet:
Tips:

How do I Set up my Candy Buffet?
One of the best parts of a candy buffet is that there are no strict guidelines for how it must look. Moreover, it looks great with jars, bowls and trays of different sizes. This means that you can use displayware and materials that you have on hand, rather than spending a fortune on a matching set. Here are some supplies that you’ll want to have ready:
A sturdy table
The weight of bulk candy and displayware adds up quickly. This is not a job for a small card table.
Tablecloth
Most buffets benefit from a tablecloth. Find one in a color that matches your candy, or keep it neutral with white. We suggest a tablecloth that is larger than your table. The excess material can be draped over pedestals to keep the look cohesive.
If you’re using an accent color, choose details for the table in a matching tone. We included a gold banner.
Backdrop
Because your candy display will inevitably feature tall containers, guests’ eyes will also be drawn to the walls behind them. A simple backdrop in coordinating colors is enough to keep things pretty. We used circular paper fans on our wall.
You can also use streamers, garland, paper lanterns, balloons, or even your favorite paintings and posters for a background. If you feel like getting crafty, colorful paper plates twisted in cellophane look like giant hard candies.

Pedestals
You may not have enough tall containers on hand for your buffet. Even if you do, a pedestal is still a useful tool. It can be used to elevate a bowl, vase or jar to add another dimension to the table. While you can purchase a pedestal specifically for this purpose, an inverted box, brick, book or dishware works just as well. Cover it with your tablecloth so it’s not visually distracting.
Containers
Because a candy buffet shouldn’t be composed of all the same types of containers, you’re encouraged to use what’s on hand. Here are some common container ideas. You can use mason jars, large lidded jars, vases, bowls, trays and cake stands.
Tips:
How do I Decorate my Candy Buffet?
For a candy buffet that’s unique to your party, don’t shy away from extras. Confetti, ribbons, garlands or even cute plush animals make an excellent addition to the table. However, less is more, so a couple finishing touches are all you need.
If you’ve created a candy buffet to celebrate someone special, try featuring their name in foam letters with colorful candies glued on top. You can tuck party blowers into tubs of candy for a birthday party, or scatter ornaments on the table for a holiday celebration. The choice is up to you!
Now that you’ve got some fun candy buffet table ideas, we hope you feel inspired! If you follow these tips and have fun with it, your display will inevitably be a success. For a perfect centerpiece to your buffet, try one of our candy and chocolate gifts. Wishing you sweet success with your setup!
Hello all! Valentines Days is coming up, so here are some of the cutest treats from around the web to get you inspired.


Hope these give you some inspiration for the big heart day!
Happy Baking!
Sharon
First off, thank you to Sharon for the opportunity to connect with her readers. I’m Sarah, and I work at CandyStore.com. We have a lot of experience helping people plan candy buffets for their weddings and events. I am excited to share this great tip to get you started. Here goes!
If you’re new to building a candy buffet, you may be intimidated by the prospect of building one yourself. Don’t be. The main reason people give up on having a candy buffet at their event is not money, it’s fear*. The solution to removing that fear is here. With one tip, we can soothe this savage beast.
“Fear?” you say. I ain’t scurred. Right, I’m not talking about grizzly bear fear or public speaking-type fear.

I’m talking more about the fear that it’ll take too much time to plan and fear that even after all that time it won’t turn out well. It’s that overwhelming, my-brain-just-turned-off feeling where you just think. I can’t even. But you CAN! Here’s the tip that will save you:
This is true in many avenues of life, even scientists agree. With candy buffets, it’s a little more nuanced. It boils down to choosing the appropriate size buffet for your event and budget. You don’t need to have a magazine cover-style Candy Buffet of the Year spread.

If building a diy candy dessert bar gives you anxiety attacks – are you ready? – use a small table.
You can see your shoulders dropping already. Your breathing is getting more relaxed. That’s it, thaaaaat’s it.

And yeah, a small table – that’s it! The beauty of a small table is that you can break it down in your mind more easily. It’s more doable in your head. It’s also less expensive, easier to plan and has just as much impact as a large table, if not more. Now that you’re nice and relaxed, here’s the rest of the plan.
The biggest decisions you have to make for a candy buffet have already been made.
You know the answer already. Since you’ll likely want to match the colors of your event, that takes care of that step. Bulk candy can be bought in most general colors now-a-days and even some more specific colors like maroon and aqua. Gold candy and dust are popular and fit within many events color schemes. Just be careful with the edible stuff.
Ok, this is already gaining momentum! You’re on your way.
You need 3 types. Big, medium and small. There we go with the bear metaphor again, goldilocks. A nice looking candy buffet uses zones to create depth and (sometimes just the illusion of) abundance. There’s more detail in my DIY candy buffet guide here, but basically, that feeling of abundance is harder to create over a larger space. Keep the table small.

The Candy Buffet Zones
Put the small containers – bowls, platters – in front and put your individually wrapped candy bars here. Other appropriate things to put here are baked goods and desserts that don’t ‘scoop’ and wrapped items that might get handled a bit. Larger, bulkier items tend to work best here. Cookies, cupcakes, etc.
Medium containers in the middle will contain some unwrapped candy that may need somewhat gentle handling. Gummy sharks, old-fashioned stick candy, chocolate covered espresso beans. Use tongs or scoops where appropriate.
In the back you put your tallest containers. Fill them up with wrapped or unwrapped bulk candy. Depending on how tall they are scooping may be awkward if people need to reach over the rest of the display. Consider wrapped candy that’s easily grab-able by hand if this is a concern. Foil-wrapped chocolate balls are great and come in a ton of cool colors. Alternatively, use single-color gum balls or another easily scoop-able candy item.
If you’re getting the hang of this and your brain is flowing with ideas, consider this. An optional centerpiece. If you wanna go the extra step, use a loaded up cupcake stand as a center piece and curve your zones around it. Cupcake stand, flower arrangement, or even the event’s main cake or dessert!

You may need a slightly bigger table for this, but by now maybe you feel like you can handle that. If not, stay small. A high and tight candy buffet looks much better than a loose-goosey arrangement on a bigger table.
This is the part you’re already good at. Once you have the layout all worked out, add some personal touches to the decor. Some ribbon around the containers, maybe some tasteful confetti will look nice, fresh flowers. A framed picture of the honored guest(s).

Tie it into your existing event decor. The dessert bar doesn’t need it’s own theme, it is merely an extension of the theme of the party it lives in.

I’ll leave you with this one last thing. There are no rules. Have fun with your arrangement. If you get overwhelmed, dial it down. If you’re feeling empowered and want some more knowledge, we put together this amazing infographic (below) from my Ultimate Guide to DIY Candy Buffets. Pin it, print it out, use it to your advantage.
I’ll be answering any questions in the comments section, so let them fly. Also love to hear about how it went! So please let me know if you used these tips and how your candy display table turned out. Love to Sharon and SugarEd Productions!

(* You may be saying, fear isn’t the only reason people give up. They might also think it’s going to cost too much because they’ll have to hire someone to build the darn thing. This is a subset of the fear you have of doing it yourself. There’s no reason buying some bulk candy and some containers should be expensive. The bang for your buck is there if you can get past your fear!)
Hi sweet friends!
St. Patrick’s Day is this week! To get you ready for this festive holiday, here are some treats to inspire you!


Decorated Biscoff Cut-Out Cookies


Fiona’s Cottage, St. Patrick’s Day Gingerbread House

St. Patrick’s Day Rice Krispie Treats
I hope these treat ideas make you feel empowered with the Luck of the Irish!
Happy Caking!
Sharon

Hey Y’all! It’s almost here – TURKEY time! If you’re like me and running short on time, you might like some help coming up with something creative 🙂 I’ve rounded up some super cute and easy ideas to dress up your Thanksgiving table. I’ll be using a few of these cute ideas myself:

Peekaboo Pumpkin Pound Cake by SheKnows
 Pumpkin Pie Cookies by Munchkin Munchies
 Turkey and Stuffing Cupcakes by Saucy Sprinkles
 Pumpkin Pie Cupcakes by Hoosier Homemade
 Pumpkin Cheesecake Pie by Just A Pinch
 Festive Fall Cheesecake Leaves by Hungry Happenings

Perfect Pumpkin Roll by SugarEd Productions
 Acorn Cake by The Celebration Shoppe
 Turkey Cake Balls by SugarEd Productions
 Have Mercy Turkey Cake Topper by Crazy Cool Cakes by Linda
I hope some of these ideas help you come up with your own pretty table. I’d love to hear what you guys are making. I’m always in charge of all the desserts for my extended family gathering, cuz ….well…. I don’t cook very well. They let me do the only thing I do well, haha!
Happy Thanksgiving from all of us at SugarEd Productions!
XX
Sharon

Hey guys! Today we have a guest post from the ever creative Kim Heimbuck of The Partiologist blog. She has the best ideas (be sure to check out her blog for serious cuteness), and this one is so clever! A unique spin on the traditional candy apple:

Beware of Pirates? Not this kind.
You probably didn’t know that there was such a thing as chocolate covered pears. Well, if I can help it, there will be chocolate covered everything, including pears.
Chocolate Covered Pirate Pear:

Start with as many pears as you plan to make.
Use white candy melts for dipping your pear.

Use the caramel apple sticks.

Insert sticks into the pears and dip into both white and green melted candy melts.

For the pirate, use a round cookie cutter to cut the headpiece.

Also cut an oval piece of fondant for the scarf.

Pinch the oval piece together for the tie.

Fold it in half.

For the eye patch, roll and cut black fondant with a No. 1 strip cutter.

Use a small oval cutter and cut another piece of fondant to make the patch and trim the top.

Layer the patch on top of the strip.

Using number tappits, cut zero’s and pull out the inside for the teeth.

First add the eye patch and then wrap the red fondant around the top of the pear and pinch together the side, add the additional red fondant piece. Also add the other eye, nose and teeth.

Cut out several white dots and place on the scarf.

Using the large number tappits, cut out a zero and use it for the earring.

Form it into a circle and let dry.

Add the earring to the pear, cover the wooden stick with a decorative straw and you’ve got yourself a pirate!
Chocolate Covered Frankenstein Pear:
Dip your pear in green candy melts and set aside.

Roll and cut a large piece of black fondant into a circle. Use a small oval cutter and cut pieces out around the edge of the fondant. Add the black fondant piece to the top of the pear for Frank’s hair.

Add candy eyes to the pear by sticking them on with a bit of frosting or melted candy melts.
Cut a strip for the mouth. Add a piece of the black fondant strip to the pear for the mouth. With black frosting, pipe frosting on the pear for stitches and eyebrows. Add a mini orange M&M for the nose and mini marshmallows to the sides.

Now you can do the monster mash!
HAPPY HALLOWEEN!
——————————————————————
 Kim has a love for unusual and over the top parties. In 2011 she started her blog, The Partiologist, where she shares her unique and creative ideas. From cakes and cookies, to favors and tablescapes, her inspiring ideas flow freely. Forever fun loving, her mantra is “Life is short; party accordingly!” You can follow Kim on her blog or Facebook page. Kim has a love for unusual and over the top parties. In 2011 she started her blog, The Partiologist, where she shares her unique and creative ideas. From cakes and cookies, to favors and tablescapes, her inspiring ideas flow freely. Forever fun loving, her mantra is “Life is short; party accordingly!” You can follow Kim on her blog or Facebook page. |

One of my very favorite holidays is upon us. Halloween is a confectioner’s dream, as it provides an opportunity to make some of the cutest tasty treats evah. Let me share with you some I made this week. These were a lot of fun, and not very difficult nor time consuming. They get extra points for that!

.jpg)
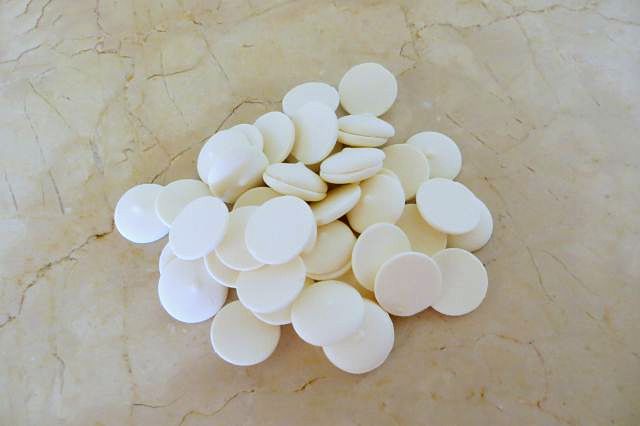
Initial supplies used to make our cozy candy couple include yellow candy melts, green oil based candy color, marshmallows and sucker sticks. I highly recommend Merkens brand melts for optimum dipping performance. In this case I used the campfire roasting marshmallows. Have you seen those things? They are hugantic! They are as big as…..as ……as a giant marshmallow! I also suggest using the thicker sucker sticks, as these bad boys are heavy once they are done.
.jpg)
.jpg)
Other supplies used will be these candies and pre-made googly eyes, that you can get at most cake decorating places.
.jpg)
.jpg)
Let’s do Franque first:
.jpg)
Cut out a circle of black fondant and cut out notches along the outer edge. Do not cut them evenly or symmetrically. Franque does not have the most couture coif I have ever seen. Just sayin’.
.jpg)
Lay the toupee over his head and just press down all around the sides. (Hint: use shortening as your glue. Trust me. You will thank me for this later.) Glue on his googly eyes with melted chocolate. Cut a white Good & Plenty in half and glue in place for his bolts. Give the rest of the box to hubby because he loves those nasty candies. Oh wait, that is my hubby. Ignore that. Next use a paintbrush to drop a dollop of the same green chocolate on his handsome face to make a nose.
.jpg)
Next we need to bring out the big guns. OK just one small gun. Anyway, get your clay gun out, and using the smallest size circle disc, extrude a string of black fondant. Use that to make eyebrows and mouth. Again, using shortening on his face as glue will save you many bad words. And if you just cannot help yourself (like me), use silver luster dust mixed with vodka to paint his bolts. An edible marker (not shown) can be used to make his scar.
MWAHAHAHA!

.jpg)
As with all ladies, we need to spend some time on the hair. Use your clay gun with the largest muti hole disc.
.jpg)
Extrude a length of purple fondant and apply to the side of her head.
.jpg)
.jpg)
Cut a few short pieces to make her bangs. The bob is very in this season in the witch world.
.jpg)
Now to make her face. Clay gun string again for the brows and mouth. Half of the green Mike and Ike candy for the nose. (Keep that box cuz we like those.) Another pair of google eyes.
.jpg)
.jpg)
To make the pointy part of her hat, start with a ball of black fondant.
.jpg)
Roll it into a cone shape initially, and then continue to elongate and shape it into a witch hat shape.
.jpg)
A circle of black fondant laid on her head, and then the cone part of the hat is attached to the top of that. A couple of purple clay gun strings will create a perfect hat band.


Happy Halloween everybody! Send me pics if you make these and I will post them on Facebook. Please tell all your friends to like our Facebook page.
Sharon
Sugared Productions Online School
Hi friends!
It’s almost that spooky fun time of year! Halloween is such a great holiday for making fun and creative sweets and treats. The possibilities are endless. It’s not to early to start planning, so here’s some ideas and tutorials you help get you kick started:

Mummy Cake by The Partiologist

Mummy Pumpkin Cookies by OMG Chocolate Desserts

Oreo Bat Truffles by One Sweet Appetite

Halloween Bundt Cake by Love Bakes Good Cakes

Reese’s Frankenstein Cupcakes by Your Cup of Cake

Haunted Cupcakes by Today’s Parent

Cake Ball Brains by Hungry Happenings
 Vampire Cake Pops from Bakerella
 Ghost Cupcakes from Better Homes and Gardens

Purple Candy Apples by The Kitchen McCabe
Aren’t these just the cutest? I can’t wait to see what you guys make; link me to your photos in the comments!
Happy Halloweening!
Sharon
Sugared Productions Online School
Hi ya’ll!!
Have you had enough of summer? I know I have. It’s hot as heck down here in the deep south.
Let’s dream about the upcoming Fall season. Here’s a round up of Autumn themed treats and recipes to help get us ready!

Chocolate Caramel Cupcakes from Sweetopia

Indian Corn Cookies from Sweet SugarBelle

Pumpkin Cake Pops from The Pink Whisk

Autumn Basket Cake from SugarEd Productions

Kitty Cat Pumpkin Cake from The Cake Girls

Chocolate Painted Cake from The Cake Blog

Slice of Pie Cookies from Cookie Crazy

Pumpkin Patties from Mom On Timeout
I can almost smell the scent of pumpkin pie in the air. I hope these got you inspired for Fall baking.
Happy Caking!
Sharon


