Sugared Productions Blog

  • Blog Home
    • Home
  • Online Classes
  • Shop
  • Contact
  • About

Easy Halloween Cupcakes

October 25, 2011 by Sharon Zambito 19 Comments

Halloween is almost here!
Are you ready? No?
Well I am here to help!


This post is for all you procrastinators out there. And I say this with the utmost love and respect. For I am a champion, card carrying, flag waving procrastinator. I even joined a support group, but it hasn’t been much help:

I feel your pain. You had all these great delusions of grandeur of all the amazing treats you were going to make for Halloween. Maybe a haunted gingerbread house. Or a topsy turvy Tim Burton style. Or a batch of fabulously custom decorated cookies. You had it all planned in your head. You laid awake at night with excitement thinking of the joy you were going to experience while creating your incredible Halloween confections.


And here we are, just a few days before Halloween and…… nothing….. nada…… crickets. Where did the time go? What will we do? The kids are looking up at you with those sad longing eyes, asking what you will be making for their class or neighborhood party. Crikey! Why did we wait so long? Your heart starts to race; sweat forms on your brow; the room is going white. Pure unadulterated panic.

Raise your hand if you are with me so far. I have been in this situation more times than I count.

Well, have no fear. Queen Procrastinator is here to help you.

Oops wrong queen. I will fix that. Later.


So let me share with you these super duper easy Halloween cupcakes that you can whip out in no time, but still impress even the most discerning goblins and ghouls.

Ghosts and skeletons and graveyards, oh my!


Let’s start with the standing skeleton:


You will need white chocolate covered pretzels, sucker sticks, and marshmallows.


Draw a face on the flat side of a marshmallow that has been cut in half with an edible food marker. Three of the pretzels need to be glued to the sucker stick with some melted chocolate to make the rib cage.


And that was the tricky part. I spent a good 20 minutes trying to get those finicky pretzels to line up correctly on the sucker stick without flopping over or getting out of alignment. I found the above method worked the best. I used gravity to hold the back edges of the pretzels onto the stick while the chocolate hardened. Worked great and was very easy.


You use another pretzel cut as shown above to make the arms. You use the piece on the left, and eat the piece on the right. It’s a win/win for everybody.


After you pipe your icing swirl, just stick the sucker stuck in and lay the arm bones into the holes of the upper rib cage pretzel. Done. Fast. Easy. Cute. ( I must give credit to Woman’s Day for this idea. I saw it online and copied it.)


Now to the spooky graveyards:


I found these adorable sugar skulls at Wal Mart In the Wilton isle.


They appear to me to be gumpaste, and they were a very nice shape with good details.


To kick them up a notch, bring out a couple of brown petal dusts and give them a roughing up.


That took all of about 30 seconds, and they look awesome!


To make the tombstone, just cut a rectangular piece of fondant (with tylose added) and impress the RIP with your favorite alphabet cutters.   The cute cupcake wrappers were also made by Wilton.


Once the tombstones dry, hit them with a little luster dust. Pipe a swirl onto your cupcake, and slap a tombstone and skull on top. Done. How easy was that?


Crazy easy ghosts:


A Dum Dum lollipop.


Drape a circle of white fondant over it.


Add two eyes made from either fondant or your edible ink pen. Stick into cupcake icing. Woooooooo.


And you are done!


Group shot!


Cuteness overload.


Tread only if you dare!


He is a happy little fellow.


I don’t know what came over me. I lost my head.


And you saved the day! You have created this wonderful spread of amazing cupcakes, and it was fast and easy. You can take convenient pre-made products, do a little doctoring, and turn them into a custom made and impressive result:

HAPPY HALLOWEEN EVERYBODY!


Happy baking,
Sharon
Visit the SugarEd Online School

Two New Flower DVDs!

October 22, 2011 by Sharon Zambito 1 Comment


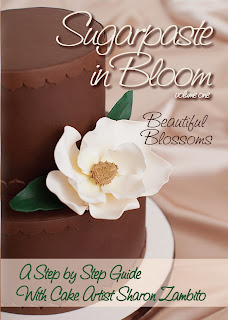
Sugarpaste in Bloom
Volumes 1 and 2


We have two brand new DVDS on the horizon for you!
 
Sugarpaste in Bloom  Volume 1  
Beautiful Blossoms
 
 
Learn all the basic techniques needed to make gorgeous sugar flowers, while applying those techniques to the 6 flowers taught in this DVD. Once you learn these techniques, you can apply them to making any kind of flower you desire.
 

Magnolia


Diva Flower


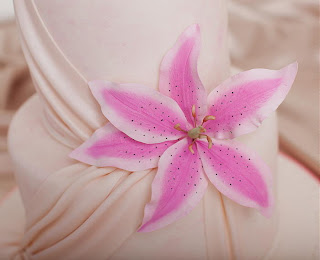
Small Pink Lily


Large Pink Lily


Large Stargazer


Small Stargazer


Tiger Lily


Small Yellow Lily


Casablanca Lily


Daisy and Sunflower


Sunflower


Daisy


Daisies


See a video preview here:


Sugarpaste in Bloom Volume 2 
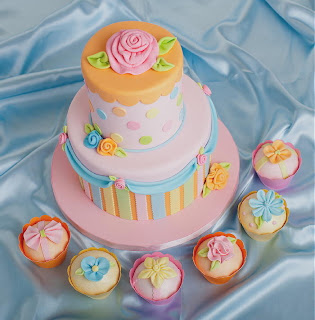
Fantasy Flowers
 
 
Learn 11 fantasy flowers that will add a 
custom touch to all of your cakes.


Fantasy Rose


Bermuda Bling


Lacy Flower


Ribbon Rose Topper


Ribbon Roses and Pinch Flowers


7 Petal Pinch Flower


Carnation Pinch Flower


4 Petal Pinch Flower


Bow Tie Pinch Flower


3 Petal Pinch Flower


5 Point Star Pinch Flower


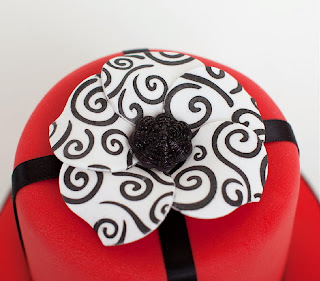
  Stenciled Flower


See a video clip here:


SPECIAL PURCHASE: 
 
Purchase both DVDs and get a $13 savings plus a
FREE BLOSSOM CUTTER used in the DVD.
 
DETAILS HERE


 And a Give-away!


All orders placed by October 28, 2011 will be entered into a drawing for three of these great logo tote bags:

BOTH OFFERS EXPIRE  10/28/11
 
 
We thank you for your business!
 
www.sugaredproductions.com


Basic Buttercream Class

October 7, 2011 by Sharon Zambito 10 Comments


Hello Sugar Friends!

A couple of months ago my BFF, right arm, crazy talented cake artist, and all around superwoman, Wendy, hosted a  basic buttercream class at her shop. It was a wild two days of flying powdered sugar, flinging icing, bench scrapering, smoothing, and all around good clean fun.  I would love to share some photos with you of this rip roaring event!


(You can click on the photos to view them larger)
 
 
Here are all the stations set up and the eager students ready to hang on my every word. OK, maybe not that last part, but they were ready to get started.


First we learned how to make smooth as silk and totally airless icing in both the 5 quart and 6 quart mixer.


Here is the mixer beating the 5 quart bowl full of icing into airless submission.


Take a look at THAT! Not. One. Air. Bubble.


Next Wendy showed us how to make a big ole batch in the 6 quart mixer.


Serious students scribing scintillating synopses.
 
(OK, I admit I had to use the thesaurus for that one.)


Each student then went back to their stations to make their own batch of icing. You have to do it to really get the feel for it.
 
 
Then it was time to fill the cakes.


Here is a student’s filled cake waiting to be iced. No cake dummies in our classes; always real cake!


Pipe the dam.


Fill ‘er up.


Ice that puppy.


Work that top edge.


Students’ turn!


Melissa’s finished cake. Wowee girl!


Day two. Oh yay, we get to ice square cakes now! And first thing in the morning, too. Whose bright idea was that? Oh yeah, mine.


Ice the sides.


Smooth with bench scraper.


Make those corners so sharp you have to register them as a lethal weapon.


Scrape, scrape, scrape.


Never saw a camera lens I do not like.


My finished demo cake.


Beautiful Donna working her magic.


Bridgette getting her smooth on.


Nikole admiring her kick butt corners.


Deneise is workin’ it baby!


Wendy, Melissa, and me.


Wendy, Mimi, and me. No, I am not pregnant despite how this photo looks.


Mitzi in the smoothing zone.


Candi. The most perfectionist student I have ever had. And her work shows it.


Lovely Dee.


Mattie is as sweet as her cakes.


This is Kim. She is my number one student. She has attended every single local class I have given since the beginning of the universe. She is a total sweetie and a fabulous cake artist as well.


Here is me pretending to show the talented Myrtis something important. No really, it was important. Whatever it was.


This is the only picture I have of Heather. Sorry Heather. Heather looks like Leah Remini. Gorgeous.


Leticia making her icing.


This is Lauri. She was at the buttercream class, but I don’t have a photo of her. So I used this one from the topsy turvy class instead 🙂


Oh yeah, we have fun. And lots of it!


Melissa’s square cake. Ouch!


As if all of that was not enough, we then did a little lagniappe. (Bonus stuff.) Some good old fashioned piping.


And stenciling on buttercream. Yes, red on white buttercream! Do not fear.
Wait for it…..


Wait for it…….


Ta dah!!


And a few lagniappe things on the round cake as well. Impression mats, some airbrushing and my custom top border.
 
 
So that was it! Two jam packed days full of buttercream fun. We were pooped but happy.


And then……
 
(Cue the Jaws music)
 
da  nutt 


da nutt


da nutt   da nutt     da nutt


AHHHHHHHHH!!!


OH NO!!!!!!!!!!!!!!!


IT’S SO SCARY!


 The dreaded blow out! Ruined my cake!!


Heck no, I was not going to let a blow out ruin my cake! And this was a great opportunity to show the students how to repair one. The reason why I got this blow out was because I  had iced my cake the day before right after I unwrapped it from plastic wrap. I did not take the time to let the condensation dry off the sides. Moisture is a main factor in the development of blow outs. So let’s fix it.


Take your exacto knife or palette knife and surgically remove the blown out icing.


As you start to cut it away, you will be able to see in there where the icing is no longer touching the sides of the cake. Keep carving all of that away until you get the entire area of non adhered icing off the cake. Then let that air dry out for 20-30 minutes in the A/C.


Lawsy that sucker was big!


Then I fill in the opening by piping buttercream in with a large round tip or the open coupler. (not shown).


            Then gently smooth that out with a hot palette knife or small spatula.


Let the patch crust well, and then come back with a small piece of smooth food safe paper, and smooth it with your spatula or palette knife over the paper, only over the patch. Do not put pressure on the rest of the impressed pattern. Then let it crust for a while longer before you finish the impression.


It is hard to see in this photo, but I have  a small portion of an impression mat in my hands. (I have an extra mat or two that I cut  up for this purpose.) Match up the pattern and then impress the patch. Just be careful, and you will have a seamless matching of the pattern.
 
 
Then I piped  the missing little crosses on the sides.
 

                                        Before.


After.


You can do it!!


And they all lived happily ever after in buttercream land. 

You can learn all of these buttercream smoothing techniques and more in the   Perfecting the Art of Buttercream DVD.

You can learn how to make airlessly smooth 
icing in the Back to Basics DVD.  

Happy caking!
Sharon


Long Time No Talk

September 29, 2011 by Sharon Zambito 2 Comments

Hello Sugar Friends!
 
 
I have missed you all so much! I apologize for neglecting  the blog these last few months. We have had so much stuff going on behind the scenes at SugarEd, (and some of them unexpected  and rather complicated), that it has taken all my time and attention.  We have filmed (and are presently editing) our two new gumpaste flower DVDs. We have rebuilt the entire website and shopping cart for better performance on both ends. We are now able to process credit card orders directly on the website. You can still use Paypal to checkout if you choose to do so. We are also planning a  big website expansion that will include a lot more goodies for you. We are brainstorming and developing that as we speak!
 
I thank you for your patience as we work on all of these projects, so that we can continue to provide you with the best service and products we can produce.
 
I will have another blog post for you in a few days. In the mean time, please enjoy these fabulous cakes submitted by our readers:


 This stunning topsy turvy was made by  Karen in Australia for her son’s 21st birthday. Perfection!


This sassy fish cake was made by Mari in Florida.  Love it!


Katherine C made this buttercream beauty. Can you believe she has only been decorating for one year?  Unbelievable!


Lucy made this wonderful version of the Sweet Luxuries cake. Bravo!


Esther S shows her mastery of image transfers with her cute Cuban drummer. Maybe that is Ricky Ricardo? ( Love Ricky!)


Jaycee made this beauty as a 10th anniversary gift from a husband to his wife. Now that is flawless fondant!


———————————————————


Gorgeous work guys!  Feel free to submit your sugar art, recipes, tips and questions to this email address. You might get it published on the blog or newsletter.
 
 
Thanks again everybody! I will see you in a  few days with a post about our last buttercream basics class. I will show you how I repaired a HUGE blowout!
 
Happy caking!
Sharon
 
www.sugaredproductions.com


Sunflower Grad Cake

May 24, 2011 by Sharon Zambito 106 Comments

Graduation season is here! Are you guys making a lot of grad cakes right  now? I had the opportunity last week to make a cake for my son’s best friend. She is a very sweet girl, and I was happy to make it for her. I included the elements in the cake that she requested: the colors of red and black, a sunflower (her favorite flower), and paw prints to represent her desire to open her own small animal care business. And of course we had to include the grad cap and tassel to represent her school. (Instructions on how to make the cap and tassel can be found  in our Book Smarts DVD.)
I took some photos of the process I used while making the sunflower and thought you might like to see them, so here we go:

I used yellow gumpaste (Wilton premade works very well) to cut out two of the sunflower shapes.

Putting the petal on my cel pad, I used my ball tool to thin the cornstarch dusted petals. I put most of the pressure on the middle of the petals, because sunflower  petals are a little bit wider in the middle than they are on the two ends. I avoided thinning too much where the petals join the center portion, because sunflowers (and daisies) are notorious for breaking in that vulnerable spot.

After the thinning was done, I used the veining tool to add some vertical lines to the inside of the petals.

The flower was  placed into a cupped former lined with foil. I pinched the tips of the petals to give them  some movement and make them more life-like. Petals were propped with paper toweling in a random pattern to give the petals a natural look.
I repeated the exact same process with the second layer, but I did not glue the two pieces together. The reason for this is because I wanted them to dry in the proper shape together, but I needed to be able to  separate the pieces later for dusting.
In order to speed up the process of drying, I placed them into my dehydrator. (I made two flowers; I always make extra for breakage.)
This is Bessy. She may be old, she may be ratty and held together with masking tape, but she is a faithful and loyal friend who always gets the job done. She is a Nesco food dehydrator that I got at Walmart years ago for about $35. I use her constantly for so many items. I could not live without her. If you invest in one, I recommend that you get one with a temperate regulator. Always use the coolest temperature setting so that your items do not melt.
After the flower was fully dry, it was time to dust. The best part!  Dusting the flower just makes it come to life, and is so much fun! My dusting process was as follows: The entire flower got a light dusting with buttercup yellow. The lower portion of the petals were dusted with a combo of sunflower and pumpkin. The centers of the petals were hit with some daffodil yellow. The tips also got a little bit of the sunflower color. Then the entire flower got a very very light dusting with yellow luster dust, just to brighten it up a bit.
Remember  that I said this type of flower is known for petal breakage? Yep, happens almost every time! ACK! Here you see a petal glued back on with just a little bit of melted white chocolate. The break was low enough on the petal that it will be covered by the center once applied.
I used a silicone push mold to make the center. Brown gumpaste was pushed into the mold, and popped right out. So easy it feels like cheating.
A little bit of dark brown petal dust was applied to the center. Then I brushed the center with just a little bit of  shortening to give it a little sheen and wake it up. We don’t want a sleepy sunflower! 🙂
Now onto the cake for a minute:
I wanted extra height on the cake tiers, so that the sunflower and stem would be in the correct proportion. We did not need any more extra servings of cake, so I increased the height by using fomecore under the tiers. I used  pieces of  1/2 inch  fomecore taped together, and then covered that with Glad Press and Seal.
I used three pieces of fomecore for the lower tier, and 2 pieces for the upper tier. Then I proceeded to ice and stack  per my normal techniques. (You can learn my technique for smooth icing and stacking in our DVDs available here.)
The finished flower was then attached to the side of the cake with a little bit of melted chocolate. Ta da!! Isn’t it pretty! I love how the yellow pops against the red and black.
And the finished cake. Nicole was thrilled with it, and I was very happy that she was happy.
We will be shooting our next DVD in a few weeks. The topic will be gumpaste and fondant flowers. Do you think we should include this sunflower in the DVD? Leave a comment here and tell me what you think, and you will be entered into a drawing to win a free flower DVD when it is released in the fall. Woo Hoo! Free stuff!
Happy caking everyone!
Sharon
http://www.sugaredproductions.com/

25th Anniversay Cake

May 11, 2011 by Sharon Zambito 19 Comments

26 years ago today I married my college sweetheart.
One year ago we had a nice party for family and friends to celebrate our 25th.  I have not published the photos of the cake to date because I thought they were going to be featured in a prominent cake magazine. Well, that never happened, so I thought today would be an appropriate day to share them with you.
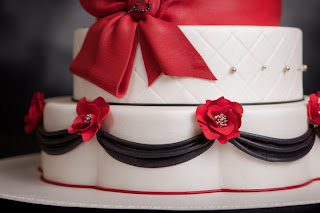
I chose black and red with touches of silver to match the decor of the venue we had rented for the party. I did make my own cake, but I cheated. It was all stryo dummies, for two reasons. I wanted to be able to save the top tiers as a keepsake, and I wanted to be able to work on the cake early, since I would be so busy with party preparations in the days before the event.
I made my fantasy bling flowers; the same ones I made for our TLC cake, but smaller and in red this time. (We will be teaching this flower in our next DVD release, yay!) The 25 topper was made by gluing Swarvoski crystals to jewelry wire I bent into shape.
I used the diamond impression mat for the sides of two tiers. Black fondant swags and bling roses for the bottom petal tier.
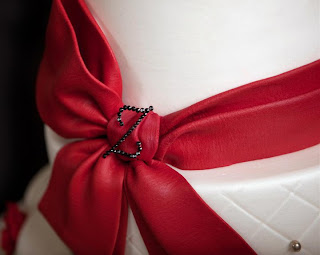
I also made a small monogram Z for the center of the bow from crystals. This was my favorite part of the whole cake.
Purchased beaded ribbon was glued to the separator drum and the presentation board. You can’t see it in the photos, but there is silver in the beading. The sizes of the tiers were 6,9,10,13 and 16.
Here are a few casual shots of the party:
Hubby and I toasting to 25 years!
We also celebrated Paul’s 50th birthday that night, so I made a toast to him….
……. and I got a little choked up.
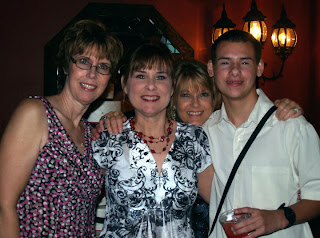
My two wonderful sisters and my youngest son, J-man.
My men. The lights of my life.
My beautiful Italian mother in law.
Paul’s brother, and yes they do look a lot alike!
 It was a wonderful night to celebrate my blessings with my family and friends. Thank you for sharing it with me too!
Happy caking!
Sharon
http://www.sugaredproductions.com/

Easter Egg Basket Cake

April 29, 2011 by Sharon Zambito 24 Comments

HELLO SUGAR FRIENDS!!
I know it has been a long time. I apologize for my neglect of the blog. We have been so very busy behind the scenes, working on new and exciting projects for SugarEd that have been very time consuming. We are planning our next DVD releases, a website upgrade and expansion, and more fun surprises that you will learn more about at the end of this year. (Good things come to those who wait, LOL)
Things are starting to settle down just a bit, so I am going to do my best to get back to blogging regularly. And I thought you might enjoy a tutorial on the basket cake I made last week for an Easter order. I know Easter is over, but you can use these techniques for many types of other cake themes.
Disclaimer: There seems to be something amiss with my camera (or there is the very remote possibility it is user ignorance), so the quality of these photos is not great, but I think you can still see them pretty well. I so want to take photography classes but there is just no time!
Today we are going to make a big ole beautiful Easter basket full of pastel chocolate eggs!
The basket handle was made about 5 days ahead of time. I used half chocolate and half white fondant, adding a very liberal amount of powdered tylose. I formed two thick sausages, then twisted them together, and curved them into the shape I needed for the handle. Make a wire handle that custom fits your cake in width and height, and use that as a guide to form the shape of your fondant handle. Insert sucker sticks into the two ends of the handle. I put it on a cooling rack so the air could get to the under side to aid drying. I have done this many times with success, but I think next time I might try 50/50 gumpaste. More on that later.
Now to make the chocolate eggs. I like Merkens brand super white candy melts. I used candy colors to tint it a few pastel shades. I used a large 3D egg chocolate mold to form the eggs. The molds are clipped together with strong office clamps, and the chocolate is poured into a hole cut out on the underside of the mold. The mold was put in a small cup to hold it straight and put in the freezer for about 15 minutes. Then the mold was removed from the cup and placed back in the freezer, allowing the cold air to fully reach all sides of it. It was ready to be unmolded at about 20-25 minutes total freezing time.

Here are some eggs fresh out of the molds. Oh no!! Look at those ugly seems! What shall we do?? No worries, we can clean that up easily.


Here they are all cleaned up. Use your palette knife or exacto knife to scrape off all the excess. Then use the heat of your gloved hand to smooth and buff out any lines and imperfections. This will cause the egg to lose its shine from the mold, but I have never seen a super shiny dyed Easter egg anyway. We are going for realism here!
However, we do want just a little bit of sheen to bring our eggs up a notch in elegance and refinement. So I used the edible lacquer spray an gave them 2 or 3 thin coats, allowing them to dry in between coats.
Here are the eggs right after spraying. Once dry, they will not be nearly this shiny.
Then the fun part of decorating the eggs! I used a variety of pastel colored fondant, strip, circle and flower cutters to decorate them in a variety of designs. You can use water, piping gel, or shortening as the glue for your fondant trims.
Aren’t they pretty? Try to get your fondant thin, as thick bulky appliques do not looks a nice on the eggs. Now back to the basket….. ( after a fountain Diet Coke run, of course.)
Ahhhhh, now that we are all refreshed, it is time to carve the cake into a slightly tapered basket shape. I have three 2 inch layers of cake here with one layer of filling. The cakes are 12 inch diameter. If you need to see the detailed method for carving this shape, you can check out our Tosy Turvy DVD.
Once the cake was carved, I used the thickened ganache method (also shown in the Topsy Turvy DVD) to coat our cake. Here it is shown all nice and smoothed. The top edge of excess ganache is removed the next day after the ganache has set up to a nice firm shell.
Now we have time to go play on Facebook, have some coffee and a snack, watch tonight’s rerun of the Young and the Restless, and then go to bed. Tomorrow we put our basket all together!
*
*
*
*
*
*
*
*
*
Good morning! Did you have a nice rest? Oh, who am I kidding. I never cake in the morning. I never cake before 3PM. Not a morning person, it takes me half the day to get fully awake and functioning.
So now we must roll out a very long piece of fondant (half chocolate and half white for this shade of brown) that is long enough to wrap around our cake, with a little extra on the end.
I used the PME basketweave roller to make the basketweave impression. I. love. this. roller. The end.
Measure how tall you want your piece of fondant to be and cut a strip that exact height, and roll it up bandage style.
I smeared shortening all over the ganached cake (with a gloved hand) in a light coat for glue. Shortening is excellent glue. Then I started at the back of my cake, and unrolled the wrap as I went around the cake. (I was taking my own photos, so I had to step away from the cake to take the picture.)
Do not pull or stretch it as you unroll. Just gently unroll it as you smooth it onto the cake with your hand. You do not want to erase or distort the basketweave pattern.
I used a clay gun to make a rope border for both the top edge and the bottom of the basket. Here you can see two large bubble tea straws inserted into the cake where the sucker sticks at the base of the handle will go.
I filled the straws with melted chocolate using a piping bag.
Then the sucker sticks were inserted into the straws . I propped the handle in place with a roll of Viva until the chocolate set.
I added more chocolate around the base of the handles to add more stability to them and let that fully firm up. Lookin’ good!
Now I have to insert four support straws…..
………that will hold up the cake circle that will support the weight of the heavy chocolate eggs.
Looks like an Easter basket now! I just added pieces of rolled out ivory fondant in a free form blanket shape and placed the eggs on top. So pretty! But hmmm……. that handle does not look quite as straight as it did when I put it in. Oh well, I am sure it will be fine.
I added a pink gumpaste ribbon and bow, and piped buttercream grass to complete my project. Boy, that handle is getting wonkier looking. I checked it; it seems solidly in place and stable. Well, it is time to go deliver. I am going to drive because hubby has been banned from driving with cakes after that last episode we will not speak of.
*
*
*
*
As I pull into the neighborhood of the client, I hear a big thump in the back of the vehicle. I knew what it was. I knew what had happened. I could not look. I said to Hubby, it happened didn’t it? He said, Yep.
Ok, now what to do? Surprisingly , I did not freak out. I called the customer, explained to her what happened, and that I was going back home to to do repairs. Unfortunately I had only one handle (I always make two, always…. but not this time for some unkown reason). I explained to her that it will not have a handle, but it will be a pretty cake anyway. She was incredibly understanding and not upset in the least. Thank goodness for easy-going clients , right?
So back home we go. I should have taken a photo of it with the broken handle. It broke off clean on both sides, about 6 inches up from the blanket. There was no fixing it.
Here you can see where I clipped the broken handle down as low as I could to the top of the cake without disturbing the other decorations. I dare not attempt to take the pieces out of the cake that were embedded. My plan was just to cover these spots with a little bit more blanket, that is until a lightbulb went off! I had an idea!
I would make small side handles! I could do this over wire, and it would not require the handles to have any drying time before I applied them. I bent some floral wire into the desired shape, and simply wrapped a clay gun string around it.
I coated the ends of the wire with chocolate, and after that was dry, I inserted the handles into both sides of the cake. I used melted chocolate to close in any holes or gaps where fresh cake was exposed, and also to secure the new handles in place.
I added some more blanket pieces to cover all the oopsies, and here is the final product:
What do you think?

I think I might even like it better than the first version. Whew, so glad that worked out, because who ever heard of an Easter basket with no handles?

So all is well that ends well! I hope you guys give this basket technique a try. I would suggest using a lot of tylose or gumpaste in your handle, and give it at least a week to dry if not longer. Or possibly even form it over very sturdy wire that can provide some support. I have made large handles using this method many times with success; I think this time it had not dried long/hard enough.


Oh and make TWO of everything!

Happy Caking Everyone!

Sharon
http://www.sugaredproductions.com/


Choose Your Free Gift!

April 12, 2011 by Sharon Zambito 1 Comment

 
FREE GIFT WITH PURCHASE!


With every purchase of $50 before shipping, you may choose one of the following items as your gift:

Back to Basics DVD
Perfecting the Art of Buttercream DVD
Flawless Fondant DVD
Successful Stacking DVD
Boxes and Bows DVD
Topsy Turvy DVD
Sheet Cake Secrets DVD
Sheet Cake Bonus DVD
Design Gallery DVD
Sweet Luxuries DVD
Diamond Impression Mat
Line Impression Mat
Butterfly Stencil
Daisy and Dot Stencil
Frill Cutter set 1
Frill Cutter set 2
Palette Knife
Stitching Tool
Baby Bootie Cutters
Toy Tappit Cutters
Bench Scraper
Business Card Boxes
Choose two of the molds below:
Chocolate Frame
Business Card
A-L Chocolate Mold
M-Z Chocolate Mold
Cherry Cordial


Here’s how to claim your gift:

Please do not put the desired item into your shopping cart or you will be charged for it. When you check out via Paypal, click on the “Gift Options Add” link right under “Special Instructions” on the “Review your information” page. (It is small.) A text box will pop up, and you can enter the name of the item you want as your gift there. Then proceed with your checkout as usual.

OFFER GOOD FOR ORDERS PLACED APRIL 12-15, 2011 ONLY

**May not be combined with other special offers


ORDER HERE

Thank you for your business!


Book Smarts DVD ShippIng Now!

April 3, 2011 by Sharon Zambito 2 Comments


NEW BOOK SMARTS DVD IS SHIPPING NOW!


JUST IN TIME FOR GRADUATION SEASON!


Techniques taught include:
 
–Fondant wood grain cake board
 
–Carving book shapes and crumb coating
 
–Creating white fondant “pages”
 
–Creating templates for book covers
 
–Measuring, embossing, cutting and applying fondant book covers
 
–Doweling and stacking
 
–Creating a fondant grad cap and tassel
 
–Adding trims and lettering to book spines
 
–Molding chocolate photo frame
 
–Painting chocolate photo frame
 
–Applying edible photo to frame
 
–Making rice paper diploma with fondant tie
 
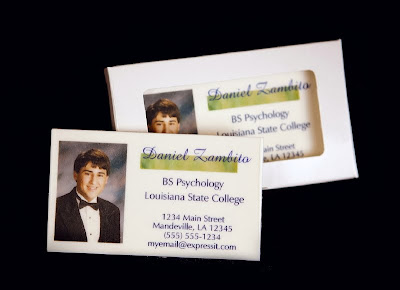
–Making edible business card party favors


ORDER AND SEE A VIDEO CLIP HERE


Sugar Free Yule Log

December 21, 2010 by Sharon Zambito 4 Comments

MERRY CHRISTMAS EVERYONE!
We at SugarEd hope you have the most wonderful of holiday seasons. We want to take this opportunity to thank our loyal customers. We value and appreciate you, and hope to bring you more products in 2011 that you desire.
This year’s holiday blog is a guest entry by my beautiful sister Janice. Those of you that follow this blog know that she is the adventurer of the family. This past year she ziplined in the Nantahala Gorge in North Carolina, and whitewater rafted the Ocoee River where they had the Olympics. Her goal for 2011 is to skydive, and plans to take a two week motorcycle trip through the western U.S. in July. She also has a new granddaughter due on my birthday in May! It exhausts me just typing all that.
So with no further adieu, take it away Janice:

Christmas 2009 is near, and as always, I am assigned the task of providing a sugar-free dessert for my family on Christmas Day. Having done this for quite a few years now, and being easily bored, I am once again looking for something new and different; the same old apple and pumpkin pies seem so ordinary. (Although I do have a fabulous recipe for sugar-free apple pie that I may share with you in a future blog.) But Christmas seems to call for something a little more special, a little more decorative, a little more elegant. And as it usually turns out – a little more of a pain in the patootie.

As the festive season draws nigh, I begin to ponder how I will top last year’s spectacular creation, and I ask my sister Sharon, who you all know and love, to suggest something impressive and “bloggable.” She emails me a recipe for a Buche de Noel, or Yule Log. “What do you think about this?” I ask Pepper Marie. “It looks pretty difficult but I think I can adapt the recipe to sugar-free.” Pepper Marie is my 16-year old Pomeranian, and she helps me do everything. I seek her opinion in all things, great and small, and never make a move without her. She is to me as Wendy is to Sharon. Pepper Marie says that I should scrap the whole cake idea and serve a rotisserie chicken instead. “Chicken for dessert?” I ask. “Sounds like a winner to me!” she says. (Every year, her Christmas wish list is the same: a rotisserie chicken, whole, and no sharing, please.)

There are many theories about the origin of this decorative holiday dessert, but it seems clear that the Buche de Noel dates back to the time of Napoleon. One legend has it that Napoleon issued a decree that on the coldest nights, the peasants had to keep their chimneys closed to keep the cold air from coming in. (What a control freak!) That meant that the fireplaces could not be lit, so the patisseries (French bakeries) made these cakes in the shape of logs, and it became a French tradition. My question is how did they make these cakes if the fireplaces could not be lit? They didn’t have electric ovens back then, did they?

Be that as it may, since I am planning a trip to France in May/June of 2010, I think this is the perfect selection for this year’s confection. Since it’s going to be sugar-free, I guess I will call it my Buche de Noel sans Sucre. So on Christmas Eve, I take the day off, and right after breakfast (oatmeal for me, chicken for Pepper Marie), I pop my trustee IPOD into the dock, hit the shuffle, and as Pink declares that it is time to “Get the Party Started,” Pepper Marie and I begin this year’s culinary creation.


The Buche de Noel sans Sucre consists of four parts: the cake, the filling, the icing and the decorations. As Fats begins “Walkin’ To New Orleans,” Pepper Marie and I begin to assemble our ingredients for the first part – the cake:


Ingredients:

Three large eggs
Three tbs sugar-free strawberry jam
150g (5 oz) cocoa powder
A few squares of very dark, high cocoa content chocolate (I bought mine at Whole Foods)
One tsp cornflour
200g (7 oz) raspberries
300ml whipping cream (I used sugar-free Cool Whip)

The recipe says to start by preheating the oven to 375 degrees. That seems high to me, so I set it to 350. I grease a standard oblong fudge tin (or jelly roll pan), and separate the eggs. In one bowl, I whisk the egg yolks and two tablespoons of the sugar-free strawberry jam. Kenny is begging Ruby not to take her love to town, as I sieve the cocoa powder and cornflour and gently stir in. The recipe does not say to add water, but the batter seems very dry to me, so I add some water. “Tootsie Roll, does this look right to you?” I ask Pepper Marie. She sniffs it and says, “I think it needs some chicken broth.”


I place the egg whites in another bowl and beat with a mixer on high speed until they form stiff peaks. I slowly fold the egg white mixture into the chocolaty batter, spoon into the greased tin and place in the oven for about 15 minutes or until firm. I remove and allow to cool.


I wash and hull and the raspberries while Sting pleads with Roxanne not to put on the red light. I place the raspberries in a food processor and puree, adding a little Splenda to sweeten them just a tad.


I stir the pureed raspberries into the cream one-quarter at a time and it turns a beautiful pink shade. Of course, at this point, I cannot resist a little taste. That’s the best part about making sugar-free desserts – I get to taste!


The Village People extol the benefits of joining the YMCA as I sprinkle some cocoa powder onto a clean surface (I use a clean, smooth dish towel, but I imagine you can use parchment paper just as well). I carefully remove the sponge from the tin and lay it on the cocoa, and spread the remaining sugar-free jam all over the sponge.

I then spoon the raspberry cream on and spread.

Michael swears that Billie Jean is not his lover as I carefully roll up the sponge. “Think he’s telling the truth?” I ask Pepper Marie. She doesn’t care.

Now, the hardest part about making a Yule Log is getting the cake light and spongy enough to roll it up without cracking. Remember before when I said I thought the batter was too dry so I added water? I now believe I did not add quite enough. I am not a baker, however. I am a legal assistant. I can e-file a brief with the Federal court, set up a corporate deposition, and arrange a multi-party international conference call, all at the same time and in the blink of an eye. But make a judgment call about what looks right and what doesn’t when baking? Well, that is just not my area of expertise. “I think it needed more liquid,” I tell Pepper Marie. “It’s not too late to go with the chicken idea,” she says. “I may regret not taking your advice,” I say as I roll up the sponge. To my dismay, it cracked substantially upon rolling. “OMG!” I say. “I hope the icing covers this mess up.” “This baking stuff is too stressful,” says Pepper Marie. “I need a little nap.”

It’s time for me to get ready for church anyway. So I go get dressed, and as I am about to leave, My Special Angel is playing on the IPOD. “How appropriate,” I think to myself as I pause and take a long look at my Sweetie sleeping like a little angel. She is getting very old. I will say a special prayer for my own Special Angel at church tonight.

When I return, Pepper Marie and I are both refreshed – she physically, and I spiritually – and we are both ready for some victuals and libations. So I fix her some dinner (yes, this involves chicken), and mix myself a martini. Grey Goose, up and dirty, with two olives! Ahhh, this is good!

Now it is time to get back to work. This cake is taking longer than I thought it would. As I begin to assemble the ingredients for the icing, Prince is partying like it’s 1999. “He’s been partying for ten years now! He’s going to have a heck of a hangover!” I tell Pepper Marie, but she is too busy scarfing down chicken to worry about Prince.

The recipe I use for the icing comes from one of my diabetic cookbooks, and I must tell you that I do not love it. It is made with chocolate and butter, and that’s what it tastes like – butter. There is no cream in the buttercream, if you know what I mean. It calls for a substantial amount of salt which common sense should tell me is a flaw in the recipe, and maybe if I baked more often this would register with me. But like I said before, I am no Sharon Zambito. I make the first batch and it tastes incredibly salty. Now I am getting stressed again! “I knew that was too much salt!” I say. Pepper suggests that it would actually taste pretty good on top of some chicken. Once again, she’s probably right, but I am not to be defeated. I draw strength from Gloria’s assurances that I Will Survive. (Well, that and the martini.) “I will survive this cake,” I say, as I throw out the whole batch of icing and remake it without the salt. Thank God I have enough ingredients to make a second batch.

It is better without the salt, but still has a strong taste of butter. Since I would not recommend this recipe, I am giving you another one for the icing. This is what I would do next time.

1 envelope Dream Whip
½ teaspoon vanilla
½ cup milk
1 box sugar-free chocolate Jello pudding

Blend together milk, vanilla, and Dream Whip. Beat until stiff. Add pudding mix and continue to beat until light and fluffy. Add milk as needed until desired consistency is reached.

I’m thinking that if you want to simply things, you could probably use the sugar-free Cool Whip and just eliminate the milk. Or maybe use the milk to make the pudding and then mix that with the Cool Whip? Dream Whip, Cool Whip, Kool and the Gang? What do you think? I don’t know. Just don’t use the recipe that I used unless you like eating sticks of butter.

Speaking of Kool and the Gang, it’s time to Get Down On It, and I spread my new batch of icing onto the cake. One of Sharon’s palette knives would come in handy about now, but since I don’t have one of those [hint to Sharon for a Christmas gift], I use a small spatula or butter knife to form bark-like ridges on the icing. I use a toothpick to make the rings on the sides to look like a log.

Well that hid the cracks pretty well. So far so good. Now it is time for the decorations.

I was looking at pictures online trying to get ideas on how to decorate the Buche de Noel sans Sucre. You could really just use some store-bought holly, twigs, etc., and that would look very nice, But while I was surfing the web, I saw one that was decorated with meringue mushrooms. Cute! And luckily for me, a recipe was included.

Ingredients:

2 large egg whites, room temperature
1/4 tsp cream of tartar
½ superfine sugar (This is hard to find. You can use regular granulated sugar and process it for about 30 seconds in a food processor. I used Splenda, but I think meringue comes out better with real sugar. The Splenda did work, though.)

I line a baking sheet with parchment paper and set up a pastry bag with a No. 6 (½ inch diameter) round plain tip. I preheat the oven to 200 degrees, beat the room temperature egg whites with an electric mixer at slow speed until foamy. Then I add the cream of tartar and beat at medium speed until soft peaks form. I continue beating (increasing speed to high), gradually adding the sugar until the whites are stiff and glossy. I rub a little of the meringue between my fingers to make sure all the sugar has dissolved.

With a rubber spatula, I place the meringue into the pastry bag.

To pipe the caps, I hold the pastry bag upright and close to the parchment paper. I pipe the meringue with even pressure into even rounds building up the meringue to form a round. You can adjust the size of the caps depending on the size of your cake. I sharply twist the bag and stop the pressure as I slowly move the tip off the meringue. Try to make the top as smooth as possible but you can use a wet fingertip to smooth out any bumps. This takes practice, and the finished product is fragile. Make way more than you think you need.

To pipe the stems, I hold the pastry bag upright and close to the parchment paper. I pipe the meringue with even pressure into a cone shape, making the base of the stem a little larger than the top. I try to keep the stems as straight as possible. Again, make more than you need.

I bake the meringues for approximately one hour or until the mushrooms are firm enough that they can be lifted from the baking sheet without sticking.


To glue the caps to the stems, I use a little melting chocolate. I take a mushroom cap and spread some of the melted chocolate on the underside, and then press the stem onto it. You have to be very careful when you are doing this because the meringue is so fragile, if you use too much pressure, you can easily crush the mushroom. The first one I tried, the mushroom disintegrated into dust in my fingers. Actually, that happened a few times before I got the hang of it. I thought that Pepper Marie was making fun of me until I realized that Queen was singing Another One Bites The Dust on the IPOD.

The mushrooms look pretty cute, but too clean. I lightly brush them with a little cocoa powder to give them an “earthy” look. “Well, Sweet Cake, I think this all looks pretty good,” I say to Pepper Marie. “I really think your guests would rather have chicken,” she says. “But we’re having turkey for dinner,” I inform her. “Well, that’s even more better,” she replies. “Turkey for dinner, chicken for dessert. It’s a theme dinner.” That dog has a one-track mind.

Willie is pining to be On the Road Again, which reminds me that I need to take this concoction on the road tomorrow. I am tortured by memories of last year’s unexpected three-hour trek across the Causeway with my “needs refrigeration” cake melting in the back seat, and my “needs frequent potty stops” Aunt in the front seat. Luckily, this year I don’t need to go quite that far; our family celebration is being hosted by my son and daughter-in-law, who live five minutes from my apartment. Also, blessedly, my brother and his family are picking up my Aunt from her assisted living home, so I am relieved of that responsibility as well. I have only the Yule Log to worry about. Nevertheless, just to be on the safe side, I opt to transport the cake undecorated. So as Aaron Neville reserves his spot in that number When the Saints Go Marching In, Pepper Marie and I march off to bed to await the arrival of Santa Paws.

Our family celebration the next day is not until 5:00 p.m. I am able to spend the morning with Pepper Marie before I go to a friend’s house for Christmas dinner. (FYI – my contribution to this Christmas dinner is the aforementioned sugar-free apple pie which is a huge hit. It does not taste like sticks of chocolate butter.) I return home in the afternoon, with just enough time to load up my Honda Civic with gifts, kiss my precious Old Lady Dog on her soft, furry head, and I am off to my son’s house. This year, the Christmas Confection can ride in the front seat with me. I go slow, slow, slow, with one hand always on the dessert plate. I have horrible images of some reckless driver who has spent the last two days in an alcoholic stupor pulling out in front of me, causing me to slam on my breaks, and sending my Buche de Noel sans Sucre flying into the dashboard. “Good thing I don’t do this for a living,” I say out loud although there is no one to hear. “I’d have a ulcer.”

Upon arrival at the home of my son and daughter-in-law, I assemble the Yule Log. I have brought the meringue mushrooms in a plastic container lined with paper towels (for shock absorption!), and some of those store-bought holly and pine cones for embellishment. I arrange them all on the dessert dish. I sprinkle some Splenda “snow” on top of the log. “Wow, that looks great!” I say. “I’m a genius! A gourmet baker! I could be on the bleepin’ Ultimate Cake Off!” Unfortunately, as I am standing there expounding on my own creativity, the Splenda “snow” dissolves into the icing before my very eyes, and is soon gone from sight. Well, who knew? “That’s OK,” I say, “it’s just like a snowfall in New Orleans. It melts as soon as it hits the ground.”

The dish looks fantastic, and in spite of my disappointment with the taste of the icing, my family seems to like the Buche de Noel sans Sucre. Are they just being polite? Perhaps it is more appealing to the taste buds because it is so pretty, and they didn’t have the experience of that awful first batch of salty icing? Maybe they really DO like eating sticks of butter? I don’t know, but everyone tries it, even those who are not sugar restricted. If they mind the taste of the creamless buttercream icing, they don’t let on. In any event, the entire cake is soon gone. I guess that’s a good sign.

If any of you want the recipe for the creamless chocolate buttercream, let Sharon know and I’ll have her post it on the blog. Perhaps you know of a way to improve it. Maybe with a little chicken broth?

Well, here’s wishing all of you in Blogland a very Merry Christmas and a Super[bowl] New Year, from all of us down here in the Who Dat Nation! Talk to you soon.

————————————
EPILOGUE:

In Memoriam –

I dedicate this blog entry to my beloved Pepper Marie, my Baby, my Special Angel, my Tootsie Roll, my Helper, who passed from this life on May 14, 2010, just shy of her 17th birthday. No words can ever express the loss that I feel. I am forever grateful for every day I had with her, for the many years that she was at my side, for her unconditional love. She truly was my helper. She helped me do everything from the minute I woke up in the morning until the second I fell asleep at night. And even in between – I slept peacefully just knowing she was there. Many times she was my “glue” – she held me together through some really hard times. And we had lots of good times, too. We traveled all over the U.S. together. But whatever life brought our way, it was always she and I. We took it all on together. I carry her in my heart now, and always will. On what would have been her 17th birthday, I celebrated her life with a rotisserie chicken and champagne. And what a life it is to celebrate. I love you, Baby.


Pepper Marie
August 25, 1993 – May 14, 2010

  • « Previous Page
  • 1
  • …
  • 8
  • 9
  • 10
  • 11
  • 12
  • …
  • 18
  • Next Page »

Sharon Zambito

Sharon Zambito

An RN turned SAHM turned cake maniac. Owner of SugarEd Productions Online School. Join me for some caking, baking, and all around sweet fun :)

Follow me..

  • Facebook
  • Instagram
  • Pinterest
  • YouTube

Pinterest

  • Autumn House Two Trees Machine Embroidery Design – Blasto Stitch
    Autumn House Two Trees Machine Embroidery Design – Blasto Stitch
  • Embroider  Sew :: Jelly Roll Purses - Embroidery Garden In the Hoop Machine Embroidery Designs
    Embroider Sew :: Jelly Roll Purses - Embroidery Garden In the Hoop Machine Embroidery Designs
  • (1) How to QUICKLY & SAFELY remove acrylic, gel, and dip powder polish | BAGGY METHOD - SO EASY! - YouTube
    (1) How to QUICKLY & SAFELY remove acrylic, gel, and dip powder polish | BAGGY METHOD - SO EASY! - YouTube
  • (1) Bouffant Surgical Cap - YouTube
    (1) Bouffant Surgical Cap - YouTube
Follow Me on Pinterest

Follow Me on Instagram

Instagram requires authorization to view a user profile. Use autorized account in widget settings

Recent Posts

  • Egg Safety Basics
  • Stable Mabel Support System Sale
  • Guest Post : 4 Vegan Cake Recipes No One Should Miss Out On!

Popular Posts

  • Ways To Make Your Cake Fluffy And Moist
  • How To Stencil on Cookies with Royal Icing
  • Doctored Cake Mix Recipes
  • Transferring an Image Without a Projector
  • All About Buttercream!
  • How to Fix Broken Ganache
  • Edible vs Non Toxic Gold Dusts

Categories

Search

Archives

Copyright © 2025 · Sharon Zambito and SugarEd Productions,LLC

Copyright © 2025 · Evangeline Theme on Genesis Framework · WordPress · Log in