Easy Halloween Cupcakes
This post is for all you procrastinators out there. And I say this with the utmost love and respect. For I am a champion, card carrying, flag waving procrastinator. I even joined a support group, but it hasn’t been much help:
.jpg)
And here we are, just a few days before Halloween and…… nothing….. nada…… crickets. Where did the time go? What will we do? The kids are looking up at you with those sad longing eyes, asking what you will be making for their class or neighborhood party. Crikey! Why did we wait so long? Your heart starts to race; sweat forms on your brow; the room is going white. Pure unadulterated panic.
Raise your hand if you are with me so far. I have been in this situation more times than I count.
Well, have no fear. Queen Procrastinator is here to help you.
.jpeg)
So let me share with you these super duper easy Halloween cupcakes that you can whip out in no time, but still impress even the most discerning goblins and ghouls.
.jpg)
.jpg)
You will need white chocolate covered pretzels, sucker sticks, and marshmallows.
.jpg)
Draw a face on the flat side of a marshmallow that has been cut in half with an edible food marker. Three of the pretzels need to be glued to the sucker stick with some melted chocolate to make the rib cage.
.jpg)
And that was the tricky part. I spent a good 20 minutes trying to get those finicky pretzels to line up correctly on the sucker stick without flopping over or getting out of alignment. I found the above method worked the best. I used gravity to hold the back edges of the pretzels onto the stick while the chocolate hardened. Worked great and was very easy.
.jpg)
You use another pretzel cut as shown above to make the arms. You use the piece on the left, and eat the piece on the right. It’s a win/win for everybody.
.jpg)
After you pipe your icing swirl, just stick the sucker stuck in and lay the arm bones into the holes of the upper rib cage pretzel. Done. Fast. Easy. Cute. ( I must give credit to Woman’s Day for this idea. I saw it online and copied it.)
.jpg)
I found these adorable sugar skulls at Wal Mart In the Wilton isle.
.jpg)
They appear to me to be gumpaste, and they were a very nice shape with good details.
.jpg)
To kick them up a notch, bring out a couple of brown petal dusts and give them a roughing up.
.jpg)
.jpg)
To make the tombstone, just cut a rectangular piece of fondant (with tylose added) and impress the RIP with your favorite alphabet cutters. The cute cupcake wrappers were also made by Wilton.
.jpg)
Once the tombstones dry, hit them with a little luster dust. Pipe a swirl onto your cupcake, and slap a tombstone and skull on top. Done. How easy was that?
.jpg)
.jpg)
Drape a circle of white fondant over it.
.jpg)
Add two eyes made from either fondant or your edible ink pen. Stick into cupcake icing. Woooooooo.
.jpg)
.jpg)
.jpg)
.jpg)
.jpg)
And you saved the day! You have created this wonderful spread of amazing cupcakes, and it was fast and easy. You can take convenient pre-made products, do a little doctoring, and turn them into a custom made and impressive result:
.jpg)
.jpg)
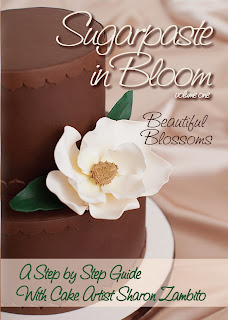
Two New Flower DVDs!
All orders placed by October 28, 2011 will be entered into a drawing for three of these great logo tote bags:
Halloween Marshmallow Pops
Boo!
One of my very favorite holidays is upon us. Halloween is a confectioner’s dream, as it provides an opportunity to make some of the cutest tasty treats evah. Let me share with you some I made this week. These were a lot of fun, and not very difficult nor time consuming. They get extra points for that!
.jpg)
Initial supplies used to make our cozy candy couple include yellow candy melts, green oil based candy color, marshmallows and sucker sticks. I highly recommend Merkens brand melts for optimum dipping performance. In this case I used the campfire roasting marshmallows. Have you seen those things? They are hugantic! They are as big as…..as ……as a giant marshmallow! I also suggest using the thicker sucker sticks, as these bad boys are heavy once they are done.
.jpg)
.jpg)
Other supplies used will be these candies and pre-made googly eyes, that you can get at most cake decorating places.
.jpg)
.jpg)
Let’s do Franque first:
.jpg)
Cut out a circle of black fondant and cut out notches along the outer edge. Do not cut them evenly or symmetrically. Franque does not have the most couture coif I have ever seen. Just sayin’.
.jpg)
Lay the toupee over his head and just press down all around the sides. (Hint: use shortening as your glue. Trust me. You will thank me for this later.) Glue on his googly eyes with melted chocolate. Cut a white Good & Plenty in half and glue in place for his bolts. Give the rest of the box to hubby because he loves those nasty candies. Oh wait, that is my hubby. Ignore that. Next use a paintbrush to drop a dollop of the same green chocolate on his handsome face to make a nose.
.jpg)
Next we need to bring out the big guns. OK just one small gun. Anyway, get your clay gun out, and using the smallest size circle disc, extrude a string of black fondant. Use that to make eyebrows and mouth. Again, using shortening on his face as glue will save you many bad words. And if you just cannot help yourself (like me), use silver luster dust mixed with vodka to paint his bolts. An edible marker (not shown) can be used to make his scar.
MWAHAHAHA!
.jpg)
As with all ladies, we need to spend some time on the hair. Use your clay gun with the largest muti hole disc.
.jpg)
Extrude a length of purple fondant and apply to the side of her head.
.jpg)
.jpg)
Cut a few short pieces to make her bangs. The bob is very in this season in the witch world.
.jpg)
Now to make her face. Clay gun string again for the brows and mouth. Half of the green Mike and Ike candy for the nose. (Keep that box cuz we like those.) Another pair of google eyes.
.jpg)
.jpg)
To make the pointy part of her hat, start with a ball of black fondant.
.jpg)
Roll it into a cone shape initially, and then continue to elongate and shape it into a witch hat shape.
.jpg)
A circle of black fondant laid on her head, and then the cone part of the hat is attached to the top of that. A couple of purple clay gun strings will create a perfect hat band.
Happy Halloween everybody! Send me pics if you make these and I will post them on Facebook. Please tell all your friends to like our Facebook page.
Sharon
Sugared Productions Online School
Basic Buttercream Class
A couple of months ago my BFF, right arm, crazy talented cake artist, and all around superwoman, Wendy, hosted a basic buttercream class at her shop. It was a wild two days of flying powdered sugar, flinging icing, bench scrapering, smoothing, and all around good clean fun. I would love to share some photos with you of this rip roaring event!
And they all lived happily ever after in buttercream land.
You can learn all of these buttercream smoothing techniques and more in the Perfecting the Art of Buttercream DVD.
You can learn how to make airlessly smooth
icing in the Back to Basics DVD.
Happy caking!
Sharon
Long Time No Talk
Sunflower Grad Cake
I used yellow gumpaste (Wilton premade works very well) to cut out two of the sunflower shapes.
After the thinning was done, I used the veining tool to add some vertical lines to the inside of the petals.
25th Anniversay Cake
Easter Egg Basket Cake
Here are some eggs fresh out of the molds. Oh no!! Look at those ugly seems! What shall we do?? No worries, we can clean that up easily.
I think I might even like it better than the first version. Whew, so glad that worked out, because who ever heard of an Easter basket with no handles?
So all is well that ends well! I hope you guys give this basket technique a try. I would suggest using a lot of tylose or gumpaste in your handle, and give it at least a week to dry if not longer. Or possibly even form it over very sturdy wire that can provide some support. I have made large handles using this method many times with success; I think this time it had not dried long/hard enough.
Oh and make TWO of everything!
Happy Caking Everyone!
Sharon
http://www.sugaredproductions.com/
Choose Your Free Gift!
With every purchase of $50 before shipping, you may choose one of the following items as your gift:
Back to Basics DVD
Perfecting the Art of Buttercream DVD
Flawless Fondant DVD
Successful Stacking DVD
Boxes and Bows DVD
Topsy Turvy DVD
Sheet Cake Secrets DVD
Sheet Cake Bonus DVD
Design Gallery DVD
Sweet Luxuries DVD
Diamond Impression Mat
Line Impression Mat
Butterfly Stencil
Daisy and Dot Stencil
Frill Cutter set 1
Frill Cutter set 2
Palette Knife
Stitching Tool
Baby Bootie Cutters
Toy Tappit Cutters
Bench Scraper
Business Card Boxes
Choose two of the molds below:
Chocolate Frame
Business Card
A-L Chocolate Mold
M-Z Chocolate Mold
Cherry Cordial
Please do not put the desired item into your shopping cart or you will be charged for it. When you check out via Paypal, click on the “Gift Options Add” link right under “Special Instructions” on the “Review your information” page. (It is small.) A text box will pop up, and you can enter the name of the item you want as your gift there. Then proceed with your checkout as usual.
OFFER GOOD FOR ORDERS PLACED APRIL 12-15, 2011 ONLY
**May not be combined with other special offers
- « Previous Page
- 1
- …
- 17
- 18
- 19
- 20
- 21
- …
- 36
- Next Page »


