Sugared Productions Blog

  • Blog Home
    • Home
  • Online Classes
  • Shop
  • Contact
  • About

Pilgrim Pumpkin

November 16, 2011 by Sharon Zambito 14 Comments

Thanksgiving Blog Blitz Post #3!
I hope you are having a nice Fall so far, and are enjoying the anticipation and preparations leading up to the holidays.  Thanksgiving is my very favorite holiday, and I love making  fun treats for the occasion. And I have to tell you that this little dude has got to be  my all time favorite! I have been busting at the seams since I made him; I am so excited to share him with you!
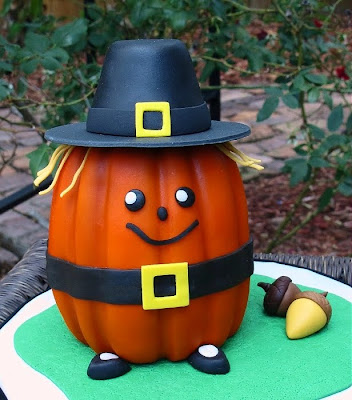
Meet my Pilgrim Pumpkin mini cake!
Don’t you just want to squeeze him?
Let me show you how I made him:
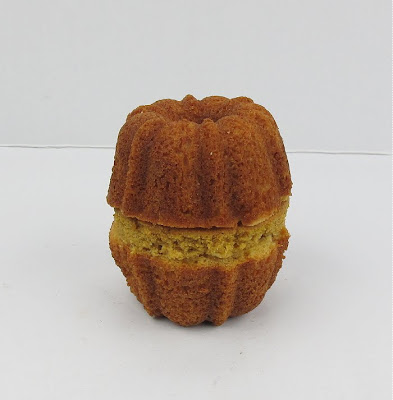
For his body I used two mini bundt cakes and a circle of cake I cut from a round layer with a cookie cutter. The height of the cut circle of cake was about 1/2 inch.
You need that extra height the circle of cake gives. Otherwise, he will be too squatty and you won’t have enough room for his belt and his face. If you want to spackle the seem with some stiffened buttercream to hide it more, you can do so.

 Crumb coat the cake with a  very thin layer of icing. Then cover the top half with orange fondant. Use a wooden dowel to impress in the grooves of the bundt pan to make them show up well. You will need a pretty thick layer of fondant or all the lumpy bumps  will show through. Or you can use two thinner layers of fondant, which is what I did. Once you get the top half covered, let it sit for a while to let the fondant set up some.
Then flip the cake over and do the exact same thing on the other half. Cut a clean seem between  both layers of fondant where they overlap in the middle, so that you get the result you see above.

Looking pumpkiny!

I airbrushed him just a little to help his colors pop, but that it optional. Cover the seem with a strip of black fondant to make his belt. Make his face with pieces of black fondant.

Cuteness emerging.
His hair is thin strips of a golden yellow fondant. Prop them away from his head  with  paper towels until they firm up. Make his adorable little pilgrim shoes from triangles of black fondant with an oval  piece of white fondant on top.At this point, just go ahead and squeal with delight. You will want you. You will need to. You have my blessing.
Cut a circle of black fondant for the brim of his hat, and fashion another piece in the tapered shape of a pilgrim hat. Let those both firm  up well. Attach the hat pieces together with  chocolate.
Once all is in place, add the  buckles to the belt and hat. I presented him on a little bit of fondant grass  with some acorns. At this point I called in all my family, my neighbors, the postman, and a stray cat to share my excitement with them.
Isn’t he just the cutest thing?
I heart him.
——————————

I often get asked where I get my ideas from, which can be all kinds of things. This project was inspired by this piece of  clip art I stumbled upon while searching on the internet for something:


My little guy came out pretty much how I envisioned in my head; which rarely happens. So I was very pleased.

Hope you give him a try, he was a lot  of fun to do!

Stray tuned for the next installment of my Thanksgiving Blog Blitz coming Friday!

Happy caking!
Sharon
www.sugaredproductions.com


Turkey Cake Balls!

November 14, 2011 by Sharon Zambito 20 Comments

Welcome to post #2 of my Thanksgiving Blog Blitz!  I will have a new blog post for you every few days from now until Turkey day. I hope you enjoy.


It’s Turkey Season!
Yay!


I don’t know about you guys, but I have  serious crush on cute little turkey themed treats. I love seeing all the adorable confections that people come up with  this time of year. I did a post a couple of years ago about Thanksgiving cake balls, which we make every year. But I wanted to kick them up a notch this year, and turn them into something  more fun and eye catching.


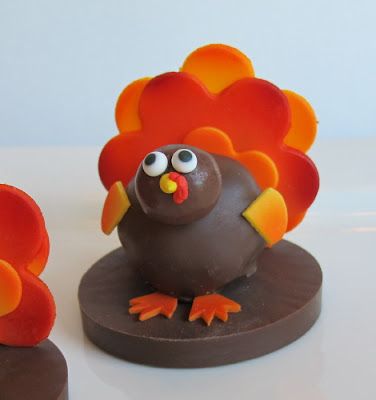
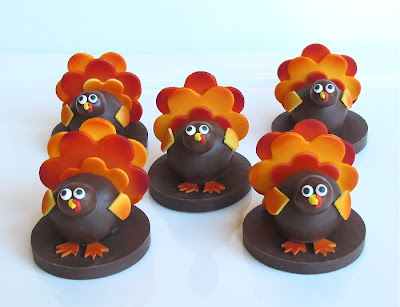
And here is what I came up with:


Tee hee hee.


They tickle me pink. Well, they tickle me orange and yellow, anyway.


Here is how you make ’em:


You will need Whopper candies and your dipped cake balls in the flavor of your choice.


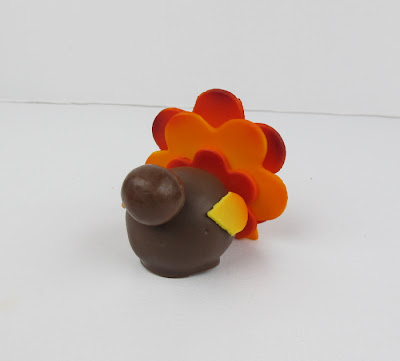
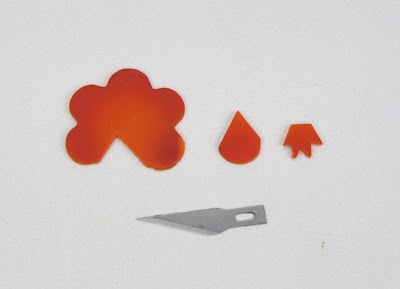
Cut the fondant  “feathers” by  using 3 sizes of blossom cutters. See the brown ones? Ignore those. I decided later that I did not like the brown feathers so I  left them off.


If you like, hit the edges of them with some airbrush color to make them pop and give them dimension.


To make the little front wings,  cut two petals out of a blossom with an exacto knife.


Attach a whopper for his head, 3 blossoms for his fan of feathers, and his side wings with melted chocolate.


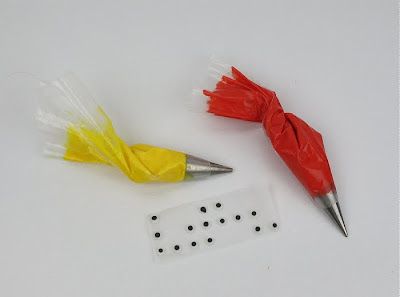
Attach candy googly eyes, and pipe his beak and that jiggly red thing with royal icing.


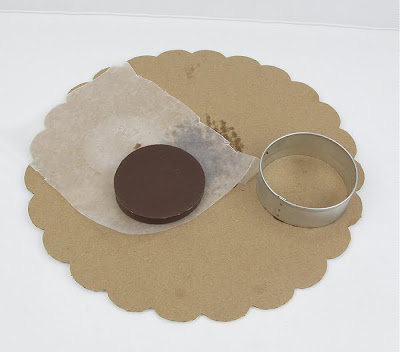
To make the base he is standing on, pour some melted chocolate into a round cookie cutter that has some wax or parchment paper under it.


Pop it into the freezer until fully firm and release it from the cutter.


Use two more petals cut and carved out with a knife to make his feet.


Attach the turkey and his feet with chocolate to the base.


SO STINKIN ‘CUTE!


What you lookin’ at Willis?


I simply adore these turkey cake balls. I can see them sitting on top of a bread plate at each place setting on the Thanksgiving dining table.  Your guests will simply go nuts over them, and you will get rave reviews for being such a clever confectionery creator.

;

I hope you try them out!


Happy turkey-ing,
Sharon
www.sugaredproductions.com


PS. You can learn how to make perfect cake balls step by step in our online school.


Have Your Pie and Eat It Too

November 7, 2011 by Sharon Zambito 8 Comments

Thanksgiving means one thing to everyone I am sure:


Pumpkin Pie!


I love all things pumpkin flavored: muffins, breads, shakes, martinis (oops, did I admit that?)…. except for one thing….. pie. I just do not care for it for some reason. But I cannot imagine having a Thanksgiving spread without that iconic pie on the table. So I thought I would try to have the best of both worlds this year, and maybe even play a little trickery on my unsuspecting family at the same time. (devilish  grin)


Oh that beautiful symbol of fall, gratitude, good food, and precious time with family and friends…..
 

Let’s make ours!


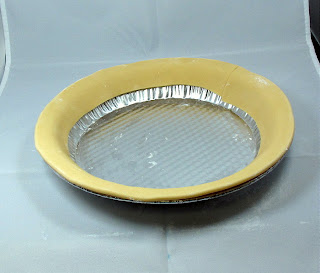
Start with a pie tin and line the edge with a strip of ivory fondant. Use some shortening to glue it on or it will not stay in place.


Flute the edges with  your fingers just as you would do a regular pie crust.


Airbrush color gives this “pie” its magic. A little yellow base coat, then followed by ivory (which comes out light brown for some reason). If you do not have an airbrush you can use the color mists in the can as well.


After the crust is dry, then add a layer of pumpkin cake. You can split and fill the cake if you want, but it is a pretty short layer, so I find the icing on the top to be enough for me.


Ice the  top of the cake with colored icing. I used orange, brown and a little red to get this color. Some pumpkin pies are more brown, and others more orange, so go for the look you like. Sprinkle some cinnamon on top of the icing. If you get big clumps like you see in this photo, just spread it out with your spatula, let the icing crust, and then smooth it out with your Viva paper  towel.


A little bit more airbrushing on the top. I used a combo of yellow and ivory to give it that  yummy custard-y baked look.


How about some mini meringue “pies” on the side ? (wink wink)


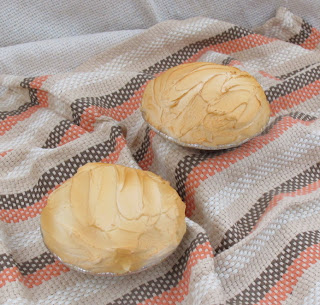
Follow the same process using mini pie shells. Pile on white icing  with a spatula and hit it with a light coat of ivory airbrush color.


They have that beautiful just baked meringue look.


Mmmmm.


Watch your guests’ faces as they cut into this pie and find out your secret surprise! (You might want to bring along a real pumpkin pie as back up, just in case. You don’t want an angry crowd caused by being deprived of pumpkin pie at Thanksgiving.)


This cake was SO easy and fast to do. You can make several and trick all of your neighbors we well. And your coworkers and boss. And the kids’ teachers. The fun could go one for weeks!


Here is an easy pumpkin cake recipe I used. It is super moist and yummy:


Ingredients

  • 1 (18.25 ounce) package spice cake mix
  •  3 eggs
  • 1/3 vegetable oil
  • 1 (15 ounce) can pumpkin puree
  • 1  TBS pumpkin pie spice
  • 1/3 cup white sugar

Directions

  • Combine everything in mixer at speed two until combined. Pour into prepared pan and bake at 325 until  done.
  • Cool completely. Level off the top, put the scraps in a ziplock bag, and hide them in your office so no one else can get to them.
  • Split layer into the height needed to fill your pie pan.


I really hope you guys give this fun cake a try and send me photos so I can post them!

Happy caking!
Sharon
www.sugaredproductions.com


Give-Away Winners!

October 31, 2011 by Sharon Zambito Leave a Comment


Hello everybody!
 
Thanks to you all who have purchased your Flowers DVDs  on pre-order!
 
The duplicator is supposed to have them to me by November 5th, and we will ship them out as soon as we receive them.  All of the orders are boxed up and just waiting for the DVDs to be added and mailed. We thank you so very much for your patience; we know you are anxious to get them. And we are eager to get them to you!


By random draw, the three tote bag winners are:
 
Deb Werner
 
Dawn Beckley
 
Grace Hanson
 
Your tote bags will added to your pre-order shipments. Congratulations!!


And the winner by random draw from the sunflower tutorial post is:  
 
Rita Greer 
Rita please email us to claim your prize.


 Stay tuned as we will have another contest soon.
 
Thank you all for business!!
 
I hope you all enjoy  your Halloween festivities tonight. Then it is time for us to go right into Thanksgiving preparations! I have a few great blog posts coming up in the Turkey Day theme, so stay tuned!
 
 
Happy caking,
Sharon
www.sugaredproductions.com


Easy Halloween Cupcakes

October 25, 2011 by Sharon Zambito 19 Comments

Halloween is almost here!
Are you ready? No?
Well I am here to help!


This post is for all you procrastinators out there. And I say this with the utmost love and respect. For I am a champion, card carrying, flag waving procrastinator. I even joined a support group, but it hasn’t been much help:

I feel your pain. You had all these great delusions of grandeur of all the amazing treats you were going to make for Halloween. Maybe a haunted gingerbread house. Or a topsy turvy Tim Burton style. Or a batch of fabulously custom decorated cookies. You had it all planned in your head. You laid awake at night with excitement thinking of the joy you were going to experience while creating your incredible Halloween confections.


And here we are, just a few days before Halloween and…… nothing….. nada…… crickets. Where did the time go? What will we do? The kids are looking up at you with those sad longing eyes, asking what you will be making for their class or neighborhood party. Crikey! Why did we wait so long? Your heart starts to race; sweat forms on your brow; the room is going white. Pure unadulterated panic.

Raise your hand if you are with me so far. I have been in this situation more times than I count.

Well, have no fear. Queen Procrastinator is here to help you.

Oops wrong queen. I will fix that. Later.


So let me share with you these super duper easy Halloween cupcakes that you can whip out in no time, but still impress even the most discerning goblins and ghouls.

Ghosts and skeletons and graveyards, oh my!


Let’s start with the standing skeleton:


You will need white chocolate covered pretzels, sucker sticks, and marshmallows.


Draw a face on the flat side of a marshmallow that has been cut in half with an edible food marker. Three of the pretzels need to be glued to the sucker stick with some melted chocolate to make the rib cage.


And that was the tricky part. I spent a good 20 minutes trying to get those finicky pretzels to line up correctly on the sucker stick without flopping over or getting out of alignment. I found the above method worked the best. I used gravity to hold the back edges of the pretzels onto the stick while the chocolate hardened. Worked great and was very easy.


You use another pretzel cut as shown above to make the arms. You use the piece on the left, and eat the piece on the right. It’s a win/win for everybody.


After you pipe your icing swirl, just stick the sucker stuck in and lay the arm bones into the holes of the upper rib cage pretzel. Done. Fast. Easy. Cute. ( I must give credit to Woman’s Day for this idea. I saw it online and copied it.)


Now to the spooky graveyards:


I found these adorable sugar skulls at Wal Mart In the Wilton isle.


They appear to me to be gumpaste, and they were a very nice shape with good details.


To kick them up a notch, bring out a couple of brown petal dusts and give them a roughing up.


That took all of about 30 seconds, and they look awesome!


To make the tombstone, just cut a rectangular piece of fondant (with tylose added) and impress the RIP with your favorite alphabet cutters.   The cute cupcake wrappers were also made by Wilton.


Once the tombstones dry, hit them with a little luster dust. Pipe a swirl onto your cupcake, and slap a tombstone and skull on top. Done. How easy was that?


Crazy easy ghosts:


A Dum Dum lollipop.


Drape a circle of white fondant over it.


Add two eyes made from either fondant or your edible ink pen. Stick into cupcake icing. Woooooooo.


And you are done!


Group shot!


Cuteness overload.


Tread only if you dare!


He is a happy little fellow.


I don’t know what came over me. I lost my head.


And you saved the day! You have created this wonderful spread of amazing cupcakes, and it was fast and easy. You can take convenient pre-made products, do a little doctoring, and turn them into a custom made and impressive result:

HAPPY HALLOWEEN EVERYBODY!


Happy baking,
Sharon
Visit the SugarEd Online School

Two New Flower DVDs!

October 22, 2011 by Sharon Zambito 1 Comment


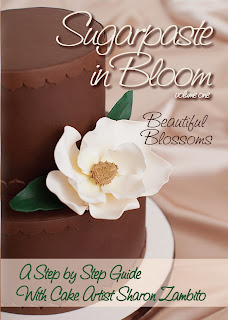
Sugarpaste in Bloom
Volumes 1 and 2


We have two brand new DVDS on the horizon for you!
 
Sugarpaste in Bloom  Volume 1  
Beautiful Blossoms
 
 
Learn all the basic techniques needed to make gorgeous sugar flowers, while applying those techniques to the 6 flowers taught in this DVD. Once you learn these techniques, you can apply them to making any kind of flower you desire.
 

Magnolia


Diva Flower


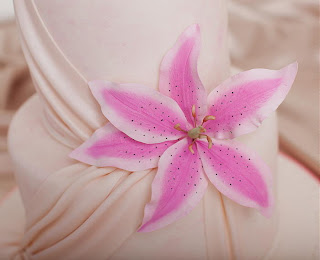
Small Pink Lily


Large Pink Lily


Large Stargazer


Small Stargazer


Tiger Lily


Small Yellow Lily


Casablanca Lily


Daisy and Sunflower


Sunflower


Daisy


Daisies


See a video preview here:


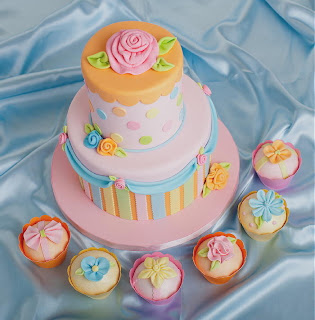
Sugarpaste in Bloom Volume 2 
Fantasy Flowers
 
 
Learn 11 fantasy flowers that will add a 
custom touch to all of your cakes.


Fantasy Rose


Bermuda Bling


Lacy Flower


Ribbon Rose Topper


Ribbon Roses and Pinch Flowers


7 Petal Pinch Flower


Carnation Pinch Flower


4 Petal Pinch Flower


Bow Tie Pinch Flower


3 Petal Pinch Flower


5 Point Star Pinch Flower


  Stenciled Flower


See a video clip here:


SPECIAL PURCHASE: 
 
Purchase both DVDs and get a $13 savings plus a
FREE BLOSSOM CUTTER used in the DVD.
 
DETAILS HERE


 And a Give-away!


All orders placed by October 28, 2011 will be entered into a drawing for three of these great logo tote bags:

BOTH OFFERS EXPIRE  10/28/11
 
 
We thank you for your business!
 
www.sugaredproductions.com


Halloween Marshmallow Pops

October 13, 2011 by Sharon Zambito 24 Comments

Boo!


Did I scare ya?


Probably not, as you intentionally logged onto this post. 🙂


Monster Marshmallow Pops Tutorial


One of my very favorite holidays is upon us. Halloween is a confectioner’s dream, as it provides an opportunity to make some of the cutest tasty treats evah. Let me share with you some I made this week. These were a lot of fun, and not very difficult nor time consuming. They get extra points for that!


Halloween marshmallow pops

Meet Broomelda and Franque. (He is French).


Initial supplies used to make our cozy candy couple include yellow candy melts, green oil based candy color, marshmallows and sucker sticks. I highly recommend Merkens brand melts for optimum dipping performance. In this case I used the campfire roasting marshmallows. Have you seen those things? They are hugantic! They are as big as…..as ……as a giant marshmallow! I also suggest using the thicker sucker sticks, as these bad boys are heavy once they are done.


Big bowl of green melty chocolate.


Other supplies used will be these candies and pre-made googly eyes, that you can get at most cake decorating places.


For Broomelda, we have to cut angles off each side of the gargantu-mallow. Run your knife under hot water, and dry it off before each cut. This will make the cutting of the freakishly large marshmallow much easier.


Stick and dip. Place on wax paper to dry fully.


Let’s do Franque first:

Cut out a circle of black fondant and cut out notches along the outer edge. Do not cut them evenly or symmetrically. Franque does not have the most couture coif I have ever seen. Just sayin’.


Lay the toupee over his head and just press down all around the sides. (Hint: use shortening as your glue. Trust me. You will thank me for this later.) Glue on his googly eyes with melted chocolate. Cut a white Good & Plenty in half and glue in place for his bolts. Give the rest of the box to hubby because he loves those nasty candies. Oh wait, that is my hubby. Ignore that. Next use a paintbrush to drop a dollop of the same green chocolate on his handsome face to make a nose.


Next we need to bring out the big guns. OK just one small gun. Anyway, get your clay gun out, and using the smallest size circle disc, extrude a string of black fondant. Use that to make eyebrows and mouth. Again, using shortening on his face as glue will save you many bad words. And if you just cannot help yourself (like me), use silver luster dust mixed with vodka to paint his bolts. An edible marker (not shown) can be used to make his scar.

You mad confectionery scientists will have
created a marshmallow monster!


MWAHAHAHA!

Now on to Broomelda:


Marshmallow pops


As with all ladies, we need to spend some time on the hair. Use your clay gun with the largest muti hole disc.


Extrude a length of purple fondant and apply to the side of her head.


Repeat process on each side until her head is covered.


Cut a few short pieces to make her bangs. The bob is very in this season in the witch world.


Now to make her face. Clay gun string again for the brows and mouth. Half of the green Mike and Ike candy for the nose. (Keep that box cuz we like those.) Another pair of google eyes.


Well hello my pretty!


To make the pointy part of her hat, start with a ball of black fondant.


Roll it into a cone shape initially, and then continue to elongate and shape it into a witch hat shape.


A circle of black fondant laid on her head, and then the cone part of the hat is attached to the top of that. A couple of purple clay gun strings will create a perfect hat band.


marshmallow pops

 And they are done!


marshmallow pops

Franque: Hey good lookin’. You want to go for a drink?
Broomelda: Why yes, thank you. I will have a Bloody Mary.


marshmallow pops

Double date!


Happy Halloween everybody! Send me pics if you make these and I will post them on Facebook. Please tell all your friends to like our Facebook page.

Sharon
Sugared Productions Online School

visit our online school


Basic Buttercream Class

October 7, 2011 by Sharon Zambito 10 Comments


Hello Sugar Friends!

A couple of months ago my BFF, right arm, crazy talented cake artist, and all around superwoman, Wendy, hosted a  basic buttercream class at her shop. It was a wild two days of flying powdered sugar, flinging icing, bench scrapering, smoothing, and all around good clean fun.  I would love to share some photos with you of this rip roaring event!


(You can click on the photos to view them larger)
 
 
Here are all the stations set up and the eager students ready to hang on my every word. OK, maybe not that last part, but they were ready to get started.


First we learned how to make smooth as silk and totally airless icing in both the 5 quart and 6 quart mixer.


Here is the mixer beating the 5 quart bowl full of icing into airless submission.


Take a look at THAT! Not. One. Air. Bubble.


Next Wendy showed us how to make a big ole batch in the 6 quart mixer.


Serious students scribing scintillating synopses.
 
(OK, I admit I had to use the thesaurus for that one.)


Each student then went back to their stations to make their own batch of icing. You have to do it to really get the feel for it.
 
 
Then it was time to fill the cakes.


Here is a student’s filled cake waiting to be iced. No cake dummies in our classes; always real cake!


Pipe the dam.


Fill ‘er up.


Ice that puppy.


Work that top edge.


Students’ turn!


Melissa’s finished cake. Wowee girl!


Day two. Oh yay, we get to ice square cakes now! And first thing in the morning, too. Whose bright idea was that? Oh yeah, mine.


Ice the sides.


Smooth with bench scraper.


Make those corners so sharp you have to register them as a lethal weapon.


Scrape, scrape, scrape.


Never saw a camera lens I do not like.


My finished demo cake.


Beautiful Donna working her magic.


Bridgette getting her smooth on.


Nikole admiring her kick butt corners.


Deneise is workin’ it baby!


Wendy, Melissa, and me.


Wendy, Mimi, and me. No, I am not pregnant despite how this photo looks.


Mitzi in the smoothing zone.


Candi. The most perfectionist student I have ever had. And her work shows it.


Lovely Dee.


Mattie is as sweet as her cakes.


This is Kim. She is my number one student. She has attended every single local class I have given since the beginning of the universe. She is a total sweetie and a fabulous cake artist as well.


Here is me pretending to show the talented Myrtis something important. No really, it was important. Whatever it was.


This is the only picture I have of Heather. Sorry Heather. Heather looks like Leah Remini. Gorgeous.


Leticia making her icing.


This is Lauri. She was at the buttercream class, but I don’t have a photo of her. So I used this one from the topsy turvy class instead 🙂


Oh yeah, we have fun. And lots of it!


Melissa’s square cake. Ouch!


As if all of that was not enough, we then did a little lagniappe. (Bonus stuff.) Some good old fashioned piping.


And stenciling on buttercream. Yes, red on white buttercream! Do not fear.
Wait for it…..


Wait for it…….


Ta dah!!


And a few lagniappe things on the round cake as well. Impression mats, some airbrushing and my custom top border.
 
 
So that was it! Two jam packed days full of buttercream fun. We were pooped but happy.


And then……
 
(Cue the Jaws music)
 
da  nutt 


da nutt


da nutt   da nutt     da nutt


AHHHHHHHHH!!!


OH NO!!!!!!!!!!!!!!!


IT’S SO SCARY!


 The dreaded blow out! Ruined my cake!!


Heck no, I was not going to let a blow out ruin my cake! And this was a great opportunity to show the students how to repair one. The reason why I got this blow out was because I  had iced my cake the day before right after I unwrapped it from plastic wrap. I did not take the time to let the condensation dry off the sides. Moisture is a main factor in the development of blow outs. So let’s fix it.


Take your exacto knife or palette knife and surgically remove the blown out icing.


As you start to cut it away, you will be able to see in there where the icing is no longer touching the sides of the cake. Keep carving all of that away until you get the entire area of non adhered icing off the cake. Then let that air dry out for 20-30 minutes in the A/C.


Lawsy that sucker was big!


Then I fill in the opening by piping buttercream in with a large round tip or the open coupler. (not shown).


            Then gently smooth that out with a hot palette knife or small spatula.


Let the patch crust well, and then come back with a small piece of smooth food safe paper, and smooth it with your spatula or palette knife over the paper, only over the patch. Do not put pressure on the rest of the impressed pattern. Then let it crust for a while longer before you finish the impression.


It is hard to see in this photo, but I have  a small portion of an impression mat in my hands. (I have an extra mat or two that I cut  up for this purpose.) Match up the pattern and then impress the patch. Just be careful, and you will have a seamless matching of the pattern.
 
 
Then I piped  the missing little crosses on the sides.
 

                                        Before.


After.


You can do it!!


And they all lived happily ever after in buttercream land. 

You can learn all of these buttercream smoothing techniques and more in the   Perfecting the Art of Buttercream DVD.

You can learn how to make airlessly smooth 
icing in the Back to Basics DVD.  

Happy caking!
Sharon


Long Time No Talk

September 29, 2011 by Sharon Zambito 2 Comments

Hello Sugar Friends!
 
 
I have missed you all so much! I apologize for neglecting  the blog these last few months. We have had so much stuff going on behind the scenes at SugarEd, (and some of them unexpected  and rather complicated), that it has taken all my time and attention.  We have filmed (and are presently editing) our two new gumpaste flower DVDs. We have rebuilt the entire website and shopping cart for better performance on both ends. We are now able to process credit card orders directly on the website. You can still use Paypal to checkout if you choose to do so. We are also planning a  big website expansion that will include a lot more goodies for you. We are brainstorming and developing that as we speak!
 
I thank you for your patience as we work on all of these projects, so that we can continue to provide you with the best service and products we can produce.
 
I will have another blog post for you in a few days. In the mean time, please enjoy these fabulous cakes submitted by our readers:


 This stunning topsy turvy was made by  Karen in Australia for her son’s 21st birthday. Perfection!


This sassy fish cake was made by Mari in Florida.  Love it!


Katherine C made this buttercream beauty. Can you believe she has only been decorating for one year?  Unbelievable!


Lucy made this wonderful version of the Sweet Luxuries cake. Bravo!


Esther S shows her mastery of image transfers with her cute Cuban drummer. Maybe that is Ricky Ricardo? ( Love Ricky!)


Jaycee made this beauty as a 10th anniversary gift from a husband to his wife. Now that is flawless fondant!


———————————————————


Gorgeous work guys!  Feel free to submit your sugar art, recipes, tips and questions to this email address. You might get it published on the blog or newsletter.
 
 
Thanks again everybody! I will see you in a  few days with a post about our last buttercream basics class. I will show you how I repaired a HUGE blowout!
 
Happy caking!
Sharon
 
www.sugaredproductions.com


Sunflower Grad Cake

May 24, 2011 by Sharon Zambito 106 Comments

Graduation season is here! Are you guys making a lot of grad cakes right  now? I had the opportunity last week to make a cake for my son’s best friend. She is a very sweet girl, and I was happy to make it for her. I included the elements in the cake that she requested: the colors of red and black, a sunflower (her favorite flower), and paw prints to represent her desire to open her own small animal care business. And of course we had to include the grad cap and tassel to represent her school. (Instructions on how to make the cap and tassel can be found  in our Book Smarts DVD.)
I took some photos of the process I used while making the sunflower and thought you might like to see them, so here we go:

I used yellow gumpaste (Wilton premade works very well) to cut out two of the sunflower shapes.

Putting the petal on my cel pad, I used my ball tool to thin the cornstarch dusted petals. I put most of the pressure on the middle of the petals, because sunflower  petals are a little bit wider in the middle than they are on the two ends. I avoided thinning too much where the petals join the center portion, because sunflowers (and daisies) are notorious for breaking in that vulnerable spot.

After the thinning was done, I used the veining tool to add some vertical lines to the inside of the petals.

The flower was  placed into a cupped former lined with foil. I pinched the tips of the petals to give them  some movement and make them more life-like. Petals were propped with paper toweling in a random pattern to give the petals a natural look.
I repeated the exact same process with the second layer, but I did not glue the two pieces together. The reason for this is because I wanted them to dry in the proper shape together, but I needed to be able to  separate the pieces later for dusting.
In order to speed up the process of drying, I placed them into my dehydrator. (I made two flowers; I always make extra for breakage.)
This is Bessy. She may be old, she may be ratty and held together with masking tape, but she is a faithful and loyal friend who always gets the job done. She is a Nesco food dehydrator that I got at Walmart years ago for about $35. I use her constantly for so many items. I could not live without her. If you invest in one, I recommend that you get one with a temperate regulator. Always use the coolest temperature setting so that your items do not melt.
After the flower was fully dry, it was time to dust. The best part!  Dusting the flower just makes it come to life, and is so much fun! My dusting process was as follows: The entire flower got a light dusting with buttercup yellow. The lower portion of the petals were dusted with a combo of sunflower and pumpkin. The centers of the petals were hit with some daffodil yellow. The tips also got a little bit of the sunflower color. Then the entire flower got a very very light dusting with yellow luster dust, just to brighten it up a bit.
Remember  that I said this type of flower is known for petal breakage? Yep, happens almost every time! ACK! Here you see a petal glued back on with just a little bit of melted white chocolate. The break was low enough on the petal that it will be covered by the center once applied.
I used a silicone push mold to make the center. Brown gumpaste was pushed into the mold, and popped right out. So easy it feels like cheating.
A little bit of dark brown petal dust was applied to the center. Then I brushed the center with just a little bit of  shortening to give it a little sheen and wake it up. We don’t want a sleepy sunflower! 🙂
Now onto the cake for a minute:
I wanted extra height on the cake tiers, so that the sunflower and stem would be in the correct proportion. We did not need any more extra servings of cake, so I increased the height by using fomecore under the tiers. I used  pieces of  1/2 inch  fomecore taped together, and then covered that with Glad Press and Seal.
I used three pieces of fomecore for the lower tier, and 2 pieces for the upper tier. Then I proceeded to ice and stack  per my normal techniques. (You can learn my technique for smooth icing and stacking in our DVDs available here.)
The finished flower was then attached to the side of the cake with a little bit of melted chocolate. Ta da!! Isn’t it pretty! I love how the yellow pops against the red and black.
And the finished cake. Nicole was thrilled with it, and I was very happy that she was happy.
We will be shooting our next DVD in a few weeks. The topic will be gumpaste and fondant flowers. Do you think we should include this sunflower in the DVD? Leave a comment here and tell me what you think, and you will be entered into a drawing to win a free flower DVD when it is released in the fall. Woo Hoo! Free stuff!
Happy caking everyone!
Sharon
http://www.sugaredproductions.com/
  • « Previous Page
  • 1
  • …
  • 6
  • 7
  • 8
  • 9
  • 10
  • …
  • 25
  • Next Page »

Sharon Zambito

Sharon Zambito

An RN turned SAHM turned cake maniac. Owner of SugarEd Productions Online School. Join me for some caking, baking, and all around sweet fun :)

Follow me..

  • Facebook
  • Instagram
  • Pinterest
  • YouTube

Pinterest

  • Autumn House Two Trees Machine Embroidery Design – Blasto Stitch
    Autumn House Two Trees Machine Embroidery Design – Blasto Stitch
  • Embroider  Sew :: Jelly Roll Purses - Embroidery Garden In the Hoop Machine Embroidery Designs
    Embroider Sew :: Jelly Roll Purses - Embroidery Garden In the Hoop Machine Embroidery Designs
  • (1) How to QUICKLY & SAFELY remove acrylic, gel, and dip powder polish | BAGGY METHOD - SO EASY! - YouTube
    (1) How to QUICKLY & SAFELY remove acrylic, gel, and dip powder polish | BAGGY METHOD - SO EASY! - YouTube
  • (1) Bouffant Surgical Cap - YouTube
    (1) Bouffant Surgical Cap - YouTube
Follow Me on Pinterest

Follow Me on Instagram

Instagram requires authorization to view a user profile. Use autorized account in widget settings

Recent Posts

  • Egg Safety Basics
  • Stable Mabel Support System Sale
  • Guest Post : 4 Vegan Cake Recipes No One Should Miss Out On!

Popular Posts

  • Ways To Make Your Cake Fluffy And Moist
  • How To Stencil on Cookies with Royal Icing
  • Doctored Cake Mix Recipes
  • Transferring an Image Without a Projector
  • All About Buttercream!
  • How to Fix Broken Ganache
  • Edible vs Non Toxic Gold Dusts

Categories

Search

Archives

Copyright © 2025 · Sharon Zambito and SugarEd Productions,LLC

Copyright © 2025 · Evangeline Theme on Genesis Framework · WordPress · Log in