Sugared Productions Blog

  • Blog Home
    • Home
  • Online Classes
  • Shop
  • Contact
  • About

Follow the Yellow Brick Road

November 19, 2008 by Sharon Zambito 30 Comments

What a great movie. Brings back such good childhood memories of watching it on TV with my big sisters. Last weekend I made a cake with the Wizard of Oz theme. I was cruising the photo gallery on Cake Central and saw one using a sheet cake as the yellow brick road and got my inspiration from that wonderful cake. I took some photos of it in progress to share with you some of the techniques I used.
Taylor’s Wizard of Oz cake.
I made a paper template of the shape I wanted the cake to be and used that to cut the shape from a 12×16 sheet cake.
Then it was filled and crumb coated.
I wanted to show you guys how airless my icing is. This batch was made 3 days ahead of time, covered in plastic wrap on the surface, and kept in a plastic container at room temp. (If you want to see a clip of me making my icing, look here.)

The fondant was colored yellow and a some powdered tylose was added to help it firm up. I rolled it out and then used my brick impression mat over it. I used the same paper template that I cut the cake with to cut out the fondant. I let it sit there for a good 20 minutes or so to firm up, so that when I transferred it to the cake it would not stretch or distort.


Top piece applied to the cake.
I then cut a long strip of fondant (long enough to go around entire cake) and rolled it up bandage style.

The sides of the cake were dampened with water, and the bandage unrolled around the cake and smoothed in place. I then trimmed it level with the top of the “bricks” with an exacto knife.


I applied pieces of green fondant around the perimeter of the road to make grass. I made a seam in the front that would later be covered by flowers. I put a 21 star tip on my finger (much like a thimble) and stippled the entire surface of the green fondant to mimic grass.


The rainbow was an edible icing sheet that was put on fondant and allowed to dry firm for a few days. That was attached to the back of the cake with some melted chocolate.
The lollipops were made ahead also, and sucker sticks glued to the back. I stuck the sucker sticks down into the fondant and secured them in place with melted chocolate. I propped them in place until the chocolate firmed up.
After they were secure, I covered the chocolate with a little more “grass”.
The shoes were white chocolate tinted red and made in a 3D mold. Here they are right out of the mold.
I cleaned up the seams, added a fondant bow and painted them with piping gel.
A skewer in the bottom let me rotate them without messing them up with my hands as I sprinkled red disco dust all over them. (Be advised that while disco dust is non toxic, it is not truly considered food safe.)
The ruby slippers. I’ll get them, my pretty!
I’m meltiiiiiingggg…..
The hat and broom were hand modeled from fondant. A little puddle of green royal icing serves as the melted wicked witch. (She scared the bejeebers out of me…..you?)

I had a good time making this cake. None of the techniques are particularly difficult, just a little time consuming. I hope you have a chance to try it one day! Send me a pic if you do!

Happy Caking!
Sharon
http://www.sugaredproductions.com/

Here Comes Santa Claus!

November 12, 2008 by Sharon Zambito 14 Comments

WOW. PERIOD.
That just about sums up the class we hosted with Bronwen Weber last Sunday. She and her crew came and taught the 3D Standing Santa to 34 very eager students. They brought all the supplies and tools; all we had to do was show up. And each and every one of us left with a completed Santa cake. Very cool.
Bronwen and her assistants Heather and Francois (who is also her new hubby). All 3 of them were super nice, fun and helpful. Bronwen is total kick in the pants fun. Very positive, encouraging, relaxed and a great teacher.
The Santa starts with a skeleton of PVC piping screwed into the base board. Arms and legs are formed with modeling chocolate.
We all went up to her demo table to see each technique and then went back to our seats to do it ourselves. We had immediate assistance if we needed it.

Wendy and I were goofing off here. Santa’s belly is cake supported by an acrylic plate.


Students busy at work.

A little army of Santas in the making.


Wendy kneading her fondant.

Working on my guy’s coat. Of all the techniques, I found the coat pieces to be the hardest to do .
Silly girls.
Bronwen showed us 2 ways to do the face. The one on the left would be the sculpted realistic face, but it is not complete. In addition, his mouth is all messed up from Bronwen getting goofy with him , but you get the general idea. The one on the right is the more cartoonish, and easier face, as there is no real sculpting involved. I chose the easier one, mostly because I wanted the cartoonishface for the kids, but I would like to try the sculpted face one day.
This is Bronwen’s Santa, with just the trim on his hat brim missing. Awesome huh?
Me, Bronwen, and my Santa. He is still wet from his vodka bath in this photo.

My Santa before his vodka bath. I still have to do a few finishing trim touches to him , and when I do, I will post some good shots of him.


I think he looks cute! I was thrilled with my cake. I never thought I could make a cake like this. I learned so many great new techniques I can apply to other cakes. It was a fabulous class and we will be hosting her here back again next year.

Gotta give a shout out to my hubby for getting us the big conference room at his place of work. Thanks Hun! And thank you to all of the students who attended and made it a great success!


Deedra’s Santa flew coach home! She said everyone on the plane went nuts over him and the pilot took a picture of him!

If you guys ever get a chance to take class with her, do it. Just do it.


Happy Holiday Caking Ya’ll!

Sharon
http://www.sugaredproductions.com/


Iced Pumpkin Cookies

November 7, 2008 by Sharon Zambito 14 Comments

I saw these cookies on a wonderful blog, The Repressed Pastry Chef, and knew I had to make them soon. So, in my quest to procrastinate from doing my cake prep last night, I figured that was the perfect time to make them. J and I both love pumpkin, and he likes to bake, so we made these together.


I am taking a little break from caking right now to eat my dinner, so I figured I would make a little blog entry on them for you guys. It gave me another chance to practice my photography, but I am not sure if I like these pictures are not. (I am always open to suggestions from you photography buffs, BTW.)


Iced Pumpkin Cookies

Ingredients

1 cup shortening
1 cup granulated sugar
1 cup canned pumpkin
1 egg
1 teaspoon baking soda
3/4 teaspoon ground cinnamon
1/2 teaspoon ground nutmeg
1/2 teaspoon salt
2 cups all-purpose flour
3 tablespoons butter
4 tablespoons milk
1 cup confectioners’ sugar
3/4 teaspoon vanilla extract
1/2 cup packed brown sugar


Method

Preheat oven to 350°F, line cookie sheet with silicone mat
Cream shortening, granulated sugar and pumpkin. Add egg and mix well. Add the baking soda, ground cinnamon, nutmeg, salt and flour and mix well. Using a small-to-medium sized disher (cookie scoop) or generous tablespoon, scoop batter onto cookie sheet. Using a wet finger, smooth points/peaks and gently press down tops. Bake 15-18 minutes then remove from oven and transfer to cooling rack and cool about 10-15 minutes before icing. To Make Icing: Cook butter, milk, and brown sugar until dissolved. Cool and add confectioners’ sugar and vanilla. Place a sheet of waxed paper under the cooling rack, take the cooled cookies and holding one at a time dip upside down into the icing, invert and place on cooling rack. Decorate with sprinkles while icing is still wet.


I made some a little larger than others, and I liked those better, as they were more moist. I liked them even better the next day, as they softened up a little. These are seriously dangerous to have around. They are very soft, cake-like and almost melt in your mouth. Very quick and easy to make too. Hope you try them!

OK, back to work for me! Have a great weekend!
Sharon
www.sugaredproductions.com

Brotherly Love

November 5, 2008 by Sharon Zambito 11 Comments

Family. Ya gotta love ’em. What would we do without them?
I was blessed (or sentenced, depending upon how look at it, LOL) to be born into a large family, the last of 5 siblings. The age gap between my older siblings and I was large enough that they really were too old to be my playmates. In fact, I think I was more an object for their entertainment by harassing and torturing me for their own evil pleasure. All of them but my brother Michael. He was never mean to me. He never stung me with rubber bands, beat up my teddy bear, or forced me to look at skeleton pictures. He never scared me with a vampire face, or tricked me by wrapping rocks to look like candy just to see me cry from disappointment. He never talked on the phone late at night when I was trying to sleep, pulled me off the desk chair to do “college work”, or eat all the fresh cherries at the beach so I got none. Nope, not Mike. (You others know who you are and what you have done. I wonder how you sleep at night.) Michael does not have a mean bone in his body. I don’t think I have ever heard him utter a cross word. He taught me to play chess, did word Jumble puzzles with me, and took me on vacation to the Grand Canyon. He is the most gentle, kind and selfless person I know.
Left to right: John, Mike, Janice, Barbara, and me.

And he’s good to me still to this day. Whenever my PC gets all bogged down with junk and viruses, and starts to run badly, I can always take it in to him for a full clean out and tune up. He gets it running fast and clean for me again. Just like he did this week. So how do I thank him for his help? By doing the only thing I know how to do: bake!

Mike can’t have sugar, so I make him sugar free cakes. Gives me a chance to try out some new recipes. He seems to like anything though; he is not picky.


This recipe I had saved on my PC, and I do not know the source to give credit. The cake was a tad dry to me, but I may have baked it a little bit too long. I would advise to take it out the oven before the toothpick comes out fully clean to prevent over baking. The icing was delicious. Squirt-the-piping-bag-right-into-your-mouth delicious. And yes, I did do that. 3 times. But not until I was finished with the cake.

Sugar-free Chocolate Cake

2 cups flour
1½ cups Splenda (granular no calorie sweetener)
3/4-cup non-dairy creamer powder
¼ tsp salt
1 ¼ tsp baking soda
½ cup + 2 Tbsp cocoa
¾ cup applesauce or vegetable oil
1 cup + 2 Tbsp milk
2 tsp baking powder
3 eggs
1 ½ tsp vanilla

Measure the dry ingredients into a bowl reserving ¼ cup Splenda. In another bowl mix the applesauce (or substitute ¾ cup vegetable oil),Milk, vanilla, and 3 egg yolks. Beat the egg whites until fluffy, slowly adding the remaining ¼ cup of Splenda. Whisk together the dry ingredients with the liquid making a smooth batter. Beat for 2 minutes until color lightens. Then fold in the egg whites. Bake in two greased and floured 8 –inch cake pans, at 350 degrees about 20 – 30 minutes. When Baking with Splenda, products bake quicker so test to see when cake springs back or when a toothpick comes out clean. They also do not rise very much. Each layer was about 1-1.5 inches tall, so I torted them and filled.

Sugar-free Chocolate Frosting

1 Large box Vanilla or chocolate instant sugar free Jell-O pudding mix
1-cup low fat milk
2 cups heavy cream

In a mixing bowl pour the milk. Measure out the heavy cream and open the pudding box. Quickly pour the pudding into the milk beating just until absorbed, add the heavy cream and continue to beat until light and fluffy.(I doubled this recipe to fill and ice my cake as shown.)
It made a nice cake and I would make it again. Janice is the real sugar free baker in the family. She doesn’t know it yet, but I am going to recruit her to contribute to my blog when she tries out all her new recipes. It’s the least she can do after all that childhood misery she caused me. I know how much I love sweets and cannot imagine not being able to have them because of dietary restrictions. So from time to time I will post some sugar free recipes.
What mean things did your sibs do to you?
Happy Baking!
Sharon,
http://www.sugaredproductions.com/

Trick or Treat!

October 31, 2008 by Sharon Zambito 18 Comments

Happy Halloween everyone!

Hope you have a wonderful day with your kids and families. Don’t get sick eating too much of their candy like I always do!

My sister Barbara, who has never decorated a cake in her life, came over for me to help her make a cake for her office Halloween goody contest. She has been a huge help to me with SugarEd over the last year, and has come with me to several of my demos and vendor shows, so she has been exposed to a lot this last year. (Some of you have met her! I also have another fabulous sister that you will meet later on.) She baked the cake herself and brought it over. I showed her how to do each technique (basically off the cake) and then she did the rest herself. She was quite a quick learner. She colored and rolled out the fondant, applied it (I helped her smooth one side while she did the other in the interest of drying out time.) She airbrushed it, made her own leaves and stem, piped the grass, and made the words. I helped her just a little bit with the face and spider.

We used 2 bundt cakes and spackled the seam with stiffened buttercream. Cream cheese filling was piped down into the center hole and a circle of cardboard sits on the top to support the stem.


Here is Barbara airbrushing her masterpiece. Do you dig the fancy taped up towels?

Piping the grass.

Finished!

Hers came out better than mine! And she won first place too! I am so proud, congrats Barb!

I also want to share with you the cookies I did yesterday for my bestest client.

All flooded with royal icing and candy eyes.

These were huge! The web was about 6 inches across.


The big bats are royal icing stenciled onto royal.

Pumpkins are royal stenciled on royal, ghosts are royal with fondant face.

Fondant face on airbrushed royal icing.
These were my favorite! They make me giggle.
Have a nice night everyone; have fun and stay safe!
Sharon
http://www.sugaredproductions.com/

Pizza! Pizza! Daring Bakers Challenge

October 27, 2008 by Sharon Zambito 16 Comments


Happy Fall Everyone! I am just loving the crisp low humidity days were are having. Too bad we only have about 3 of those a year down here in the swamps! LOL. Perfect days to fire up the ovens for some baking for fun.

My beautiful friend Jacque has inspired me to join a monthly baking group called The Daring Bakers. Every month someone hosts the challenge and picks a recipe. Everyone in the club bakes that same recipe some time during the month, and then on the designated “reveal” day, everyone blogs about it, as well as posting in the Daring Bakers forum. I have been hooked on reading baking blogs as of late, and it looked like so much fun, I decided to join. I needed something else anyway to fill all of this free time I have on my hands (wink). OK, OK, I will fess up. One of my real motivations was that if I fill up my schedule with other very important commitments such as this, then I have a really legitimate excuse not to get to the housework and laundry (which BTW I loathe.) To make up for the dirty house and lack of clean clothes, my family gets to taste test lots of great new recipes. And if those perks are not enough, I also get a chance to practice my new mad photography skills. (Because you see, taking great photos of the food is just as important as the food itself in the blogging world.) So I see it as a win/win for everyone involved. 


I have to admit that I was a tad disappointed when I read that my first challenge would be a savory recipe of pizza dough. I am not a cook by any stretch of the imagination. I am into sweets. Period. End of discussion. But, we love pizza in this house, so I embraced the challenge and gave it my all. In the end, I had a ball with the pizza variations and the photo taking. You would have thought the Food Network was in my kitchen with all the light stands and tripods set up in there. Of course I had no clue what I was doing, but it was fun anyway.

This month’s challenge was hosted by Rosa of Rosa’s Yummy Yums. You can find the dough recipe on her blog. The rules stated that we had to try to toss the pizza dough; which I did and failed miserably; hence no photos of that. But I took a couple of hundred shots of everything else! (Don’t get nervous; I am not going to post them all.) But almost all, tee hee.


I made one long rectangular pizza for hubby and I to share. His section was pepperoni, black forest ham, green and black olives with red sauce and mozzarella. My side was Canadian bacon, black olives and pineapple.


I baked it on the back of a cookie sheet at 500 degrees as the recipe stated, but found that temperature to be too high. The top was cooking too fast and drying out, while the center of the dough was not fully cooked. It could have used a few more minutes in the oven.


That being said, it was still really delicious, and a very easy dough to make. You do have to make it the day before so it can ferment, but it took no time at all to do. My pizza was just as yummy reheated in the oven the next day.


My son J formed and topped his own pizza: pepperoni and tons of cheese.


Little chef hands at work.


Ta daaaaaa!


His was cheesy and oozy and gorgeous.


His baked up beautifully and while I did not taste his, he enjoyed it a lot.


Then I also saved 2 portions of dough to make dessert pizzas with. J wanted chocolate chip like they serve at Sicily’s Pizza. Do you guys have Sicily’s? If not, too bad cuz it’s yummy. I made a crumble for the top out of flour, sugar and butter
.


This time I baked the dessert pizzas at 350 and let them go a while longer, and the crust and top baked up better that way. It was good, although personally I would have preferred a thin layer of peanut butter under the chocolate chips. J dusted the top with powdered sugar and went to town on it, so I think it was a thumbs up.


Here are two of my artsy foody photographer wanna be pics:


For hubby I made a blueberry crumble pizza:


I use canned blueberry pie filling (gasp!) and made a crumble topping from flour, oatmeal, cinnamon, brown sugar and butter.


I overcompensated for the undercooked dough in the savory pizza by keeping this one in the oven a tad too long. But it really only affected the very outer crust, so all was fine.


This was really yummy, I think my favorite of all the pizzas.


More artsy shots. How am I doing?


So, all in all I would say my first Daring Baker’s Challenge was a success. And really a lot of fun. My friend Heather has joined also, and I am trying to convince my sister to join too. (Come on Barb, you know you want to.) I am looking forward to next month already. If you would like to see what other Bakers did this month, check out the blogroll.

Happy Baking Everyone!


Sharon
http://www.sugaredproductions.com/


Making a Gumpaste Crown

October 21, 2008 by Sharon Zambito 19 Comments

Raise your hand if you love princess cakes. Yes, yes, I see a lot of hands going up! We love princess cakes! And our customers do too!

When I say Princess, you say Cakes…..


Me: Princess

You: Cakes!

Me: Princess


You: Cakes!


OK, so I get a little excited about cake. And princess cakes have been a very popular design for a few years now. I have made more than I can count. I get asked quite often how I make the gumpaste crowns, so here are some step by step pictures I took many years ago. The pictures are rather craptastic, due to the fact that I had a craptastic camera at the time, and had no idea how to take a good picture back then. But I think you can get the idea of what I am doing in them. (PS. Craptastic = if crap was fantastic, this would be it)

MAKING A GUMPASTE CROWN:
Paper template:


Cut the metal rim off one end of your can (like a shortening can; I use the gumpaste mix can):


Wrap parchment paper (or wax paper) around your can and tape it in place. The end with the metal lid still on goes down on the counter:


Tape parchment or wax paper down well on counter (you do not need the blue mat under it) and grease it well with shortening:


Roll out gumpaste onto the wax paper and lay the paper template over it and trace over it to cut out the crown shape:


Apply shortening to the surface of the cut out crown with a brush:


Cut the wax paper with a knife along the bottom edge of the crown, and proceed to cut out the rest of a rectangle around the crown. Do not cut out the wax paper along the exact shape of the crown, except along the bottom edge:


Take the can and roll it onto the crown, lining up the base of can with the bottom edge of the crown. The greased side of the crown is sticking to the parchment paper wrapped around the can:


After crown is in place, wrapped all the way around the can, stand it up. Wax paper is still in place on top of the crown:


Gently peel off the wax paper from the top side of the crown. The side of the crown that was face down on the counter, touching the wax paper, is now the upside of the crown and exposed to the air:


Let that sit and dry for 1-2 days. Do not rush it or you will surely break it. (Ask me how I know):


When the crown is dry enough to hold its shape, grab the top of the parchment paper extending above the can and gently slide all of it together off the can:

Sit that on a board and then gently peel the parchment paper off of the inside of the crown:
Let that sit and dry for a few more days. When the crown is really firm you may need to wipe the excess shortening off the inside of the crown, and then dust it with a tad of cornstarch:
When fully dry, you can airbrush or paint it silver or gold. (This photo below is a lie. I was not actually airbrushing it at this time because I had to hold the airbrush with my left hand while my right hand took the picture. Impressive, eh?):
Then you can add plastic craft jewels, or even better, make edible ones!:


Pretty easy but you have to plan a few days ahead at least. Make 2, because if you make only one I guarantee you will break it. (Ask me how I know.) I like to use the Wilton gumpaste mix in the can for these because it not very elastic and rubbery, and that cuts easier than other types I have tried.

Here is a template for the crowns shown above. This is only one half of the crown. And you will have to enlarge this template to the right size for your cake:
Here is another template, the first one I ever made, an older design:


So there you have it! Now go get to making crowns!

Lots of crowns! All kinds of crowns!


We love Princess cakes!!

Happy crowning!
Sharon
http://www.sugaredproductions.com/

Mystery Project Revealed!

October 15, 2008 by Sharon Zambito 15 Comments


Hello Sugar Friends!

I am so excited to let you all know what our lagniappe release is! Since I get tons of emails asking me what techniques I have used on many of my cakes, we thought it would be a good idea to put together A Design Gallery. This DVD is a video slide show of still pictures of over 100 of my personally decorated cakes. The photos are set to nice background music, and I give a very short narration on each cake, describing some highlights of each. I point out some techniques and tools used on each one, and throw in a few helpful pointers. The cakes are grouped by category so you can watch just the section you want to at that time. It is not an instructional DVD, and does not give a complete description of every technique used on each cake. It is intended to be an idea source for cake designs, to help you spark ideas for your own creations. ( However, I have no problem with the designs being copied exactly if you wish to do that.)
 
We are hoping to release it next month, as long as my video guy’s editing schedule goes as planned. A great stocking stuffer! I truly hope this is something you guys will find interesting and helpful.


I am so happy with the response we got to our contest! No one guessed the correct answer, although a few were close. So I put all the guesses into a hat and picked 2 random names. And the winners of a free copy of A Design Gallery are:
 
Chris- South Texas
Kdweir

(I need you two gals to email me to get your shipping info.)

As always, the SugarEd staff and I thank you for your wonderful support and enthusiasm for our products. If you guys enjoyed this contest, maybe we can have another give-a-way for the Boxes and Bows DVD. Would you all like that?

Please leave a comment and let me know what you think.

Happy caking!

Sharon

www.sugaredproductions.com


Behind the Scenes

October 10, 2008 by Sharon Zambito 17 Comments

 
Well, as they say in Hollywood when they finish shooting a movie, it is “in the can!” We spent this week filming our next DVD, Boxes and Bows. It was a crazy busy week, and a bit of a wild ride, but we had a great time getting it all done. We are planning for a January release of this one, and a November release of our “bonus” project. (to be revealed very soon!) We plan to film a DVD on topsy turvys in January or February for a spring/summer release. All dates are still tentative at this point, because all kinds of variables can come up that delay the process or affect the schedule.
 
This will be our longest DVD yet, probably a full 2 disc set. It is jam packed with tons of information. I show you 4 completely decorated package cakes from start to finish. A different box technique and bow is presented in each design. And of course we have some lagniappe items thrown in too! I put my heart and soul into it, and I think you guys are really going to like it. It will be a very complete lesson on everything boxes and bows!


Let me take this opportunity to introduce you to my wonderful Wendy. There would be no SugarEd DVDs without her. She is an amazing cake decorator and a wonderful friend. She has been here for every minute of every one we have shot. She takes 12-15 hour days away from her family to help me. And help me she does. She is invaluable to me in the shooting process. She runs around like a nut behind the scenes to get things ready for me, clean up my messes, feed me, provide me with a steady infusion of Diet Coke, make sure I have lipstick on, give me pep talks, and generally keeps me going. In addition to that, she sits at the monitor with Todd to watch all the scenes being filmed, and see how they appear on screen. She makes sure the camera angles are good, and that what I say makes sense. She helps to assure that everything is visually and verbally clear from a decorator’s point of view. Her assistance in direction and production is absolutely critical to the success of our videos. There is no way I could do this without her. And to top it off, she does it for no payment, no recognition, no glory. She is a true and genuine friend, one of the treasures in my life.
 
 
My Wendy, who refuses to have her picture taken during filming. Can’t you tell she is gorgeous inside and out?


As promised, here are some behind the scenes photos we snapped during filming. I apologize for the bad quality of these photos, but they were taken in a rush between segments, and the lighting in the room was altered for video and not conducive to camera shots.


A cool shot from behind the middle camera , the one I speak into.


Close up camera on my right side as I work on a bow.


This view is from the “command center” where Todd sits and flips all the switches and thingies to make the cameras work and stuff. This monitor shows what the shot looks like on TV, and Wendy sits here with Todd to make sure it all comes across clearly.


Todd filming me very close up from behind while I was putting little pearls on the edges of a bow. Only my hands will be seen in this shot.


A bow done in Lagniappe.


Me with the finished Valentine gift.


No, we did not drink it! ( Although at times we wanted to, LOL).We used it on the cake!


Me primping the wedding shower gift box.


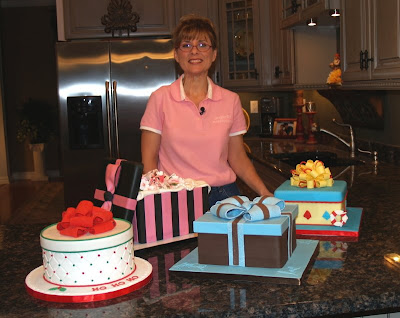
We did it! All 4 finished cakes at the end of the shoot.


Here are some shots from previous DVD productions:

Todd sitting at his “command center.” The lovely striped sheets cover the windows to block out light.


Me finishing up the stenciling on the stacking DVD.


Todd doing a close up.


This shot shows how the 3 cameras are set up.


Trish normally works the (my) right side close up camera.


From the fondant DVD.


So guys, I sure hope you all will be happy with this DVD. (I think you will.) I cannot wait to get to the editing part and watch it all come together! Feel free to leave a comment and tell me what you think.

 
I thank you as always for your support of SugarEd.
 
Now I am off to clean the horrendous mess we made of my house!
 
 
Happy Caking,
Sharon
http://www.sugaredproductions.com/


Back from NY and busy schedule!

October 1, 2008 by Sharon Zambito 5 Comments


Hello Sugar friends!

I am back from the New York ICES mini classes and what a great time I had. The other teachers were Chef Toba Garrett and Beth Parvu of Sugarpaste, LLC. I had a trying trip up there, as I got stuck in the Philadelphia airport all day due to bad weather. Flights just kept getting cancelled. I finally got on the last plane to NY City at 11PM. That was my last hope to not have to spend the night in the airport and be late for the classes! I made it into NYC a little after midnight, but alas, my luggage went to Long Island, my original destination. We picked up my bags early morning before the classes started and all was well.
 
I had the honor and privilege of spending the weekend with Toba Garrett, who is my cake idol. She is the quintessential cake artist in my mind. Just as I had hoped, she was very warm, gracious, giving and encouraging to all skill levels. A truly wonderful lady, and of course an exceptional talent. I highly recommend all of her books. She mentioned that she has a new wedding cake book coming out soon, that will include cakes with more bold colors and modern designs than she has done in the past. I can’t wait!
 
Chef Toba Garrett
 
 
I also met for the first time, the very talented Beth Parvu. Another wonderful artist. She too was as friendly and sharing as could be. I was thrilled to discover that her company carries a fully FDA approved, truly edible line of petal and luster dusts! No more worries about putting “non toxic” (but truly not food safe) dusts on our cakes! I bought several and cannot wait to try them. Sugarpaste also offers powdered flavorings for icings and batters, as well as a gum blend that can be added to royal icing for elasticity. (which makes string work easier). It can also be added to fondant to create a gumpaste type product. I am anxious to try that out as well!


I have a very busy schedule the next 2 weeks, as we are filming our next DVD next week! I am in the process of getting everything ready now. I am so excited! I will post some behind-the-scenes pictures at the end of next week. Keep your guesses coming for the contest; I will reveal the correct answer soon!

Well, back to work for me!

Happy caking everyone,

Sharon

http://www.sugaredproductions.com/


  • « Previous Page
  • 1
  • …
  • 22
  • 23
  • 24
  • 25
  • Next Page »

Sharon Zambito

Sharon Zambito

An RN turned SAHM turned cake maniac. Owner of SugarEd Productions Online School. Join me for some caking, baking, and all around sweet fun :)

Follow me..

  • Facebook
  • Instagram
  • Pinterest
  • YouTube

Pinterest

  • Autumn House Two Trees Machine Embroidery Design – Blasto Stitch
    Autumn House Two Trees Machine Embroidery Design – Blasto Stitch
  • Embroider  Sew :: Jelly Roll Purses - Embroidery Garden In the Hoop Machine Embroidery Designs
    Embroider Sew :: Jelly Roll Purses - Embroidery Garden In the Hoop Machine Embroidery Designs
  • (1) How to QUICKLY & SAFELY remove acrylic, gel, and dip powder polish | BAGGY METHOD - SO EASY! - YouTube
    (1) How to QUICKLY & SAFELY remove acrylic, gel, and dip powder polish | BAGGY METHOD - SO EASY! - YouTube
  • (1) Bouffant Surgical Cap - YouTube
    (1) Bouffant Surgical Cap - YouTube
Follow Me on Pinterest

Follow Me on Instagram

Instagram requires authorization to view a user profile. Use autorized account in widget settings

Recent Posts

  • Egg Safety Basics
  • Stable Mabel Support System Sale
  • Guest Post : 4 Vegan Cake Recipes No One Should Miss Out On!

Popular Posts

  • Ways To Make Your Cake Fluffy And Moist
  • How To Stencil on Cookies with Royal Icing
  • Doctored Cake Mix Recipes
  • Transferring an Image Without a Projector
  • All About Buttercream!
  • How to Fix Broken Ganache
  • Edible vs Non Toxic Gold Dusts

Categories

Search

Archives

Copyright © 2025 · Sharon Zambito and SugarEd Productions,LLC

Copyright © 2025 · Evangeline Theme on Genesis Framework · WordPress · Log in