Sugared Productions Blog

  • Blog Home
    • Home
  • Online Classes
  • Shop
  • Contact
  • About

Daring Bakers: Tuiles

January 28, 2009 by Sharon Zambito 12 Comments


After missing two Daring Bakers challenges during the holidays I needed to put up or shut up this month. One more miss and I would have been kicked out! LOL. Luckily this one was pretty easy and not too time consuming, as once again I am pressed for time. Ain’t I always? Aren’t we all?
This month’s project was tuiles. Tuiles? What the heck is tuile? I thought it was that meshy fabric you made bows out of for the pews at weddings. Shows how much of a baking sophisticate I am. Not.

Traditionally, tuiles are thin, crisp almond cookies that are gently molded over a rolling pin or arched form while they are still warm. Once set, their shape resembles the curved French roofing tiles for which they’re named.

This month’s challenge is brought to us by Karen of Bake My Day and Zorra of 1x umruehren bitte aka Kochtopf. They have chosen Tuiles from The Chocolate Book by Angélique Schmeink and Nougatine and Chocolate Tuiles from Michel Roux.
Recipe:
Preparation time batter 10 minutes, waiting time 30 minutes, baking time: 5-10 minutes per batch
65 grams / ¼ cup / 2.3 ounces softened butter (not melted but soft)
60 grams / ½ cup / 2.1 ounces sifted confectioner’s sugar
1 sachet vanilla sugar (7 grams or substitute with a dash of vanilla extract)
2 large egg whites (slightly whisked with a fork)
65 grams / 1/2 cup / 2.3 ounces sifted all purpose flour
1 table spoon cocoa powder/or food coloring of choice
Butter/spray to grease baking sheet
Oven: 180C / 350F
Using a hand whisk or a stand mixer fitted with the paddle (low speed) and cream butter, sugar and vanilla to a paste. Keep stirring while you gradually add the egg whites. Continue to add the flour in small batches and stir to achieve a homogeneous and smooth batter/paste. Be careful to not over mix.Cover the bowl with plastic wrap and chill in the fridge for at least 30 minutes to firm up. (This batter will keep in the fridge for up to a week, take it out 30 minutes before you plan to use it).Line a baking sheet with parchment paper or grease with either butter/spray and chill in the fridge for at least 15 minutes. This will help spread the batter more easily if using a stencil/cardboard template such as the butterfly. Press the stencil on the baking sheet and use an off sided spatula to spread batter. Leave some room in between your shapes. Mix a small part of the batter with the cocoa and a few drops of warm water until evenly colored. Use this colored batter in a paper piping bag and proceed to pipe decorations on the wings and body of the butterfly.Bake butterflies in a preheated oven (180C/350F) for about 5-10 minutes or until the edges turn golden brown. Immediately release from baking sheet and proceed to shape/bend the cookies in the desired shape.
These cookies have to be shaped when still warm, you might want to bake a small amount at a time or maybe put them in the oven to warm them up again. Or: place a baking sheet toward the front of the warm oven, leaving the door half open. The warmth will keep the cookies malleable.If you don’t want to do stencil shapes, you might want to transfer the batter into a piping bag fitted with a small plain tip. Pipe the desired shapes and bake. Shape immediately after baking using for instance a rolling pin, a broom handle, cups, cones….

I chose the regular flavor tuile and served them on pistachinilla mousse with specialty cream. ( AKA I screwed up the boxed pistachio mouse by adding too much liquid and had to add a box of vanilla Jello pudding to make it set up. And while I am confessing, that specialty cream is Cool Whip.) I know. I know. I am such a cheater.
But hey, in my own defense, I have a wedding order this week, am working furiously to get the Boxes and Bows DVD ready, and my chronic reflux is flared up bad. Had to set my priorities and I figured the wedding cake and getting the DVD to you guys was more important than home made mousse. Yeah. That sounds good. I’m sticking with that story.

J said the cookies looked like the flowers in Bikini Bottom on Sponge Bob. He is right! They are a delightfully thin, light , not too sweet cookie. Perfect with mouse, pudding, sorbet ice cream or a spot o tea. Easy and fast too, and fun to shape while they are warm. Give them a try!

____________________________________

Speaking of reflux, I have not had a Diet Coke in about 6 weeks and I feel like this:
J had a close encounter with the hair dryer. He is such a goofball. Gawd I love that kid.
I will try to post early next week before I go to the Owensboro class (still have openings, hint hint). If I don’t, I will surely check back in early the following week. If all goes well, Boxes and Bows will ship that week too!

Happy Cooky-ing,
Sharon
http://www.sugaredproductions.com/


Boxes and Bows on Pre-order now!

January 24, 2009 by Sharon Zambito 6 Comments


The much anticipated Boxes and Bows DVD
is on sale now here.
 
It will ship in about 3 weeks.


The tools used in Boxes and Bows are here.


The Design Gallery DVD is also on sale
for a limited time here.


Come check out all our new cool stuff!
 
You know you want to. 🙂


A few cakes to peek at…

January 21, 2009 by Sharon Zambito 19 Comments

 
Hello Sugar Friends!
 
I hope your week is winding down to have been a good one. I was busy this week with doctor’s appointments, school meetings, and working on the near ready Boxes and Bows DVD stuff. While I ponder my next brilliant blog topic, I thought I would share with you a few cakes pictures of some you may not have seen. Some are new and some are not so new.


This a whimsical cake I did this week. All fondant. I used my new camera lens for the first time taking these pics. I shot these really fast on auto settings, but I can see a difference already. When I have time to play around with the manual settings I think I can get better results.


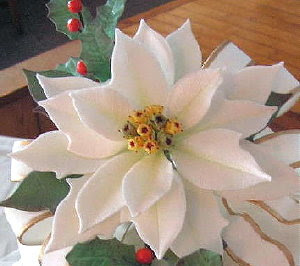
I made this flower with one of my favorite cutter sets. I used gold highlighter (not edible) mixed with vodka and sprayed them with my airbrush.


I painted the ropes with the same mixture and a brush. I like this shot; it’s kinda cool I think.


Here is a one tier whimsical I made for my friend Carla’s birthday. Too bad she lives in Texas and never got any of it. I sent her pictures and described the taste for her. She said it was really good. Tee hee hee. We are silly like that.


Lemon cake with lemon filling, ganache, and fondant. Yes it was way yummy.


Here is a buttercream cake for a 1st birthday. I hand modeled the topper. The barrel of monkeys were made from fondant using a mold I made myself with Silicone Plastique.


He’s really fat!


Geaux Saints!
This cake I iced in buttercream. I used the diamond impression mat on the side. The fleur de lis was made from dried fondant and trimmed with a string from the clay gun and painted gold.


Little football guys are strawberries dipped in white chocolate with plastic helmets that I painted and decorated.


The Bratz girls done on a buttercream sheet cake. The image was done using Toba Garrett’s glace icing and the run sugar technique. Here is the technique shown on cookies; it is the same process done right on top of the cake. The frame was airbrushed pink with fondant circles and dots applied.


What kind of cool cakes are ya’ll working on this week? I hope they all come out great! Have a great weekend and I will check in again next week.
 
Happy caking everyone!
 
Sharon
http://www.sugaredproductions.com/


Flowers and Fancies Class Location Change

January 17, 2009 by Sharon Zambito 3 Comments

 
Sharon Zambito/Jennifer Dontz Class
Moved to Owensboro, KY
 
 
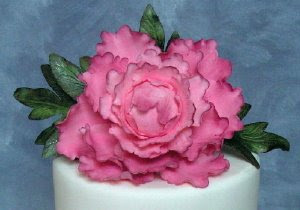
Sharon and Jen will be teaching their popular Flowers and Fancies class in Owensboro, KY on February 6-7, 2009. This action packed 2 day class incorporates beautiful fondant work and detailing with awe inspiring gumpaste flowers. Skills taught in this class include: creating the gumpaste peony and poinsettia, covering round and square cakes with fondant using two different methods, frilled fondant ribbon borders, the 5 panel box top lid, pearl borders, fondant monogram, as well as the gumpaste gift box bow. Each student will leave the class with this fully decorated 2 tier cake and 2 large gumpaste flowers:


Cost $250 for full 2 days
 
Lunches Provided

Student to bring some supplies

A few openings left!


Email SugarEd for more info and full supply list!
szcakes3@aol.com


Organizing Cake Stuff

January 15, 2009 by Sharon Zambito 7 Comments

 
I have gotten a request from one of my readers to see pics of how I store my cake supplies and what my work area looks like. (So this is for you Fiddlesticks!) I often get asked if I have any suggestions on organization. I am not sure that I have any brilliant pearls of wisdom to contribute to this topic, so I am calling upon you guys to help me out with this one.

I am very anal about certain things in my life, like my cakes, and a few other things. Some things I am a total train wreck with, such as my closet. I can’t find anything in there. (Note to self: clean out closet). But when it comes to general housework and organization of “cake stuff” I am somewhere right in the middle. Everything is basically organized and has its place, but its not perfect. There is a controlled amount of mess within that organization, if that makes any sense.


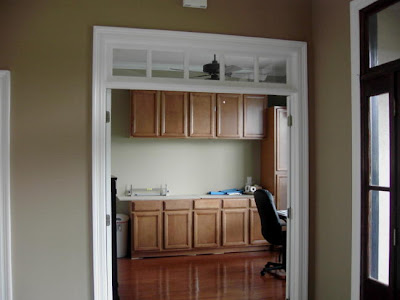
This is looking into my cake room/office.


This is my work area where I do prep work like gumpaste flowers, bows, modeling and all that stuff. This picture is a few years old and I now have a larger black table to work on in that spot. As you can see on the table, I have one of those plastic organizers sold at Home Depot to hold screws and nails for your garage. It has sliding out draws, and all my piping tips are in there. Each drawer is labeled with the tip number. I have just a few pencil type holders for my tools, and the white thing on the right of the table is a dehydrator.


Please keep in mind that these pictures were taken before my room renovation was complete. As of this date, I have the lights hardwired into the walls, and I even have a real countertop now. What you see there is plywood covered with a vinyl tablecloth, LOL. You can get a general idea here how I have stuff organized in the cabinets. The thing to the left is Jack, my portable A/C, which allows me to customize the temperature in this room when I am working on cakes. I keep it 68-72 in here when cakes are out.


This is inside the tall cabinet on the right. As you can see I am a big Rubbermaid fan. I use those stacking sliding drawers all over to organize stuff. I have all my gel colors separated by color, and many of my cutters separated by category in these stacking drawers. Foil rolls are at the bottom. (Please ignore the dirty floor; I snapped this pic before I mopped.)


The upper cabinet uses more Rubbermaid drawers and trays. It doesn’t look extremely organized but I know exactly where each thing is and can put my hands on it right away when I need it. Most of the time.


I also use the hall closet for my cake drums, boxes, fomecore, dummies, ribbons, pre-made gumpaste flowers and other miscellaneous stuff. I’m a little embarrassed cuz this looks kinda messy but really, each thing has a place and it works! I promise!


I have these fabulous deep drawers in the kitchen that allow me to store almost all of my cake pans in there. Very convenient and easy to get to them.
 
I know I am very blessed to have the work and storage space that I do. In the previous house we lived in, I did not and I had cake stuff just piled up all over the place. So this is where I need you guys to help me. If you have any great organizational tips, ideas, or photos, please leave them in the comment section or email them to me. I will post them in a later post. All those great ideas you have can really help all those cakers out there that are pressed for space.
 
So send those tips on in!
 
Happy Caking,
 
Sharon
www.sugaredproductions.com


New Orleans Doberge Cake

January 7, 2009 by Sharon Zambito 21 Comments

What is Doberge, you say? You look it up in a french dictionary and the word is not there. How do you pronounce it? (I say dough-bearj; some say dough-bosh or dough-boj.)
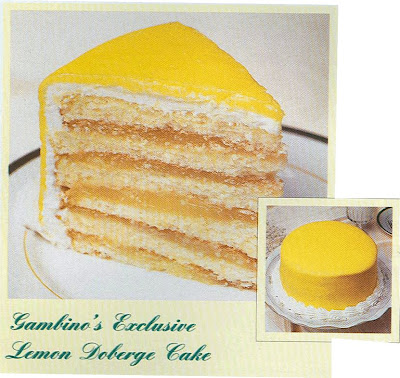
Doberge cake is an iconic staple of living in New Orleans. It is a yummy multi-layered cake with pastry cream inside and a poured glaze on the outside. You can order one for yourself here:

Traditional flavors are chocolate, lemon and caramel. But how did this deliciously delicate delight come to be? I did a little research and learned a few things myself.

Back in the 1930’s there was a New Orleans woman named Beulah Ledner, who came from a baking family in Germany. She started baking during the Depression to supplement the income from her husband’s furniture business. Experimenting in her kitchen, she came up with a variation on the famed Hungarian-Austrian dobos torta, which was thin layers of sponge cake filled with butter cream. She changed that to thin layers of butter cake with a custard filling, either chocolate or lemon.
This was a cake that was subtly rich and lighter than the original, and better suited to the New Orleans climate. But its inventor recognized that “dobos” wouldn’t fly in New Orleans. She thought it should be “Frenchified” to fit the city’s style. And so the name “doberge” was born.
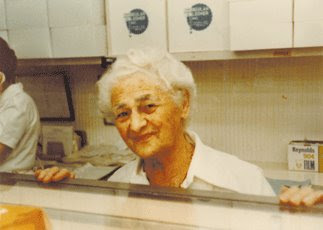
The business was first known as Mrs. Charles Ledner Bakery and was based in her home. Eventually she moved to a store front. A heart attack caused Beulah Ledner to sell the bakery, the name and the recipes to the Joe Gambino family in 1946. The agreement forbade her from operating another bakery in Orleans Parish for five years. But she could not stay away, and 2 years later opened another business in a neighboring parish (ie county) called Beulah Ledner Bakery. Beulah Ledner worked until she was 87 and sold Beulah Ledner Bakery in 1981. She died at 93, her culinary legacy intact.

Gambino’s Bakery is another icon of New Orleans, more famous for the doberge cake than Beulah. Many think that it originated there, but now we know better!

No one knows the original recipe except for Gambino’s , but here is a recipe we found on the Internet that my best friend Heather has made with good success. The only difference is that an authentic doberge cake has a poured glaze icing, not a spread on one:

CHOCOLATE DOBERGE CAKE

CAKE:

2 cups cake flour sifted
1 teaspoon baking soda
1 teaspoon salt
10 tablespoons butter
1-1/2 cups sugar
3 eggs separated whites beaten until stiff
1 cup buttermilk
2 squares unsweetened chocolate melted
1-1/4 teaspoons vanilla
1 teaspoon almond extract


FILLING:

2-1/2 cups evaporated milk
2 squares semisweet chocolate
1-1/4 cups granulated sugar
5 tablespoons flour
4 egg yolks
2 tablespoons butter
1-1/4 teaspoon vanilla
1/4 teaspoon almond extract


FROSTING:

3 cups sugar
1 cup evaporated milk
2 ounces bittersweet or unsweetened chocolate
4 tablespoons butter
1 teaspoon vanilla


DIRECTIONS:

Preheat oven to 300.
Grease and flour 2 round cake pans.
In a medium bowl sift flour, soda and salt 3 times.
Cream margarine and sugar in a large mixing bowl then add egg yolks one at a time.
Gradually alternate adding the flour mixture and buttermilk then add chocolate and mix well by beating about 3 minutes.
Fold in the three beaten egg whites, vanilla and almond extract.
Bake 45 minutes.
Allow cake to completely cool then split each layer into thirds to make six thin layers.
Put milk and chocolate in a saucepan and heat until chocolate is melted.
In a bowl combine sugar and flour.
Make a paste by adding hot milk chocolate by tablespoons to the sugar and flour and then return to saucepan.
Stir over medium heat until thick.
Add 4 egg yolks all at once and stir rapidly to completely blend.
Cook 3 minutes longer.
Remove from heat then and add butter, vanilla and almond extract.
Cool and spread on cake layering as you go.
Do not spread on top layer.
Combine sugar and milk in a heavy saucepan and bring to a boil stirring constantly.
Reduce heat and simmer 6 minutes without stirring.
Remove from heat and blend in chocolate.
Add butter and vanilla and return to medium low heat cooking 2 minutes.
Place in refrigerator to cool.
Beat well and then spread on top and sides of the cake.

——————————————————-

Now, we all know I am a fan of short cuts. Don’t get me wrong, taste is critically important to me, but if I can find a way to get excellent results with a little less work, I am all over that. So in my laziness, um, I mean, thriftiness, I have created a “doctored” version that Heather teasingly calls my Faux-berge cake.

Sharon’s Fauxberge Chocolate Cake
2 layers of your favorite doctored cake recipe in white or yellow
Jello pudding cups premade chocolate pudding
Chocolate buttercream icing
Chocolate ganache
Torte each cake layer into 3 thinner layers. Spread a thin layer of pudding in between each layer. (Premade cups have a better consistency than making the pudding in the box.) And it’s easier!! MWAHAHAHA.

Here are the 6 layers of cake on a 1/2 inch fomecore board. You will need to cover the fomecore with something appropriate to make it food safe. This was for family so I threw caution to the wind.


Ice to the edge of the fomecore with a layer of chocolate buttercream and chill in fridge until firm.


Now this next step is NOT necessary and I usually do not do it. However, this puppy was a huge 15 inch cake and rather unstable. So I gave it a coating of thick ganache (made with a 2:1 ratio of chocolate to cream.) You let the ganache thicken to a paste consistency and ice the cake with your spatula and bench scraper just like you do for buttercream. It sets up nice and firm to give you a stable chocolate “shell” encasing the layers. That top ledge of chocolate you can see in the picture was removed with my palette knife after the cake was fully chilled, but before I poured the thinner ganache layer on top.


Wanna see something scary?…………………….


Here is my ganache pouring set up. (Pretend you don’t see that pile of laundry on the chair, kay?) From bottom to top: cookie sheet lined with foil, fondant bucket wrapped in plastic wrap for food safety, piece of non skid stuff, cooling rack, piece of non-skid, and chilled cake on its fomecore board. When the iced cake is fully chilled, then you pour the final ganache coating on. That’s a LOT of ganache for this huge a$$ cake! My friend Jacque has a great tutorial on how to pour ganache on her fabulous blog Daisy Lane Cakes. Thanks Jacque, you rock!


OK, wanna see something even more scary?………………….

Moving that huge cake with wet ganache into the lowest shelf of my fridge where it barely fits without messing it up! Stress! I need a drink.


I let that ganache firm up overnight. Next day I took it out the fridge (fairly easy now that it is firm) and placed it on the display board, piped a border and placed the edible photo on top. This was for my sister in law’s dad’s 85th birthday bash. Everyone went nuts over this cake, in both looks and taste. I was even told it was better than Gambino’s! Shhh, don’t tell I cheated.


And here is a picture of the cake after serving. This photo was taken with D’s cell phone. Don’t think we’ll be getting any blog awards with this one! LOL


So there you have it, class. Your lesson on the New Orleans Doberge cake. Your assignment is to go make one of these beauties and tell me how you like it! Enjoy!

Sharon
http://www.sugaredproductions.com/

Openings in 2 day class

January 3, 2009 by Sharon Zambito 2 Comments

 
Sharon Zambito/Jennifer Dontz
Class Has Openings!
 

Sharon and Jen will be teachng their popular Flowers and Fancies class in Evansville, Indiana on February 6-7, 2009. This action packed 2 day class incorporates beautiful fondant work and detailing with awe inspiring gumpaste flowers. Skills taught in this class include: creating the gumpaste peony and poinsettia, covering round and square cakes with fondant using two different methods, frilled fondant ribbon borders, the 5 panel box top lid, pearl borders, fondant monogram, as well as the gumpaste gift box bow. Each student will leave the class with this fully decorated 2 tier cake and 2 large gumpaste flowers:


Cost $250 for full 2 days
 
Lunch Provided

Student to bring some supplies

Email SugarEd for more info and full supply list!
szcakes3@aol.com

See our full class listing here.
 
Sharon
www.sugaredproductions.com


And the Winners are:

January 3, 2009 by Sharon Zambito 1 Comment


The DVD Give-Away winners are:
 
 
Winnie N. of VA
and
Roselyn L. of CT


These 2 lucky winners have won a free copy of both the Design Gallery DVD and Boxes and Bows, which should be released next month if all goes well.
 
 
We thank all who entered, and truly appreciate your business. Please stay tuned for more contests and drawings coming in the future!
 
 
We are in the final editing stages of Boxes and Bows and it is looking good!
 
 
Click here to see more details on the popular Design Gallery DVD.


Happy New Year to all! Stay tuned to our blog for more fun stuff coming up!
 
Sharon
http://www.sugaredproductions.com/


DVD Give-Away Ends Soon!

December 30, 2008 by Sharon Zambito 10 Comments

 
HAPPY NEW YEAR EVERYONE!


I just want to drop a quick reminder that our DVD Give-away ends midnight December 31, 2008. Read here to see how to win a free copy of both A Design Gallery and Boxes and Bows, which should be released within 2 months. I am so excited about the new DVD and cannot wait to get it out to you guys. It is just jammed packed with info I think you will love!


Design Gallery DVD Preview HERE


Here is a sneak peak at the cakes featured In
Boxes and Bows:


Wedding Shower Gift Cake


Valentine Gift Box Cake


Baby Boy Shower Package Cake


Christmas Parcel Cake


Side Bow


————————–
 
 
The SugarEd Staff and I want to thank you for helping us have a very successful 2008. We look forward to serving you in 2009. Please stay safe on New Year’s Eve. We wish you a very healthy, prosperous and peaceful year.
 
 
Sharon
http://www.sugaredproductions.com/


A Few of My Favorite Things

December 28, 2008 by Sharon Zambito 22 Comments

I hope you all had a wonderful Christmas!

Ours was wild, crazy, hectic, exhausting and super fun. Way too much eating go on for the last few weeks! (Going to have to diet a bit before we shoot the topsy turvy DVD, LOL) We had a big family party to attend on Christmas Eve and I hosted dinner at my house for 17 people on Xmas day. Now that I have slept for the better part of 3 days I am ready to roll! OK, maybe not quite yet.

What did you guys get? Santa was very good to me. I got a new macro lens and tripod for my camera, so I can try to kick my foody photos up a notch. I am so excited and cannot wait to try out my new stuff. But not quite yet. Still. Too. Tired.

J got Rock Band 2 for his X Box, and when he opened it he literally screamed and and ran around the house in circles. (I think that was a good gift choice.)

D got a nice winter coat and about 800 video games. (He likes video games.)
———————–
I’m still way too pooped to bake anything, or get my photo stuff out, so I thought I would blog about some of my favorite (cake) things. I get asked all the time for my favorite recipes, brands, tools, etc. So here are a few of my favorite things:
ICING RECIPES:
Sharon’s Crusting Buttercream:
** I make the following recipe to fill my 5 quart mixer. Adjust the recipe volume to fill your mixer properly as discussed in the video Perfecting the Art of Buttercream.
5 generous cups Sweetex shortening, or other brand of hi ratio shortening
5 pounds powdered sugar
4 TBS Wedding Bouquet flavoring (or substitute your flavoring of choice in the appropriate amount)
11-12 TBS hot coffee creamer liquid (as discussed in video)
Cream the shortening , flavorings, and hot liquid with paddle attachment until well combined and creamy. Then stream in first 3 pounds of powdered sugar with mixer running at speed one. When incorporated somewhat, stop and scrape down sides of bowl well. Stream in last 2 pounds of powdered sugar at speed one. When incorporated, turn the mixer up to speed 6 and let it beat for 5-7 minutes until very smooth. Scrape down the sides of the bowl very frequently while the mixer is going at speed 6. The goal is to get all of the icing down into the belly of the bowl and fill the bowl from side to side with no air gaps around the walls, as well as covering the paddle up to the springs. If the icing is making a sucking or “kissing” noise after all the sugar is in, add just a few drops more of liquid, while scraping down the sides,with the mixer running, until that stops. You should create a bowl full of icing side to side, where the paddle is completely submerged and beating in a vacuum under the icing. 5-7 minutes at speed 6 and you should have a smooth as silk and nearly airless icing. Cool before using. Keeps at room temp for weeks or fridge/freeze indefinitely.
Youtube clip of Sharon making icing: Video
Sharon’s Chocolate Crusting Buttercream:
2.5 cups butter
2.5 cups shortening
Splash of vanilla
Dump in cocoa and mix all of the above till very dark brown (I do not measure it)
5 pounds powdered sugar streamed in
Coffee creamer liquid (as shown in DVD) in amount needed
Good at room temp for several days to weeks. Fridge or freeze also.
Kathy Finholt’s Crusting Cream Cheese Icing:

1 cup butter
1/2 cup Crisco
16 oz. cream cheese
3 lbs powdered sugar
1 T vanilla
1/2 tsp salt

Kathy says:

Mix on low speed for a couple of minutes.
This makes a fairly stiff icing if you use 3-1/2 lb. Powdered sugar. For a softer one you can use 3 lbs. of powdered sugar. Can stay out of fridge for several days. Freezes well.

————————–
CAKE RECIPES:
WASC (white almond sour cream) by Rebecca Sutterby:

1 box mix (does not work well with DH since they changed their formula)
one cup sugar
one cup flour
1 1/3 cup water
1 tsp vanilla
1 tsp almond if desired
3 whole eggs or 4 whites
one cup sour cream
2 tbs oil

*you can make this into any flavor by starting with flavored mix, and adjust extracts as desired . Bake at 325.


Durable cake recipe from Cake Central:

**My favorite for chocolate cake and best for sculpting

This cake is moist yet very durable and will hold up to many shapes and designs. It is light in taste and stays moist if making a day or two ahead.

1 cake mix
4 egg whites
1/2 cup water
1/3 cup vegetable oil (add 2 more TBS for choc recipe)
1 small pkg of instant pudding mix
1 cup sour cream

Preheat oven to 325.
Incorporate all ingredients together one by one on low speed.
Make sure to mix thoroughly between each ingredient.
Once all ingredients are mixed turn mixer to medium and mix for approximately 2 minutes.


**Mixture is very very thick.

Contributed by: Heartsfire on Cake Central


————————–


FAVORITE FONDANT BRANDS (IN ORDER):
Massa Grischuna ** by far the best
Fondx
ChocoPan
Fondarific
Satin Ice / Pettinice
——————–


TOOLS I CANNOT LIVE WITHOUT:
Bench Scraper
Fondant Smoothers
Palette Knife
Clay Gun
Ribbon Cutter
Cardstock (to make templates; I luv to make templates)
Agbay Leveler
Exacto Knife
Pasta Roller
Cornstarch
Shortening
Viva paper towels
Turntable (#35-100 )
Fondant Mat
Rolling Pin
TOOLS I USE A HECK OF A LOT:
Pearl makers
Textured rolling pins
Crimpers
Piping gel
Melted chocolate (for glue)
Frill cutters
Edible dusts (FDA approved)
Impression mats
————————
MY FAVORITE PLACES TO SHOP:
(No particular order)
Global Sugar Art
Into the Oven
Sugarcraft
Country Kitchen Sweet Art
Get Suckered
Beryl’s
Coedru (baskets)
Pfeil and Holing
Cake Craft Shoppe
Kitchen Krafts
Decorate The Cake
Dallas Foam (cake dummies)
Art Supply (fomecore)
Baker’s Kitchen (Sweetex)
Sugarpaste
CK Products (wholesale only)
Jesters Cake Supply
SugarEd Productions (fabulous DVDs and supplies!)
————————-
That’s all my weary brain can think of right now. I think it is nap time. Maybe a little snack first. Tell me what your favorite cake things are!
HAPPY NEW YEAR EVERYONE!
Sharon
  • « Previous Page
  • 1
  • …
  • 20
  • 21
  • 22
  • 23
  • 24
  • 25
  • Next Page »

Sharon Zambito

Sharon Zambito

An RN turned SAHM turned cake maniac. Owner of SugarEd Productions Online School. Join me for some caking, baking, and all around sweet fun :)

Follow me..

  • Facebook
  • Instagram
  • Pinterest
  • YouTube

Pinterest

  • Autumn House Two Trees Machine Embroidery Design – Blasto Stitch
    Autumn House Two Trees Machine Embroidery Design – Blasto Stitch
  • Embroider  Sew :: Jelly Roll Purses - Embroidery Garden In the Hoop Machine Embroidery Designs
    Embroider Sew :: Jelly Roll Purses - Embroidery Garden In the Hoop Machine Embroidery Designs
  • (1) How to QUICKLY & SAFELY remove acrylic, gel, and dip powder polish | BAGGY METHOD - SO EASY! - YouTube
    (1) How to QUICKLY & SAFELY remove acrylic, gel, and dip powder polish | BAGGY METHOD - SO EASY! - YouTube
  • (1) Bouffant Surgical Cap - YouTube
    (1) Bouffant Surgical Cap - YouTube
Follow Me on Pinterest

Follow Me on Instagram

Instagram requires authorization to view a user profile. Use autorized account in widget settings

Recent Posts

  • Egg Safety Basics
  • Stable Mabel Support System Sale
  • Guest Post : 4 Vegan Cake Recipes No One Should Miss Out On!

Popular Posts

  • Ways To Make Your Cake Fluffy And Moist
  • How To Stencil on Cookies with Royal Icing
  • Doctored Cake Mix Recipes
  • Transferring an Image Without a Projector
  • All About Buttercream!
  • How to Fix Broken Ganache
  • Edible vs Non Toxic Gold Dusts

Categories

Search

Archives

Copyright © 2025 · Sharon Zambito and SugarEd Productions,LLC

Copyright © 2025 · Evangeline Theme on Genesis Framework · WordPress · Log in